Hello!
Today I’ll walk you through the steps of configuring the single sign-on (SSO) service between the Paperless-ngx server and Authentik.
Introduction
What is Paperless-ngx?
 Paperless-ngx is a modern open source solution for paperless document management. It is a fork of the Paperless project, which is designed to scan, tag, search and manage digital copies of paper documents to minimize the need to store physical copies. Paperless-ngx offers a variety of improvements over the original design, including better user interface support, more advanced search options, automatic tagging of documents based on their content, and OCR (optical character recognition) support in multiple languages, allowing for easier management and retrieval of documents in the database.
This project is particularly useful for individuals and companies seeking to reduce the amount of paper in their work and daily lives. It offers a simple and efficient way to organize digital documents.
What is Authentik?
![]() Authentik is an open source software that serves as an Identity Provider to manage user authentication and authorization. As an alternative to commercial services such as Okta or One Login, Authentik offers similar functionality in an open-source model. Other open-source tools with a similar purpose include Keycloak and Authelia, which also allow central management of user identities in applications and web services.
Authentik is an open source software that serves as an Identity Provider to manage user authentication and authorization. As an alternative to commercial services such as Okta or One Login, Authentik offers similar functionality in an open-source model. Other open-source tools with a similar purpose include Keycloak and Authelia, which also allow central management of user identities in applications and web services.
It stands out for its configuration flexibility and broad support for various authentication protocols, making it an excellent choice for organizations looking for an advanced but accessible open-source identity management solution.
Implement OpenID Connect for the latest update
The latest update to Paperless-ngx, version 2.5.0, features significant changes and improvements, including support for OpenID Connect, a significant step toward easier integration with third-party identity providers.
Paperless-ngx’s previous Single Sign-On configurations using identity providers relied on passing user authentication information via an HTTP header. Users configured the system to accept usernames passed through the header, allowing integration with IdP systems like Authentik. With this solution, it was possible to simplify the login process, eliminating the need to enter credentials multiple times when accessing different applications. More details on this configuration can be found on Paperless-ngx’s GitHub.
Using headers for single sign-on
Using HTTP headers for single sign-on in Paperless-ngx has both advantages and disadvantages. Advantages include simplifying the login process by eliminating the need to enter credentials multiple times and integrating with SSO systems for greater convenience. Disadvantages can be related to security, as inadequate proxy configuration or improper header management can lead to security vulnerabilities, such as through the possibility of user impersonation. It is therefore important to carefully secure the transmission of headlines and make sure they are properly verified.
Benefits of the upgrade
The OIDC integration, according to pull request #5190 on GitHub, allows users to log in to Paperless-ngx using third-party identity providers. This is particularly useful in business environments or for private users who prefer to use a single authentication to manage access to multiple applications. With this update, access and identity management becomes more centralized and secure, reducing the need to manage multiple passwords.
Create a new configuration based on OpenID Connect
- Log in to your account and go to the administration interface,
- After successfully logging into the administrative interface, go to the Applications tab on the left side of the screen, and then select Providers.

- Click Create and select the OAuth2/OpenID Provider type. Then move on by clicking Next.
- Fill the provider with the following values:
- Name: paperless
- Authentication flow: Choose your configured or set default (default-authentication-flow)
- Authorization flow: choose your configured or set explicit or implicit consent. (This setting refers to the function used during authorization for this application – we define whether Authentik should display a button that allows you to go to the application after logging in, or simply redirect you without asking).
- Protocol settings:
- Client type: We leave Confidential
- Client ID: Copy and save for later
- Client Secret: Copy and save for later
- Redirect URIs/Origins (RegEx): https://paperless.xyz.com/accounts/oidc/authentik/login/callback/
- Signing Key: authentik Self-signed Certificate
- Leave the other values unchanged and click Finish.
- On the left side of the screen, selectApplications, and then Applications again.
- Kliknij Create and fill the application with the following values:
- Name: Paperless-ngx
- Slug: paperless-ngx
- Provider: paperless
- UI Settings you may or may not want to complete.
- Icon: download Paperless-ngx icon from the Internet and upload.
- Publisher: i.e. GitHub community
- Description: Document Management System
- We approve the creation of the application with the Create button.
On the identity provider side, we have already completed the necessary steps. Now it was time to configure the document management system.
Step 4 – Edit parameters in Docker Compose
In this step, we will take care of editing the parameters in the Docker Compose file to enable single sign-on systems.
- Log in to your account and go to the administrative interface of the Portainer.
- Select your environment (eng: Environments) in which you will edit the configuration of the created Docker Compose. Then go to Stacks.

- Select the created Stack named paperless-ngx (or named according to you, corresponding to Paperless).
- Add a parameter to Environment at the Paperless-ngx Web server as described below:
Step 5 – Configuration in Paperless-ngx
New integration with IdP
- Log in to your account and go to the document management system interface.
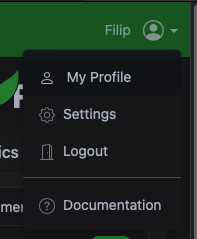
- Click on your name in the upper right corner of the screen to open the context menu, then select My Profile.
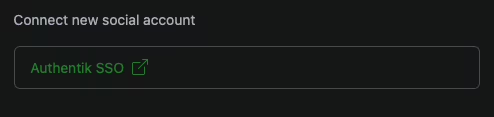
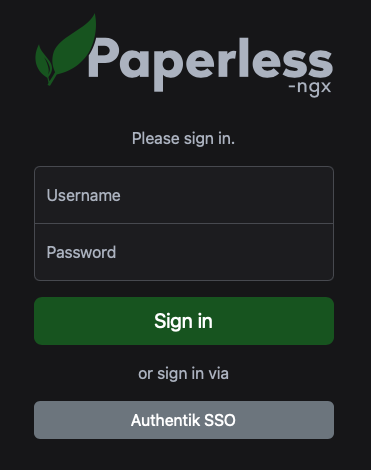
- In the Connect new social account section, select Authentik SSO to connect your account to the IdP.
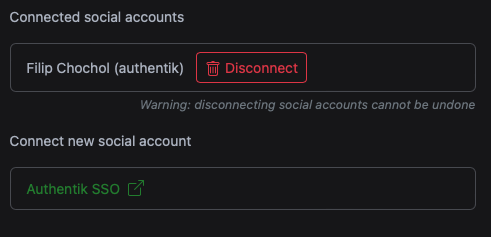
- After selecting the option to connect to IdP in the Connect new social account section, you will be redirected to the Authentik page to authorize the connection between your existing local account in Paperless and the identity provider. Once the process is complete and you return to Paperless, you will see your account as linked to IdP.
- Done! Now, to log in using Authentik as your identity provider, simply log out and then go to the login screen again, where you can use the newly configured authentication method.
Comments (6)
Sunnysays:
04/07/2024 at 12:48Good job. Very interesting tuto. When we have multiple users in paperless how to map them to authentik users ?
How authentik pass user name to paperless ?
Miguelsays:
27/04/2024 at 17:33Hello, good tutorial, I did this setup for first time, but I don’t see under My Profile => Connect new social account section. I use Nginx Proxy Manager for my subdomains (Authentik, Paperless etc.) Is any step for OIDC to be done in NPM?
Filip Chochółsays:
09/05/2024 at 16:23Hey!
If you do not see the possibility of connecting a new SSO provider – something logs suggest? Have you performed all the steps?
I also use NPM, but there is no way to integrate it into SSO at the moment.
Thanks! 🙂
Przemeksays:
24/03/2024 at 21:55Hej, fajny tutorial tylko, że nie zabezpiecza Paperless dwuetapową weryfikacją. Można normalnie logować się danym z Papaerless pomijając Authentik. Czy jest sposób aby to zablokować?
Filip Chochółsays:
25/03/2024 at 13:25Hej. Powyższy poradnik opisuje implementację Paperlessa do dostawcy tożsamości (na tym przykładzie do Authentika). MFA z Django allauth z tego co widziałem, nie zostało zaimplementowane ostatecznie. Doczytując się w dyskusji (https://github.com/paperless-ngx/paperless-ngx/discussions/424#discussioncomment-7593068), autorzy pozostawili MFA dostawcom tożsamości.
Aby zablokować defaultowe logowanie, należy dodać environment do dockera (bazując na https://docs.paperless-ngx.com/configuration/#PAPERLESS_DISABLE_REGULAR_LOGIN): PAPERLESS_DISABLE_REGULAR_LOGIN=true
Daniélsays:
19/02/2024 at 05:34Absolutely fantastic tutorial! Your effort truly made my day. Thank you!