
Hello!
Today we will cover the installation and initial configuration of our own kit for receiving the location of aircraft in the sky using a Raspberry Pi and a couple of accessories, which I will describe in the following.
Introduction to our project
I will divide the guide into several steps – from the initial setup, to preparing the system, installing Docker containers on the Raspberry Pi, sharing our data with other flight information aggregation portals.
What is the ADS-B?
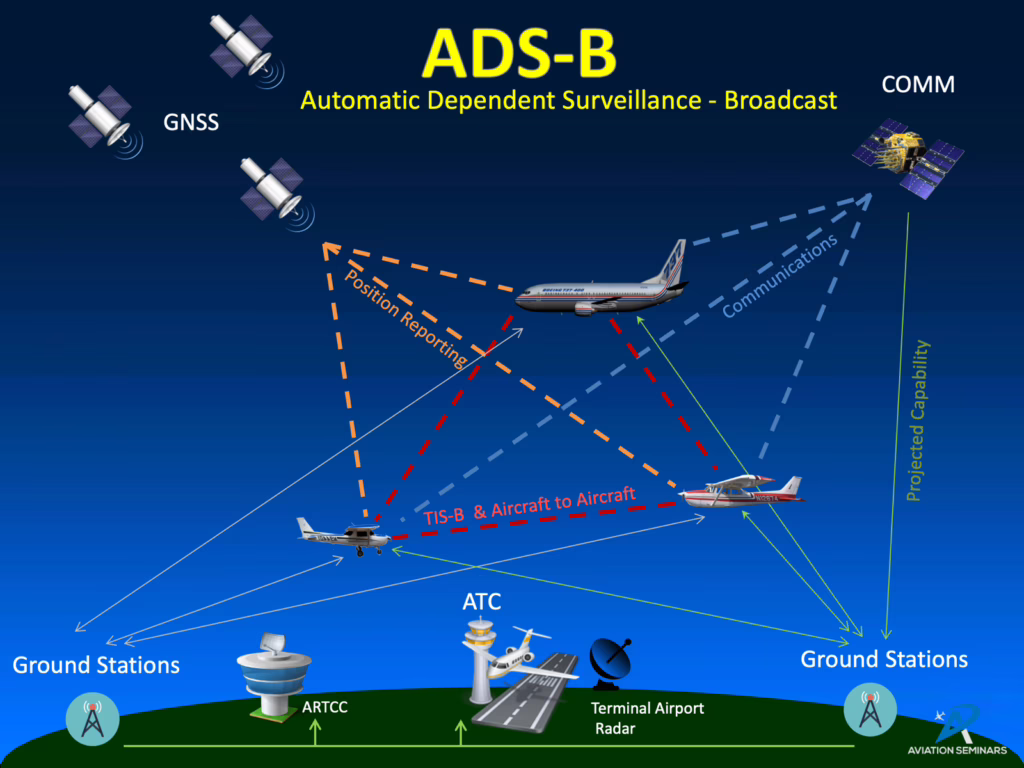
ADS-B (Automatic Dependent Surveillance-Broadcast) is an automatic surveillance and transmission system used in aviation. This technology allows aircraft to transmit data, such as position, speed, altitude and identification, to other ships and ground stations. It is based on GPS technology and transponders mounted on board aircraft.
The ADS-B system operates on two main frequencies: 1090 MHz and 978 MHz. Both bands are used depending on the world region and application.
In fact, most large aircraft are equipped with ADS-B transponders, operating at 1090 MHz, while smaller aircraft, especially those operating in the United States, can use UAT at 978 MHz. The interaction of the two bands is intended to increase the efficiency and flexibility of ADS-B in air traffic management.
Preparation
Before installing an ADS-B pickup system, it is a good idea to make solid preparations. Here is a more extensive description of what was needed based on my own setup.
For the creation of the guide, I will use the documentation provided by the SDR-Enthusiasts team, who have done a very good job. I sincerely thank them for making this information available. In the rest of the tutorial, I will also use their containers, which will make the installation and configuration process easier.
Location
When setting up an ADS-B receiving system using a Raspberry Pi, keep in mind the importance of a suitable place to install the antenna. Here are some tips that you may find helpful.
- Antenna location: Choose a location that provides free access for the antenna to the open sky. Make sure that the antenna will not be obscured by obstacles – such as trees, buildings or other objects;
- Avoid interference: Place the antenna away from devices that generate electromagnetic interference, which could affect the quality of received signals;
- Wiring safety: Ensure safe routing of cables from the antenna to the receiver, avoiding potential sources of damage. Protect your cabling from bad weather;
- Optimum height: Try to place the antenna at an optimal height to minimize terrain interference and improve the range of received signals;
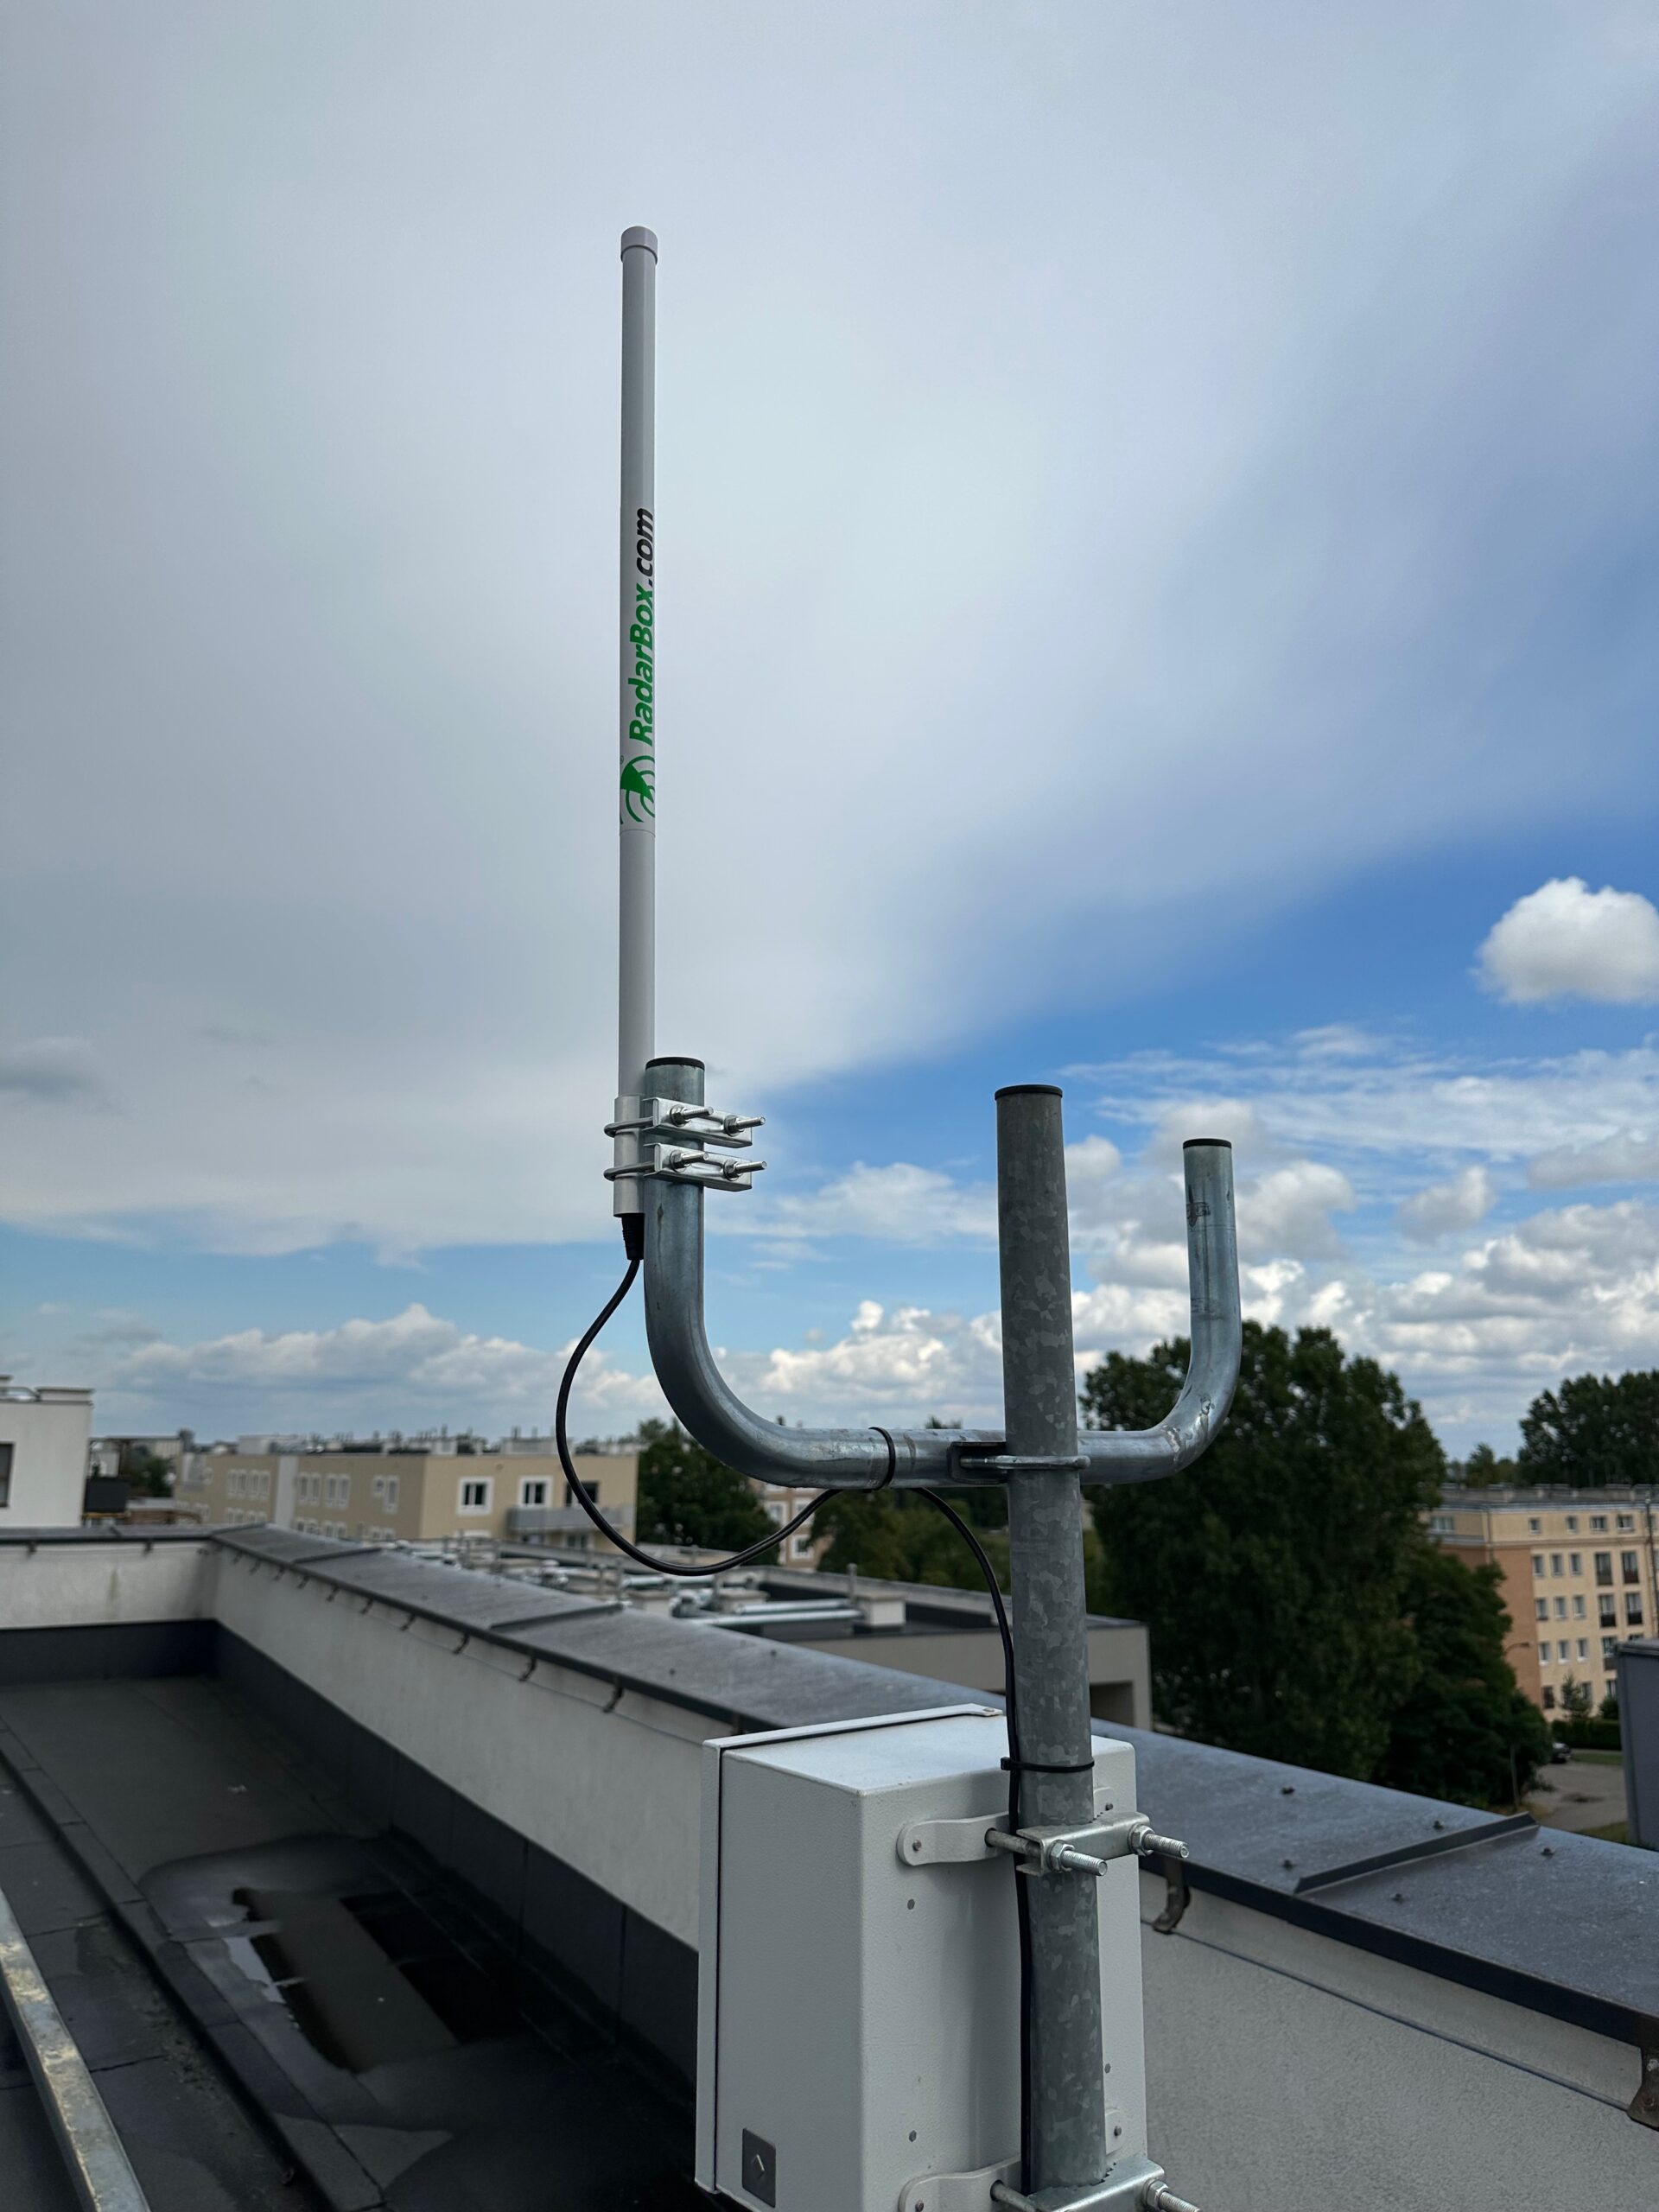
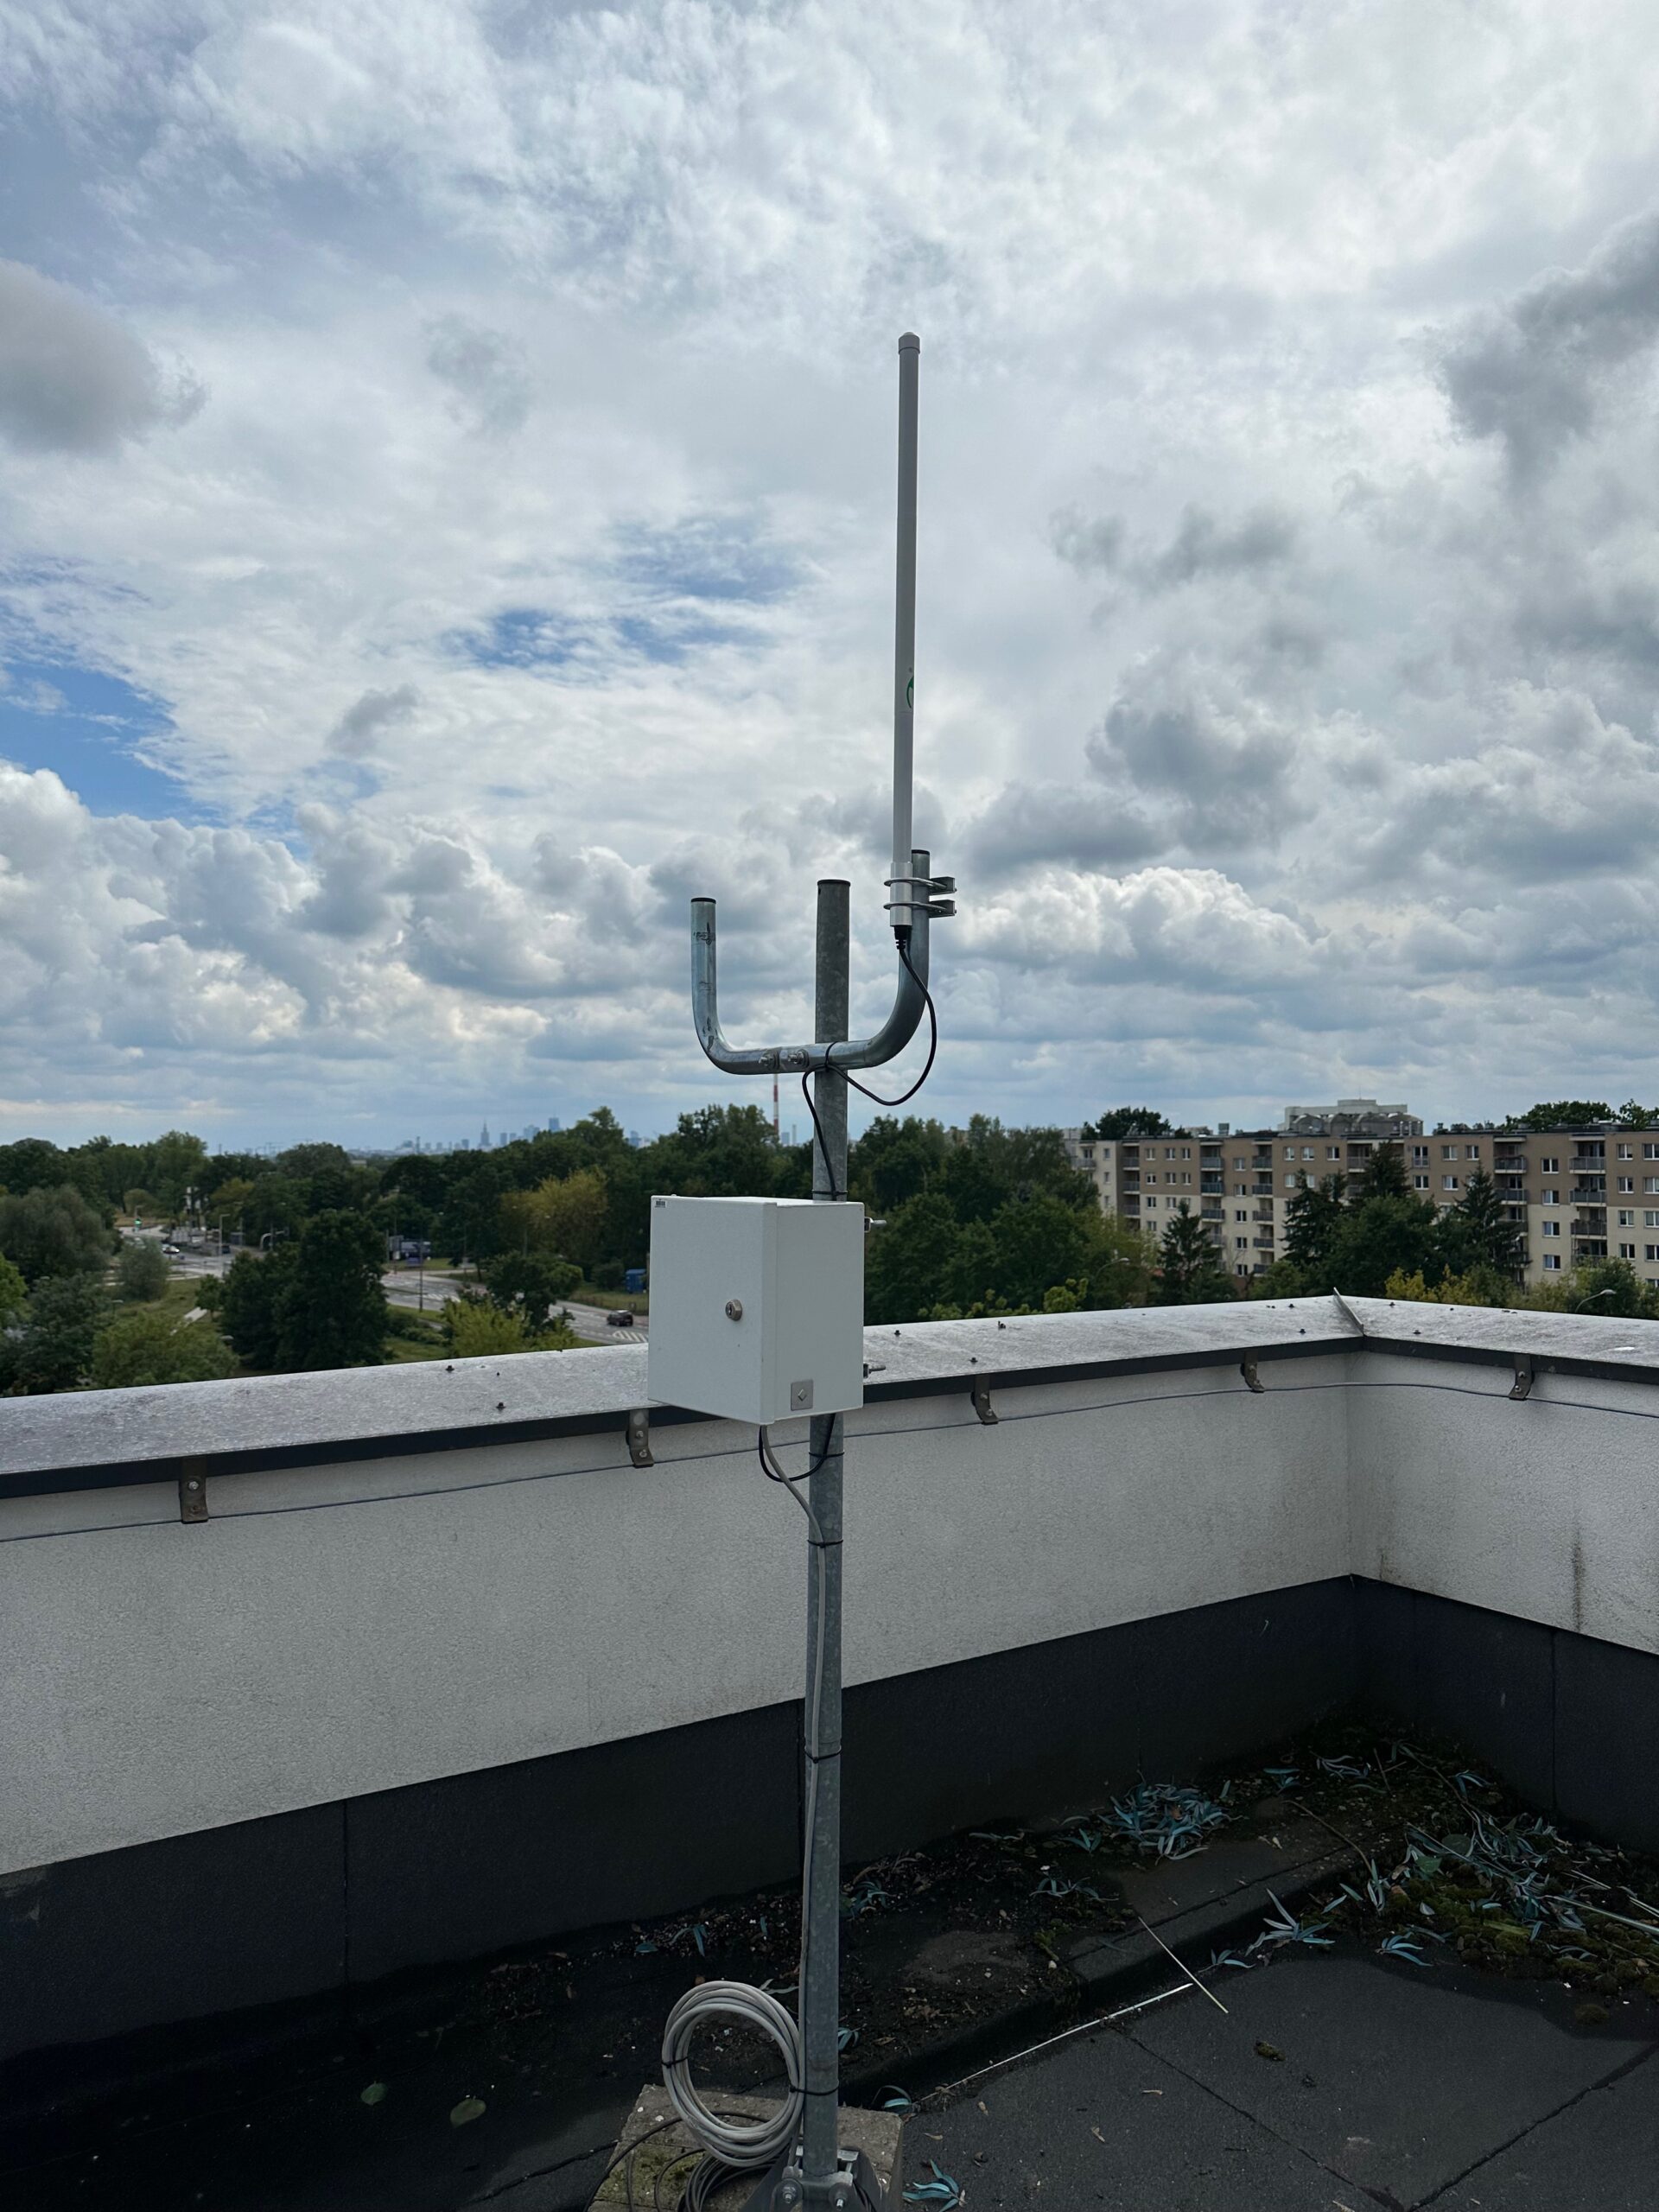
Taking these tips into account, I decided to install the antenna on the roof of the building where I live. I’m glad I foresaw the need for this a few years ago and took it into account during the construction of the development, talking to the developer about some housing changes. One of these changes was to take the antenna cable and cat 6 network cable directly from my apartment to the roof.
By locating the antenna on the roof, I am sure that I have given it free access to the open sky. Using this optimal height, I also avoid terrain interference, which helps improve the range of received signals.
Paperwork for the use of the roof in housing buildings
When planning to install an antenna on the roof of a housing building, it is necessary to comply with the formalities of the construction law, especially when dealing with a building covered by a community or cooperative. Therefore, the following steps must be taken to erect the mast and antenna on the roof:
- Community or Cooperative Consent: Before proceeding with the installation, it is important to obtain the approval of the community or housing cooperative board. Typically, the roofs of apartment buildings are considered common areas, and decisions on their use require the approval of the housing community.
- Construction Law: You should check the construction law to find out if installing an antenna on the roof requires any special permits or approvals. In some cases, depending on the type of antenna and the planned installation, additional paperwork may be required.
- Contract and Liability: The community or cooperative may also require the signing of a contract, which will specify the terms of use of the roof, rights and obligations related to the installation of the antenna. It is also worth discussing issues related to possible damage to the roof or other building components during installation.
- Structure Safety: Regardless of the purpose of the antenna installation, the mast should be sturdy and safe. Make sure it meets all safety standards to avoid possible damage or accidents.
- Notification to the Housing Community: Before starting work, it is important to inform neighbors and residents about the planned installation, and to listen to their concerns or objections, if any. Cooperation with residents can help reach an agreement on the installation of the antenna.
Remember that different rules may apply to each building and community, so it is always a good idea to consult with the management of the community or cooperative, and to consult with the Tenants’ Rights and Housing Maintenance Division of the Housing Department of the Ministry of Development and Technology (there is such a department in Poland) to make sure that all the formalities are met.
Creating an antenna in a private home is usually more trouble-free, as it does not require permission from other residents or institutions.
Required equipment and components
In my case, in order for me to start receiving any information sent by aircraft, it was necessary to have:
- Hardware:
- Raspberry Pi 4B in 2 or 4 GB version,
- Currently, you can already use the commercially available Raspberry Pi 5, however, its availability is very low. I recommend using rpilocator.com to see where you can currently get a reasonably priced device;
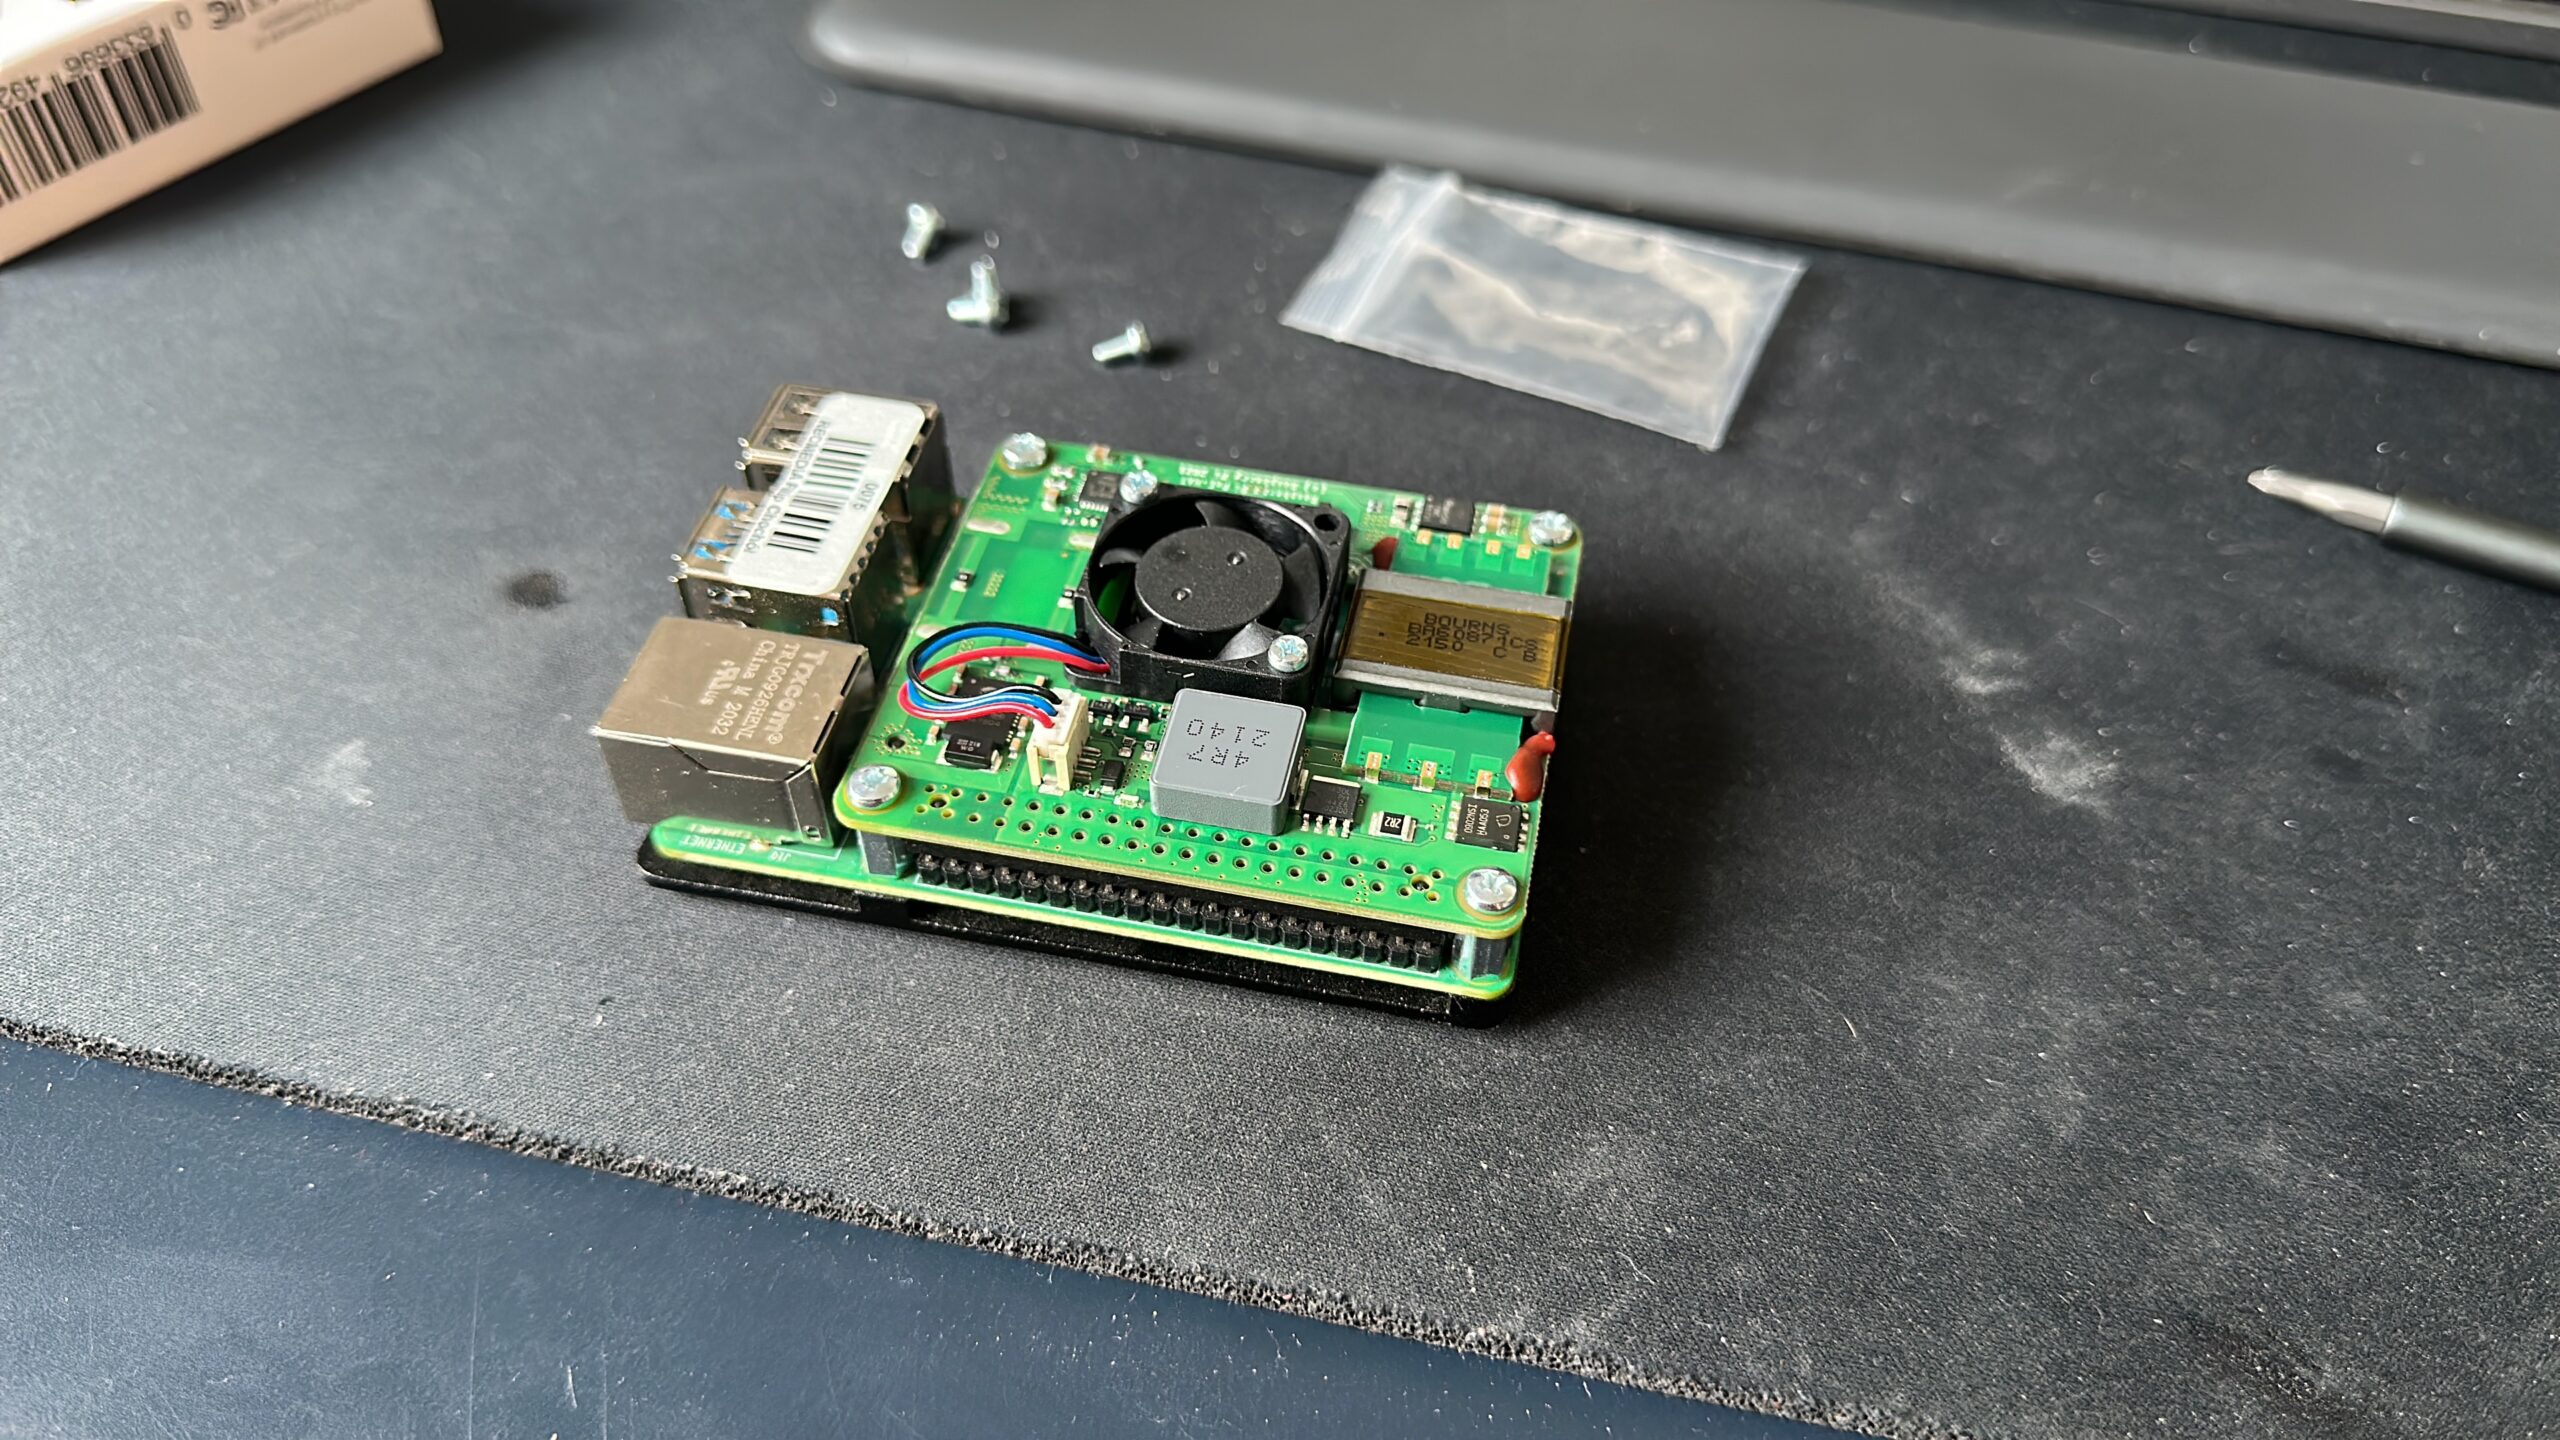
- Raspberry Pi PoE HAT,
- Due to the fact that one network cable is routed to the roof, I decided to power the Raspberry Pi over PoE using the 802.3af standard;
- It is powered by Mikrotik RB5009UPr+S+IN router;
- SDR receiver that covers 1090 MHz in range,
- The USB receiver from AirNav has a built-in filter and amplifier for the aforementioned frequency – hence it made economic sense to buy it;
- Antenna optimized for operation at 1090 MHz,
- I was able to buy the antenna at a bargain price on Allegro, hence it will serve me in describing the instructions further;
- WD Purple memory card with a capacity of 32GB.
- The choice of a card from Western Digital is intended to ensure greater reliability and durability. In your solution, you can use other manufacturers of memory cards designed for video surveillance – they have longer durability and higher TBW (Total Bytes Written);
- Raspberry Pi 4B in 2 or 4 GB version,
- Additional equipment:
- Non-invasive ballast mast with a height of 1.2 m;
- Hermetic box for mounting on the pole of a pole without invasion;
- 3 pcs. Concrete blocks for the load of the non-invasive mast;
- Rubber wiper, on which the non-invasive mast will be placed.
A few words about memory cards
In the hardware section, I elaborate on the components used. One important aspect is the memory card, which is important for stable operation of the Raspberry Pi, especially if it is used for a long time and works 24/7.
There are several reasons why a cheap microSD card may not be suitable for a Raspberry Pi running for a long time. Here are some factual reasons:
Durability: low-cost microSD cards are usually not designed for heavy continuous use over long periods of time. 24/7 operation can lead to faster wear and failure of the memory card. In contrast, cards such as WD Purple and Kingston Industrial are specifically designed for continuous use, which indicate their durability;
Weather resistance: Raspberry Pi, which works 24/7, can be exposed to various weather conditions, such as temperature changes and humidity. Cheap microSD cards may be less resistant to these conditions, which can lead to failures. Industrial cards often have better weather resistance parameters, guaranteeing reliability in a variety of conditions.
Software
To make our receiver work effectively, we will use the Raspberry Pi OS Lite operating system, devoid of a desktop environment. On the other hand, we will give it commands over SSH.
For Microsoft Windows operating system I recommend PuTTY, while for Apple macOS operating systems I recommend Termius.
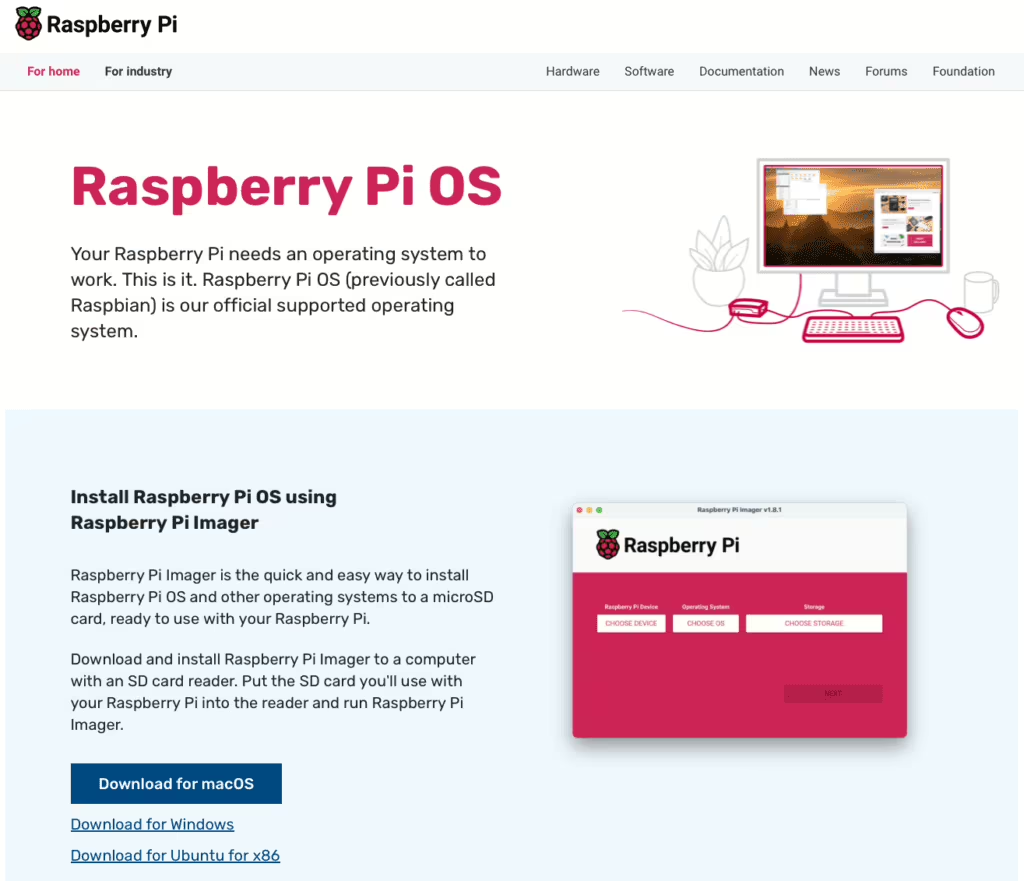
Installing the Operating System
Use the official installer to install Raspberry Pi OS Lite on your device.
Data Monitoring and Sharing Software
As software for monitoring and sharing ADS-B data with other aggregators, we will use Ultrafeeder from SDR-Enthusiasts. I will describe the installation steps below, following the instructions provided by the manufacturer.
The introduction of this software will make it possible to effectively monitor air traffic and share the collected data with other portals operating in the ADS-B area.
By making the signal available to air traffic monitoring platforms such as FlightRadar24, FlightAware and RadarBox, we can expect to benefit from free subscriptions to these portals. This enables a more complete use of advanced features, real-time tracking of air traffic and access to additional information and statistics. Sharing ADS-B data thus becomes a tangible investment in the growing aviation community, while giving access to a more advanced air traffic monitoring experience.
Collecting the location parameters of our receiver
In order to properly configure the receiver, it is necessary to collect precise data on its location. Here is the key information you need to obtain:
Antenna height (above sea level)
- For this information, visit https://www.freemaptools.com/elevation-finder.htm. Move the pin closer to the exact location of the antenna, and then consider the distance from the ground level where the antenna is installed.
Latitude and longitude of the antenna (to at least five decimal places)
- To get this information, visit https://www.gps-coordinates.net or https://maps.google.com, zoom in to the exact location of the antenna and click to get the exact latitude and longitude data. Alternatively, you can use a handy GPS.
Providing precise location data is a key step in effectively configuring an ADS-B receiver. Be sure to enter this information with the utmost accuracy to ensure effective system operation and provide reliable air traffic data.
Installing and configuring the operating system
Raspberry Pi Imager
- Raspberry Pi Device: Select Raspberry Pi 4 (or Raspberry Pi 5 – depending on what you have),
- Operating System: Select Raspberry Pi OS (other) and then Raspberry Pi OS Lite (64-bit),
- Storage: select your storage media that you have connected to your computer,
- Then click Next,

- When the Use OS customization information prompt appears, click Edit settings,
- For macOS computers – When you see the next prompt stating Would you like to prefill the wifi password from the system keychain, select No.
- When the operating system customization window opens, go to the General tab and complete it with the following parameters:
- Check Set hostname and type: rpi01
- Check Set username and password and type:
- Username: pi
- Password: Set your own password
- Check Set locale settings, then set:
- Time zone: Europe/Warsaw,
- Keyboard layout: us.
- Go to the next Services tab and check Enable SSH, leaving Use password authentication.
- To save your settings, click Save.
- Then return to the previous Use OS customization window and click Yes to apply the modifications you made.
- A warning window will pop up informing you that all the data on the memory card will be erased permanently. Confirm this action. At this point, the Imager tool will format the card and install the operating system on it with the modifications made.
For information on the changes made to the operating system for the ARM64 platform, click here.
Raspberry Pi OS
Once the installation process is complete, insert the memory card into the Raspberry Pi. Then connect them to the power supply and to the router or switch using a network cable terminated with an RJ45 connector.
The system update is sufficient to continue the configuration process. Regular updates not only ensure security, but also enable you to take advantage of the latest features and fixes, which translates into smooth and efficient operation. Before you proceed with further configuration, it’s a good idea to make sure the software on the Raspberry Pi OS is up to date.
In addition, in the process, we will deactivate the Wi-Fi and Bluetooth functions.
System and package updates
- Launch PuTTY (Windows OS) or Termius (macOS), then connect to your device,
- Enter the following command to update the package list,
Portainer Agent – Remote management of containers
The Portainer Agent is a tool that acts as an interface between Portainer (the platform for managing Docker containers) and the host on which Docker containers are run. The agent enables remote management of Docker containers on hosts via Portainer.
The main tasks of a Portainer agent are:
- Container Management: The agent allows Portainer to remotely start, stop, delete and monitor Docker containers on a given host.
- System Information Transfer: The agent collects information about the system, such as resource consumption, network availability and other parameters, and then transfers it to the Portainer so that users can track the status of their containers.
- Container Updates: Portainer using the agent enables updates to Docker images and containers on all connected hosts.
- Security: The agent works with Portainer in a secure manner, allowing secure remote management of containers without opening additional ports on the host.
Using the Portainer agent facilitates centralized and automated management of Docker containers on multiple hosts from a single user interface.
To install Portainer Agent on Raspberry Pi, follow these steps:
- Log in to your account and go to the administration interface.
- Are you using the Authentik single sign-on system? Make the login process easier for yourself by integrating Portainer with Authentik with the help of these instructions.
- At the bottom left of the Settings section, select and click Environments,
- Click Add environment,

- From the list of proposed environments, select the option to connect Docker Standalone. Then click Start Wizzard,
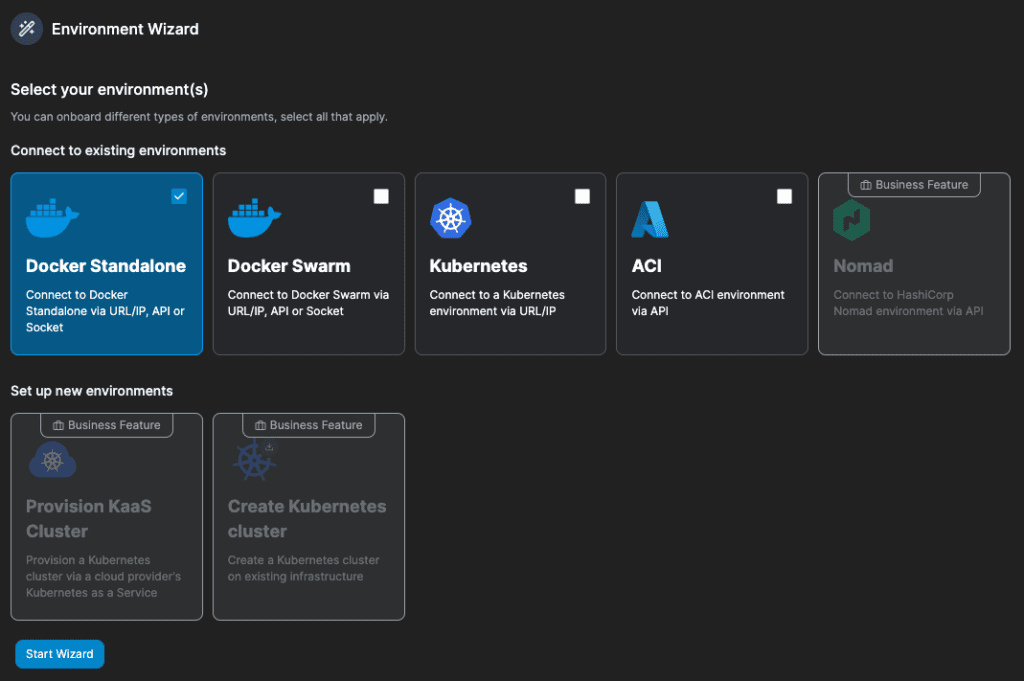
- Leave the Agent option checked, then copy the command to install the agent on the remote device,
- Log in to the Raspberry Pi and type the following command:
You can use the resulting string of this command (in the format 00000000-0000-0000-0000-000000000000) as your UUID. In further configurations, you will use the same UUID for each feeder of your station.
Create a heywhatsthat panorama ID
Heywhatsthat is a website that can generate an overlay on a map, showing a theoretical range based on obstacles and the curvature of the earth. In the upper left corner of the panorama page you will find the URL, which will look like this: https://www.heywhatsthat.com/?view=CW5KV545. This code will be used later in the configuration instructions.
To create a panorama, follow the steps below:
- Go to https://heywhatsthat.com/,
- Click New Panorama,
- Set the exact location of your antenna,
- Enter the title of your location / antenna,
- Submit the request and wait for the processing to complete,
Installing Ultrafeeder using Docker Compose in Portainer
The Ultrafeeder container is the heart of our ADS-B receiver. It receives signals at 1090 MHz from your SDR, demodulates the messages, making them available to all other containers. We will now create a configuration file in Docker Compose using the Portainer.
- From the Portainer’s home screen, select your device that you previously connected with the agent.

- Go to the Stacks section, then Add stack.
- Name: adsb-feeder
- Web editor: Paste the following code content
Environment variables in the Portainer
- In the above file, there are several parameters that have values labeled as ${PARAMETR}. These values are read from the environment variables section – which are described below.
- Under the code editor, in the environment variables section, go to Advanced mode.
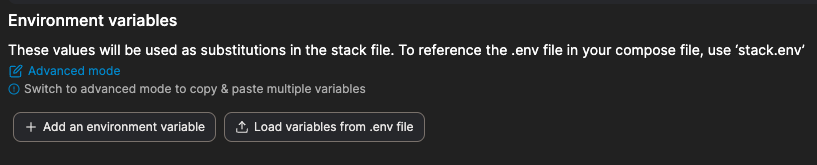
- Paste the following content, and the prompts that are in parentheses
replace with values according to the legend described below:
Leave a Reply