
Hello!
Today we will focus on preparing a guide that will show you how to change the default web ports (HTTP: 80 and HTTPS: 443) on Synology file servers. These ports are usually blocked, but with this guide you will be able to unlock them and customize them with Nginx Proxy Manager.
Introduction to our project
I’ll divide the guide into several steps – we’ll start with configuration in Synology DSM, and then move on to installing Nginx Proxy Manager in Docker Compose via Portainer. Finally, I will set the domain name that we can use to log into the DSM system on Synology (without using an IP address). I will configure DNS rewriting on the already installed AdGuard Home local DNS server.
What is Synology DSM?
 Synology DiskStation Manager is an operating system developed by Synology Inc. Specifically designed to run on their NAS servers. DSM offers an intuitive and integrated environment for data management, file sharing, backup, and support for a variety of applications.
What is Nginx Proxy Manager?
 Nginx Proxy Manager is a tool for easy management and configuration of the Nginx proxy server. Allows users to configure redirection rules and manage HTTP traffic. It is particularly useful in the context of supporting multiple applications on a single server. NPM provides a graphical interface, so even people without deep experience in proxy configuration can use Nginx services effectively.
Preparation
In order to prepare the tutorial, we will adopt an established domain name and certain configuration names, shown below. For customized configuration, apply settings according to individual requirements.
- Full domain name (FQDN) of Synology DSM: https://dsm.xyz.com,
- Full domain name (FQDN) of Nginx Proxy Manager: https://npm.xyz.com,
- Full domain name (FQDN) of AdGuard Home: https://dns.xyz.com,
- Installed on Synology via Docker: Portainer, AdGuard Home,
- Installed on Synology via Package Center: Container Manager,
- On the router’s DHCP server, the indicated IP address of the DNS server (AdGuard Home) installed on the Synology.
Step 1 – Change the default ports on Synology DSM
We will start configuring the Web ports by modifying the default login settings for DiskStation Manager. Leaving preset ports such as 5000 for HTTP and 5001 for HTTPS – widely known and a potential security risk – is a step worth modifying. Reorganizing these ports to more non-standard values is designed to increase the security level of your Synology server, minimizing the potential risks associated with using common port numbers.
- Log in to your Synology with an administrator account – still using the old port to DiskStation Manager,
- Go to the Control Panel, and from the System section, select Login Portal,
- Make the following modifications to the Web Services section:
- DSM (HTTP) port: e.g. 44444
- DSM (HTTPS) port: e.g. 44445
- Check Automatically redirect HTTP connections to HTTPS in the desktop version of DSM.
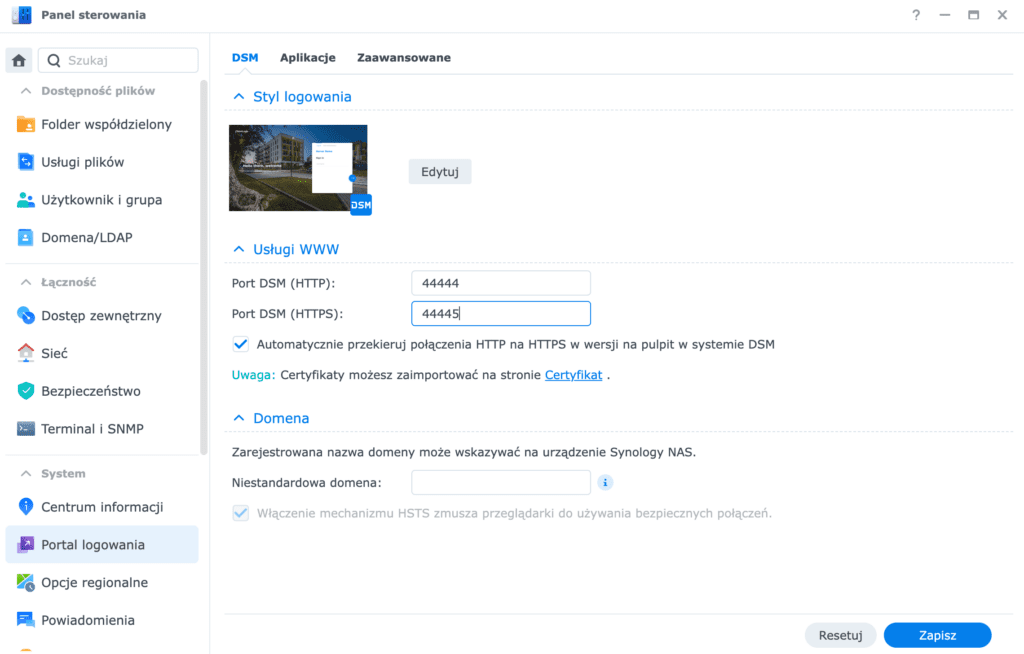
- Save your settings with the button located in the lower right corner on the blue background.
- After applying the changes, log in to DSM again, already using the new port in your browser.
Step 2 – Deactivate Synology’s listening on ports 80 and 443
Synology NAS (DSM) listens on ports 80 and 443 by default after every reboot – which means that the changes we would make to the configuration will be lost after every reboot. To get around this problem, it is necessary to run a script that releases these ports every time the server starts up.
The following command accomplishes this by freeing ports 80 and 443 on the Nginx web server on the server until the system is rebooted. Removes ports from the Nginx configuration and restarts the Nginx service.
This script converts port 80 to 81 and port 443 to 444 in the specified Nginx configuration files. After executing this command, Nginx will be restarted, ensuring that the changes will take effect until the next reboot.
Step 3 – Create a scheduled task in Synology
To preserve the changes, we will create a scheduled task that will run the above script every time the system boots.
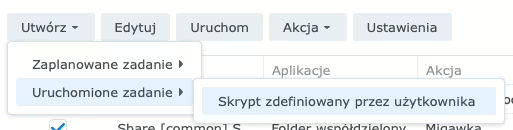
- Go to the Control Panel, then scroll down to find the Task Scheduler.
- Click Create and select Run task – User-defined script,
- On the Create Task – General tab, enter the following values:
- Task: Remaping 80/443 ports,
- User: root,
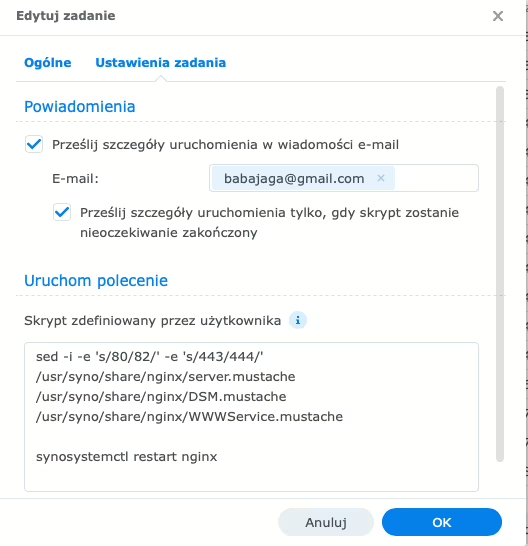
- On the Create Task – Task Settings tab, enter the following values:
- Submit the launch details in an email: Check and enter your email address,
- Submit launch details only when the script is unexpectedly terminated: Check,
- Run the command: Paste the following script in your text editor:
- After making these settings, click OK to save and activate the new scheduled task.
Now our script will run automatically after every reboot, ensuring that ports 80 and 443 are not active on your Synology NAS (DSM).
To ensure that the changes you’ve made work as expected, I encourage you to restart your Synology NAS (DSM). This simple action ensures that all modifications related to disabling listening on ports 80 and 443 will be effectively taken into account during reboot. After these pleasant steps, the new settings should laugh flawlessly after a server restart.
Step 4 – Create folders in Synology
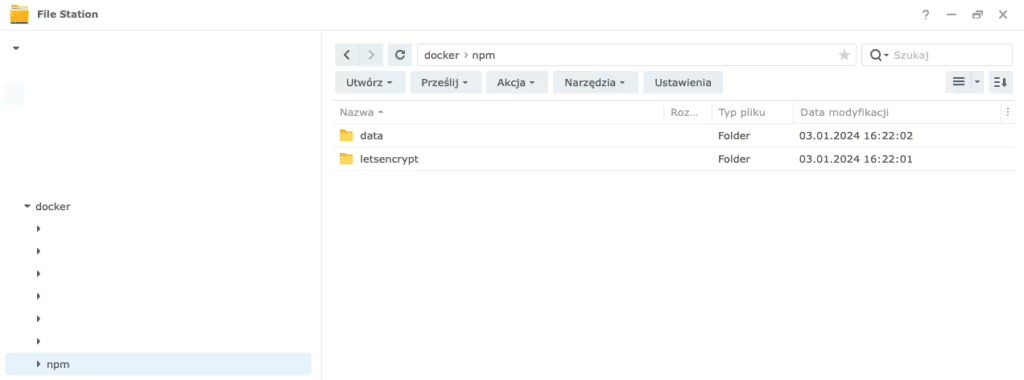
- Log in to your file server and open File Station.
- In the shared folder named docker, create a new folder and name it npm.
- Inside the npm folder, create two additional folders – data and letsencrypt
Step 5 – Installing Nginx Proxy Manager
Installation and configuration on the Portainer side
- Log in to your account and go to the administration interface
- Select Stacks from the dashboard.

- From the upper right corner (under your login), select Add stack.

- Fill in the Docker Compose file creation with the following values:
- Name: npm
- Build method: Web editor
- Web editor: copy the content described below and paste
- Click Deploy the stack and wait for Portainer to download the content and create the container.
- If everything goes successfully, the message Success: Stack successfully deployed will appear in the upper right corner of the screen, and then one newly created container will appear in the container list.

The first launch of the container
When the Nginx Proxy Manager (NPM) application is first launched, the following key events occur:
- In the first step, there is the generation of GPG keys, the importance of which lies in ensuring secure communication and encryption. The generated keys are then stored in the data folder.
- Then, the application proceeds to initialize the database, creating the necessary table structures to store configuration, user information and other data related to proxy functionality.
- In the third step, a default administrator user is created and given full access to the GUI and full control over the proxy configuration.
The entire initialization process can take several minutes, depending on the performance of your system. During this time, the application prepares itself to work efficiently and correctly, preparing the necessary elements for effective operation.
Step 6 – Logging into Proxy Manager
After successfully deploying Nginx Proxy Manager (NPM), there are some important steps to take to configure and secure the application. Here are the first steps you should take after the deploy process is complete:
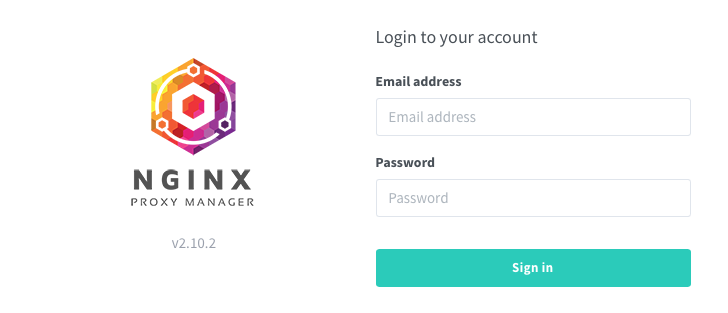
- Log in to the manager:
- Open a web browser and go to the address where NPM is running (e.g. http://ADRES-IP-SYNOLOGY:81)
- Log in using the default email address: admin@example.com and the changeme password.
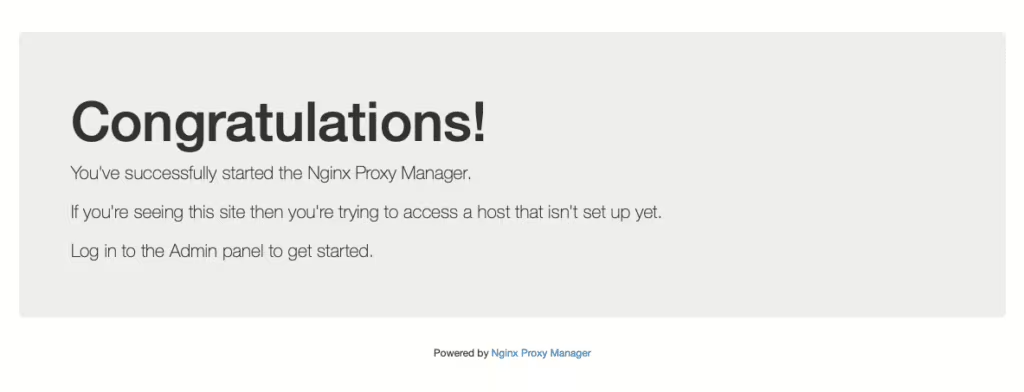
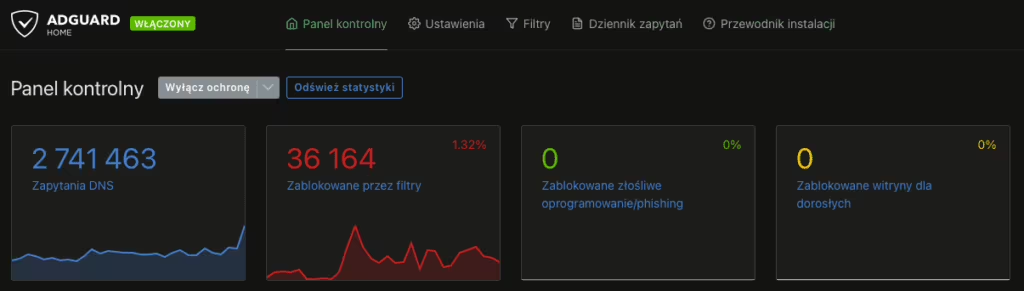
Proxy Manager, which is working properly, will let you see such a message when you browse through a web browser on port 80 or 443.
Step 7 – Set up an SSL certificate for a domain using Cloudflare
Generating a User API Token in Cloudflare
Make sure your domain is registered and managed by Cloudflare. If you haven’t already done so, add the domain to Cloudflare and configure its support.
Nginx Proxy Manager will use the generated API Token in Cloudflare to conduct a DNS challenge when issuing a Let’s Encrypt SSL certificate.
- Go to the menu for creating a user API Token in Cloudflare:
- Go to the home page and select your domain name,
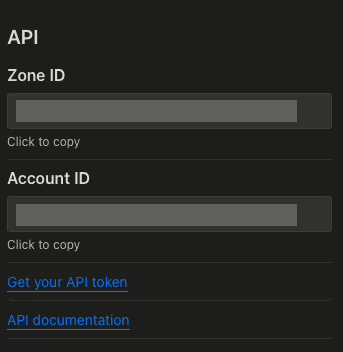
- In the domain management interface (Overview tab), on the right side, search and click Get your API Token,
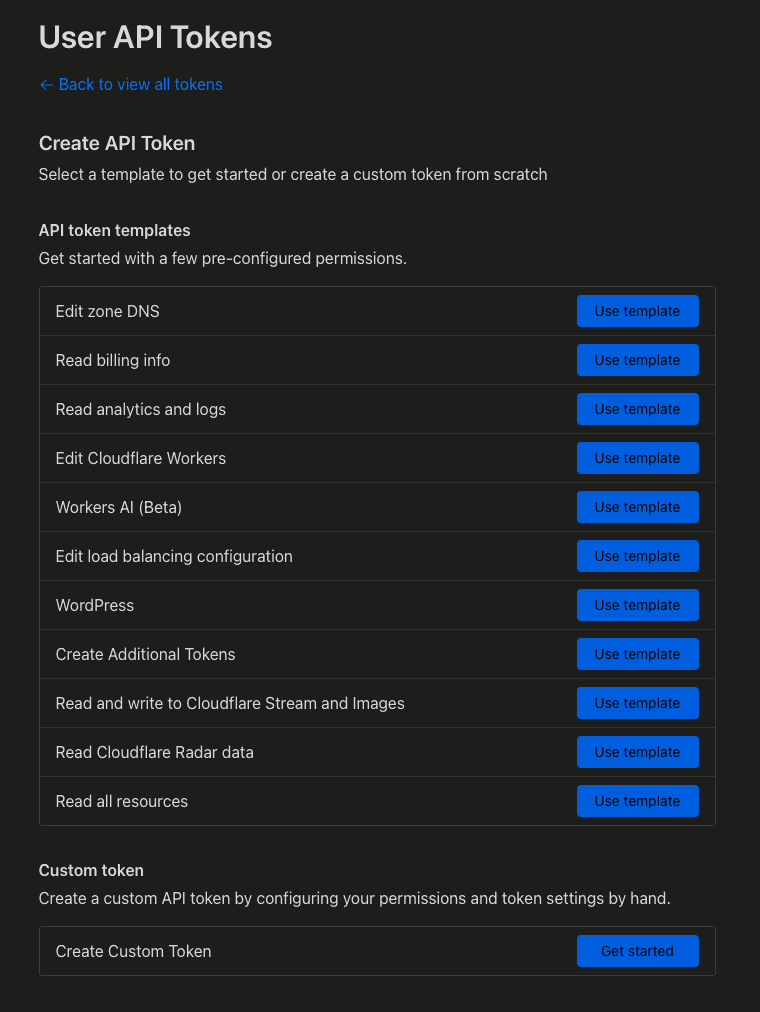
- In the list of your API Tokens, click Create Token,
- In the API Token creation menu, click on Get Started next to Create Custom Token in the Custom Token section.
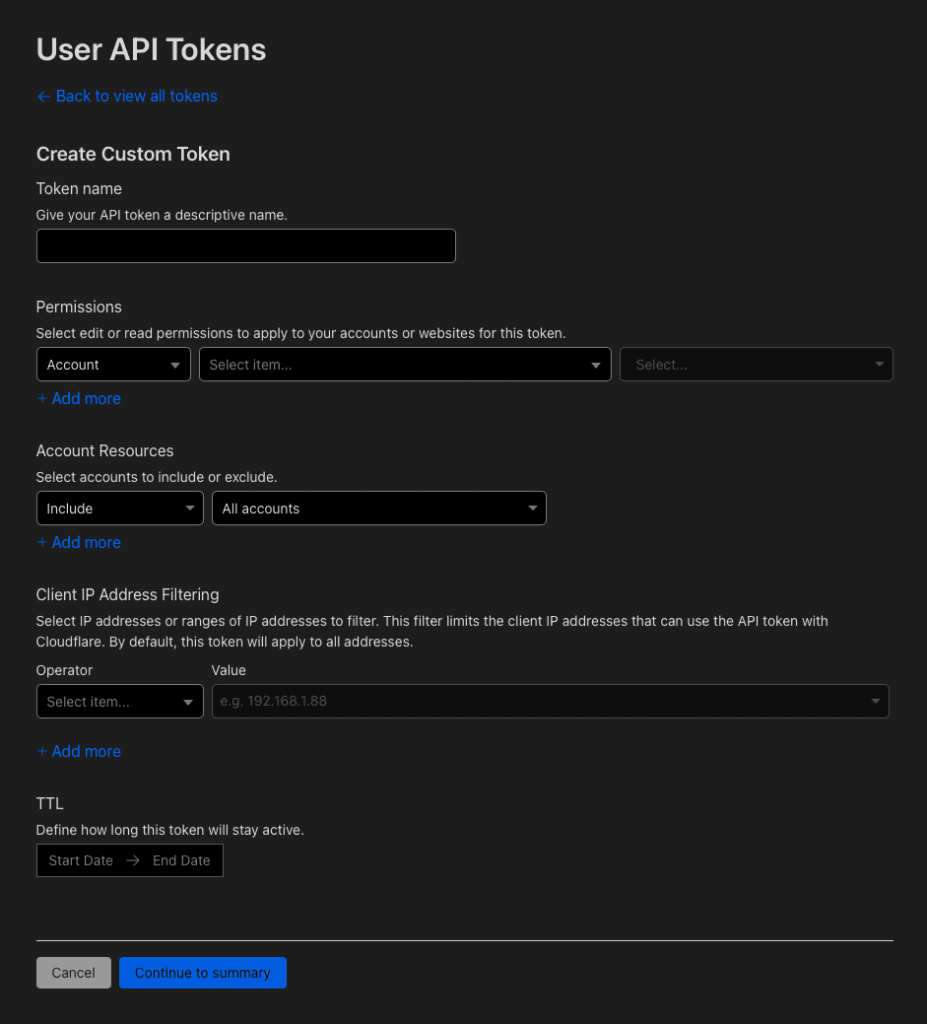
- When you go to create Custom API Token, fill the form with the following values:
- Token name: e.g. npm-xyzcom,
- Permissions: set as follows Zone | DNS | Edit,
- Zone Resources: Set the following Include | Specific zone | Your xyz.com domain,
- Client IP Address Filtering: leave uncompleted,
- TTL: leave uncompleted.
- When you go to create Custom API Token, fill the form with the following values:
- During the final stage, a summary of the API Token creation will appear. If all the information is correct, click Create Token.
- Once the API Token is created, you will receive detailed information about it, along with the option to test it in the terminal.
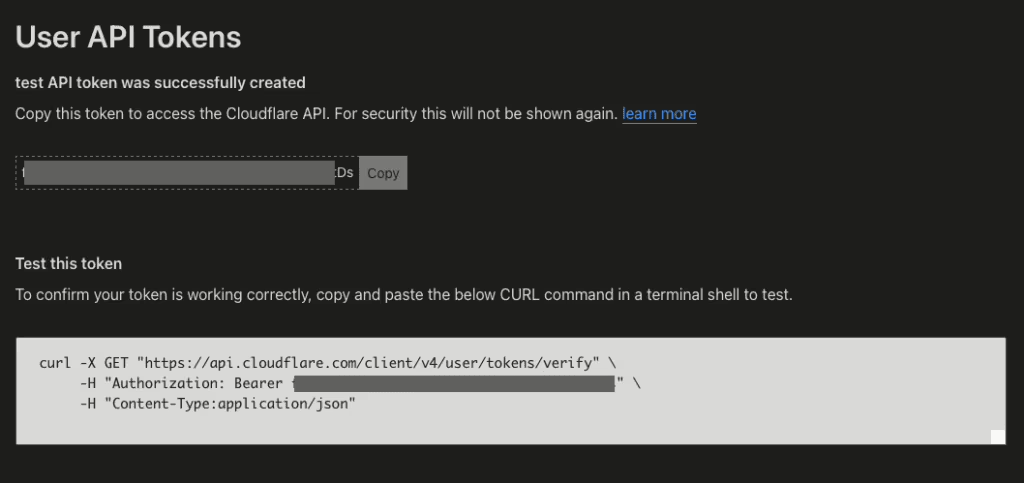
- Save the copied API Token in a notepad, as you will need it when configuring the SSL certificate in Proxy Manager.
Creating a certificate in Proxy Manager
- Log in to the administration panel and go to the SSL Certificates tab,
- Click Add SSL Certificate and then Let’s Encrypt. Fill out the form with the following values:
![]()
- Domain names: xyz.com, *.xyz.com
- Email Address for Let’s Encrypt: enter the one associated with your Cloudflare account,
- Use a DNS Challange: Check this option,
- DNS Provider: select Cloudflare from the list,
- Credintials File Content: complete according to the diagram below,
- Propagation Seconds: leave uncompleted,
- I Agree to the Let’s Encrypt Terms of Service: Check this option.
- Save the configuration with the Save button and wait for the SSL certificate to be generated. Once approved, Let’s Encrypt will begin the verification process through the DNS-01 challenge using the information provided. After successful verification, the certificate will be automatically added to your SSL configuration.
Creating a Proxy Host for NPM
After successfully obtaining an SSL certificate using the DNS-01 Challenge, we can move on to configuring the Proxy Host – for the sake of example, I will do first for Proxy Manager.
- Click on Hosts and then Proxy Hosts from the menu,
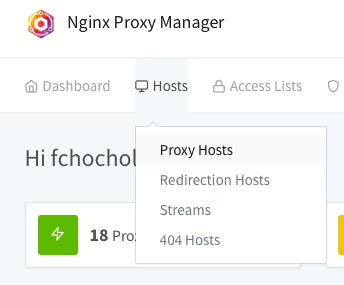
- In the upper right corner, click Add Proxy Hosts.

- Complete the parameters with the following values:
- Domain Names: npm.xyz.com
- Scheme: https
- Forward Hostname/IP: IP-ADDRESS-SYNOLOGY
- Forward Port: 81
- In the Edit Proxy Host window on the Details tab, check:
- Cache Assets,
- Websockets Support,
- and Block Common Exploits.

- Then go to the SSL tab, select your SSL certificate and check all available additional options:
- Force SSL,
- HTTP/2 Support,
- HSTS Enabled,
- and HSTS Subdomains.

Creating a Proxy Host for Synology DSM
To configure the proxy for the Synology operating system, enter port 44445 as HTTPS for DSM in the Forward Port space when editing the Proxy Host.
Step 7 – Configuration in AdGuard Home
In order to access Nginx Proxy Manager from our computer via a defined domain name (e.g. npm.xyz.com) on our local network, it is necessary to configure the DNS server to point to the location of this site.
- Log in to the AdGuard Home administration panel.
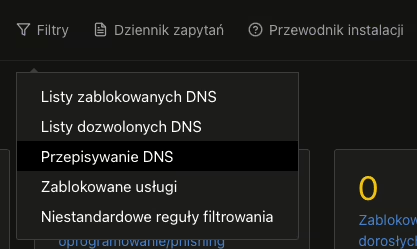
- Go to the Filters tab, and then select DNS Rewriting from the menu.
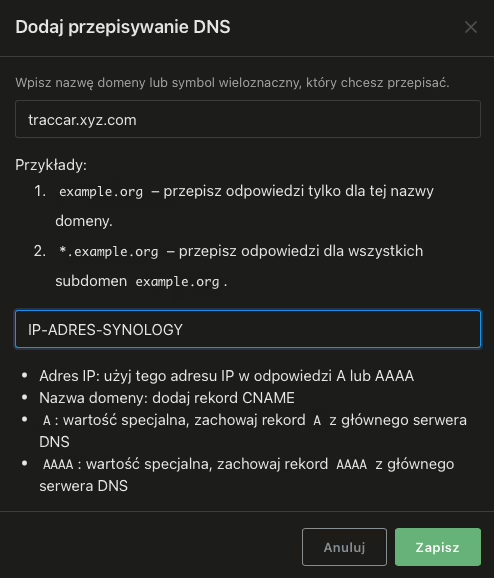
- Click Add DNS rewriting, then fill in the fields with the following values:
- Enter the domain name you want to rewrite: npm.xyz.com
- IP Address: IP-ADDRESS-SYNOLOGY
- Done! Wait a while until the configuration is saved. Once the process is complete, you will be able to access the server at npm.xyz.com. 🚀
Step 8 – External access and configuration on the router
To allow external access to your Synology server, you need to configure port forwarding on your router. Here is a general guide (using MikroTik as an example), assuming you are using a static IP address:
Redirection on the router
The port forwarding configuration in MikroTik’s NAT (Network Address Translation) section allows traffic to be redirected from a specific external port to an internal port on a specific device on the local network.
- Start WinBox and log in to your administrator account,
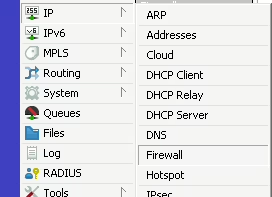
- Go to the IP tab, then select Firewall from the menu.
- Click the NAT tab,

- Click on the + sign in the upper left corner of the window to add a new redirection policy.
- On the General tab, set the parameters described below:
- Chain: dstnat
- Protocol: 6 (tcp)
- Dst. Port: 443
- In. Interface List: WAN or In. Interface: Select your WAN interface (usually ether01).
- Go to the Action tab and set the parameters described below:
- Action: dst-nat
- To Addresses: IP-ADDRESS-SYNOLOGY
- To Ports: 443
After these steps, traffic from outside, heading to port 443 (HTTPS), will be redirected to the corresponding port of your Synology server. In addition, you can customize other NAT rules according to your individual needs and requirements.
Setting an IP address in Cloudflare
Update Cloudflare’s DNS A record to point to your router’s current external IP address. This will direct traffic through Cloudflare, increasing the security level of your server.
Read also
- Are you already using Authentik and Portainer? Learn how to set up single sign-on to easily and securely log in to Portainer. Read the simple guide here to make these applications more convenient to use.
- Discover how easy it is to install the ADS-B receiver on a Raspberry Pi and start tracking flights in real time. Read here a simple guide that will open up the fascinating world of sky observation!
- Immerse yourself in the world of vehicle monitoring with Traccar on your Synology! A step-by-step guide along with the use of Docker will enable you to install it quickly and efficiently. Track your vehicles, analyze the data and control the route.
Additional sources and information
For further exploration and more information, I recommend checking out the links below. They are valuable sources that were used in the development of this guide.
- Proxy installation: https://nginxproxymanager.com/setup/#running-the-app
- Stacks in Portainer: https://docs.portainer.io/user/docker/stacks
- What ports are used by DSM services: https://kb.synology.com/pl-pl/DSM/tutorial/What_network_ports_are_used_by_Synology_services
Comments (14)
Jenssays:
02/04/2025 at 15:23Thanks for your Guide!
But my NPM can not reaced outside my LAN. Port 80/443 are “free” (tcp 0.0.0.0:80 LISTEN 22963/docker-proxy, same for 443). I can access the NPM at 192.168.1.xxx:81. When I set up a proxy host, it is not reacable. Any idea?
BerserkeRsays:
03/12/2024 at 11:42Hi does this script still work in the very latest DSM version?
Filip Chochółsays:
03/12/2024 at 11:48Hey, on my DSM 7.2 is working.
BerserkeRsays:
03/12/2024 at 12:09I”m sorry, I should have directly asked if you can possibly confirm the script is working and doesn’t break anything in DSM 7.2.2-72806 Update 2.
Can you confirm that version? Thanks in advance!
Filip Chochółsays:
03/12/2024 at 12:12This walk around for free ports on DSM is not breaking anything. On my DSM 7.2.2-72806 Update 1 is working correctly.
IF! Something will not working good – your DSM will work properly on default ports 😉
BerserkeRsays:
03/12/2024 at 13:19Hello, I changed http to 8081 and https to 8444 with your command, I managed to get port 80 free but port 443 is still in use.
root@NAS:/# sudo netstat -tulnp | grep :443
tcp 0 0 0.0.0.0:443 0.0.0.0:* LISTEN 6005/nginx: worker
tcp6 0 0 :::443 :::* LISTEN 6005/nginx: worker
any advice?
BerserkeRsays:
03/12/2024 at 13:34I got port 80 free but 443 is still listening:
root@NAS:/# sudo netstat -tulnp | grep :443
tcp 0 0 0.0.0.0:443 0.0.0.0:* LISTEN 22389/nginx: master
tcp6 0 0 :::443 :::* LISTEN 22389/nginx: master
any advice? I already tried stoppint DDNS service and email service as well.
Filip Chochółsays:
03/12/2024 at 14:01Well.. i checked now with my configuration, i tried reboot my NAS and… it works properly. Did you try it with uninstalled Web Server, change ports for DSM HTTP and HTTPS?
BerserkeRsays:
03/12/2024 at 15:07Hello, yes I have everything off I can think of.
MFA, SMTP email, Web Station, etc.. Can you still think of something to turn off?
I noticed that when I keep messing around and increasing the port ranges NGINX master process flips once from 443 to 80.
So I can have one of them free at a time but never both.. Something is still using it.
BerserkeRsays:
03/12/2024 at 15:22I figured out what it was, it was 1 remaining entry in the reverse proxy, it’s working port 80 and 443 are free 🙂
Thanks a lot!
Filip Chochółsays:
03/12/2024 at 15:28🙂
BerserkeRsays:
03/12/2024 at 16:19*Sorry, repost the other message was wrong, you can delete it.*
sed -i -e ‘s/\b80\b/8081/’ -e ‘s/\b443\b/8082/’ /usr/syno/share/nginx/server.mustache /usr/syno/share/nginx/DSM.mustache /usr/syno/share/nginx/WWWService.mustache
This will probably work better if you were to use ports like 8081 and 8082. It looks only specifically for ports 80 and 443 so it doesn’t edit anything by accident.
Clydesays:
26/10/2024 at 17:23Thanks for this excellent guide. One note, you cannot expose the NGINX admin port in the docker-compose for nginx on port 81:81 because in the script to free up port 80 and 443 on the Synology NAS port 80 is remapped to port 81. Therefore I think it best to update the guide and set the nginx admin UI port to be exposed to let’s say port 82 (82:81) in the nginx docker-compose. Thanks again for the guide.
Filip Chochółsays:
26/10/2024 at 19:46You’re right! Sorry, i will correct that in article 🙂 Thanks.