Hello!
Today we will focus on one of the key tools for system administrators – Portainer. Additionally, the value this interface brings to managing Docker containers on your Synology NAS is huge. This guide will walk you through the installation process step by step, which will open the door to simpler and more efficient management of applications in containers. Are you ready to deepen your knowledge and skills?
Introduction
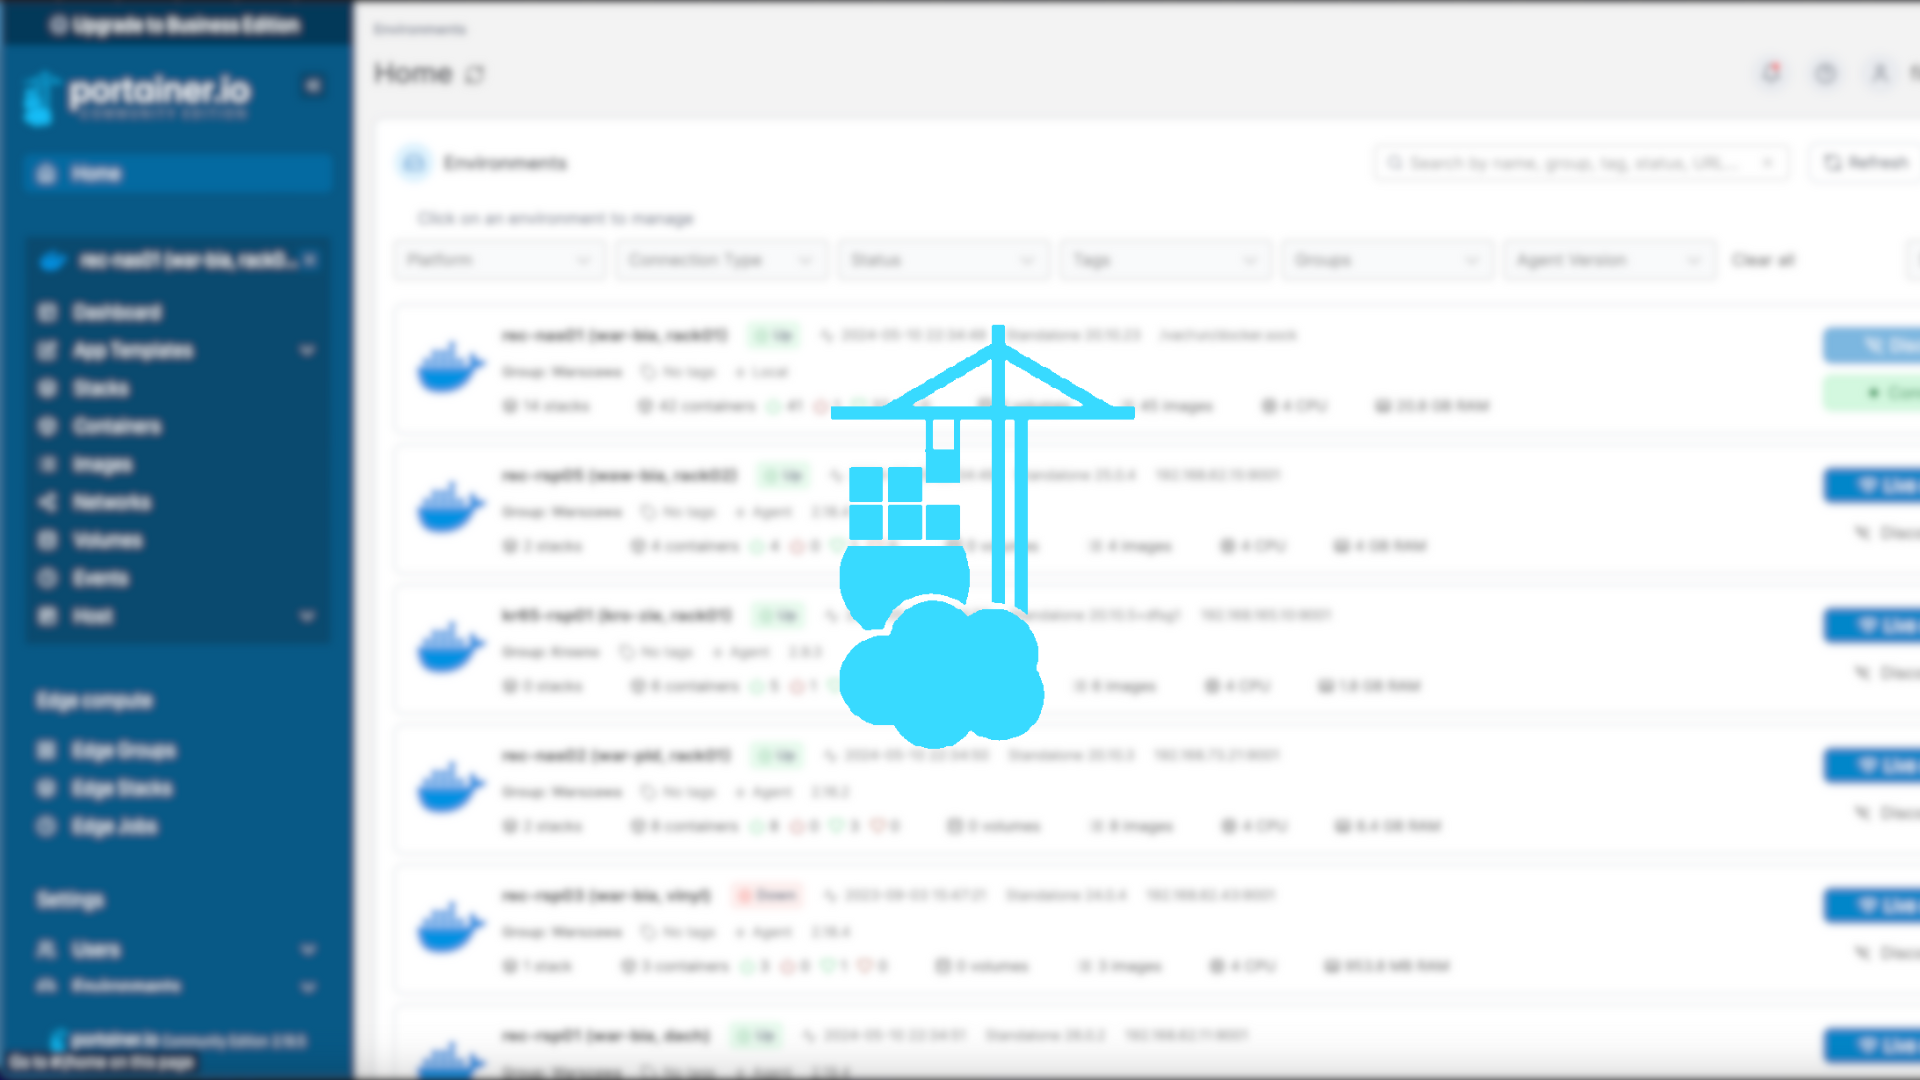
What is a Portainer?
Portainer is a comprehensive Docker container management tool that provides the user with an intuitive graphical interface. In short, Portainer acts as a control panel that allows you to easily manage Docker containers, images, networks and volumes without using the command line.
One of the biggest advantages of Portainer is its user-friendly interface, making it easy for even novice users to quickly master Docker containers. It also makes it easy to view and monitor all running containers, create new containers from existing images, import and export containers, manage volumes and configure networks.
What’s more, Portainer also offers advanced features such as user and team management, access control and support for multiple Docker instances. With this tool, system administrators can manage their container environments more efficiently, and facilitate collaboration across teams responsible for developing and maintaining Docker container-based applications.
What is Synology?
![]() Synology is a company specializing in the production of network hardware and software for data storage and management. Their main products are NAS (Network Attached Storage) servers, which offer a wide range of functions such as file storage, media sharing, backup, and hosting network services.
Synology is a company specializing in the production of network hardware and software for data storage and management. Their main products are NAS (Network Attached Storage) servers, which offer a wide range of functions such as file storage, media sharing, backup, and hosting network services.
Thanks to their flexibility, Synology devices are used both in home networks, where they serve as a central data storage and media server, and in businesses, where they are used to store and share files and run a variety of business applications, such as email servers, file servers, and project management platforms.
In addition, Synology devices are popular in security-oriented environments, where they are used to store surveillance camera footage and run video surveillance systems. Moreover, thanks to the wide range of applications available in their ecosystem, users can expand the functionality of their NAS servers by installing virtualization servers or cloud data management solutions, among others. In this way, Synology becomes not only a central data storage point, but also a platform for extensive IT infrastructure management in diverse environments.
Preparation
In order to prepare the tutorial, we will adopt an established domain name and certain configuration names, shown below. For customized configuration, apply settings according to individual requirements.
- Full domain name (FQDN) of Synology DSM: https://dsm.xyz.com,
- Installed on Synology via Package Center: Container Manager.
Step 1 – Installing Container Manager on Synology
![]() Until version 6.2, a Docker package was available on the Synology DiskStation Manager (DSM) operating system, which allowed users to run application containers on NAS servers. With the introduction of DSM 7, Synology decided to introduce its own solution, known as Container Manager.
Until version 6.2, a Docker package was available on the Synology DiskStation Manager (DSM) operating system, which allowed users to run application containers on NAS servers. With the introduction of DSM 7, Synology decided to introduce its own solution, known as Container Manager.
- Log in to the DSM interface – Open a web browser and log in to the administration panel on your Synology device, using the appropriate credentials (administrator account),
- Install Container Manager – After logging in, go to the Package Center (which is the central place to manage applications on Synology devices). Search for the Container Manager package and install it on your device.
Step 2 – Create folders
- After logging into your file server, open File Station.
- Then, in the shared folder named docker, create a new folder and name it portainer.
Step 3 – Enable SSH on the Synology
If you don’t already have SSH enabled on your Synology, follow these steps
- Go to the Control Panel, then under Connectivity, select Terminal and SNMP;
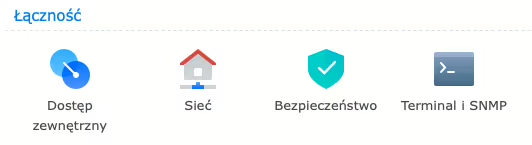
- Click Enable SSH service and set any high port such as 45000.
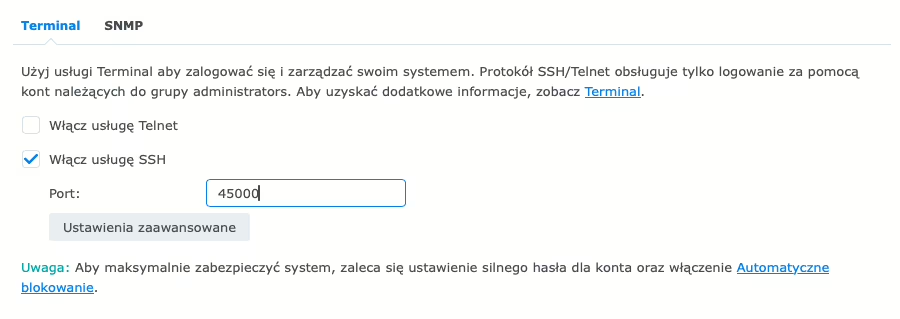
- Save the settings and proceed to log in via SSH to our Synology.
For Microsoft Windows operating systems, I recommend PuTTY, for its reliability and rich configuration options. On the other hand, for Apple macOS operating systems, you should definitely consider using Termius, which offers an intuitive interface and many useful features.
Step 4 – Install Portainer using SSH
- I personally use macOS, thus I will use Termius. The following action is performed on the right root,
- Log in to your Synology account over SSH.
- Type the following command to install the Portainer.
- Wait for the server to download the contents of the Portainer to disk.
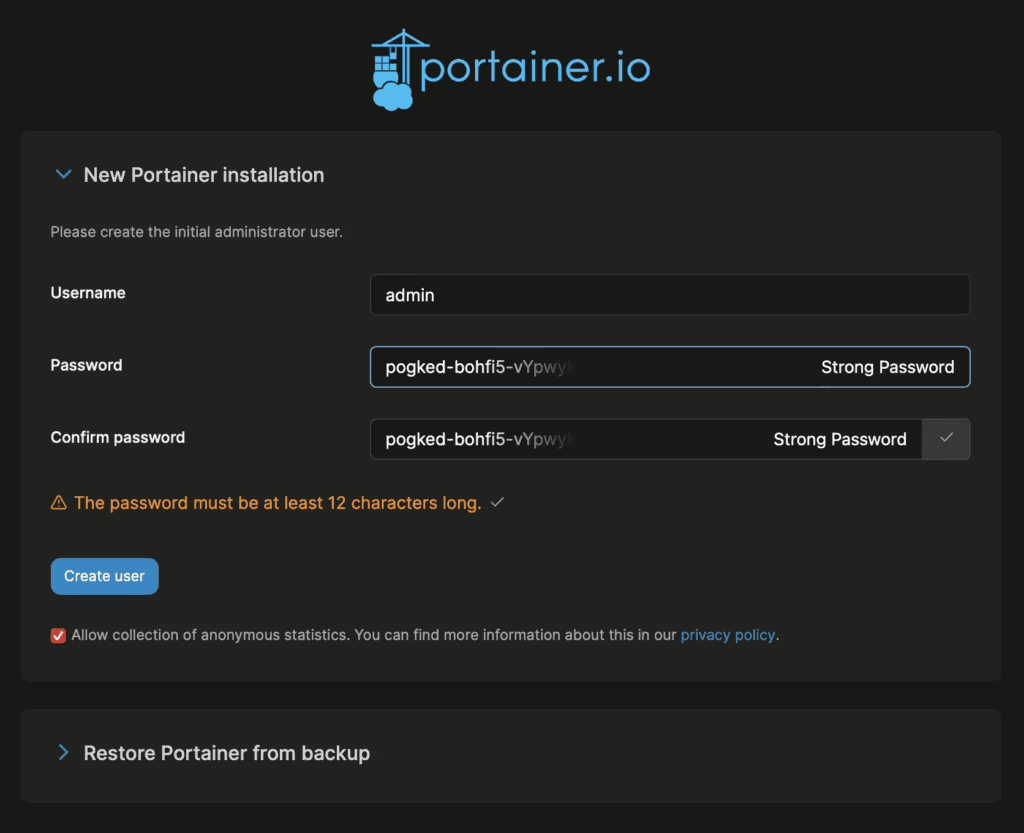
- Open a browser and type http://IP-ADRES:9000/. Choose a username and a strong password, confirm them, and then click Create User.
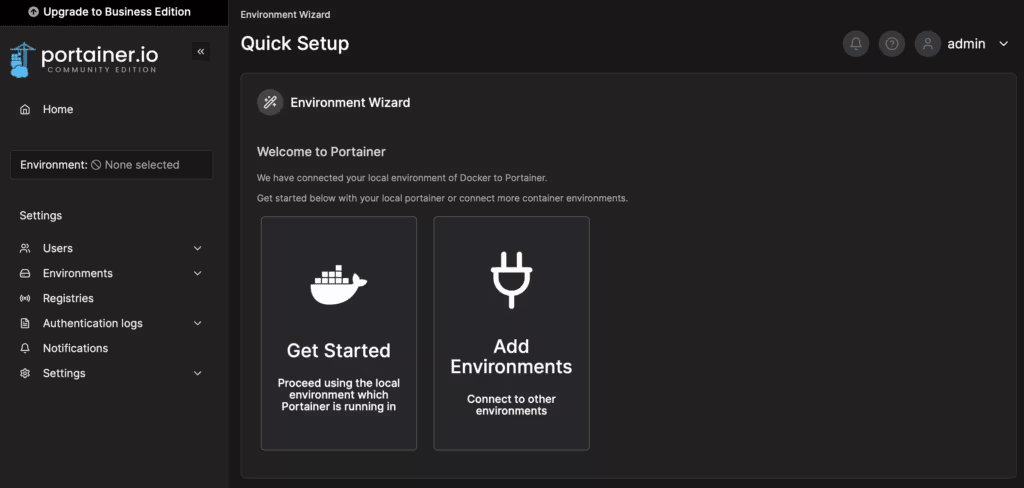
- Then click Get Started to continue using the local environment in which Portainer is running.
- Done! Enjoy your use! 🚀
Single Sign-On with Authentik
Interesting, isn’t it? But this is just the tip of the iceberg! If you want to learn more about Portainer’s advanced capabilities, take a look at our other article, where we describe Portainer’s integration with Authentik in SSO. Discover how you can improve the security and convenience of Docker container management even more!
If you have additional questions about the setup, go ahead and leave a comment under this article or contact me directly. I will be happy to answer any concerns and help solve any problems. Your questions can help improve this guide for other users.
Additional sources and information
Thank you for reaching this point. For further exploration and more information, I recommend checking out the links below. They are valuable sources that were used in the development of this guide.
- Portainer Documentation: https://docs.portainer.io

Discover how to easily upload digitally signed PDF files to Paperless-ngx for document management convenience.
Take benefit of Traccar’s single sign-on. A simple way to manage users. See how easy it is to control access.
A guide to installing Netbox on Synology using Docker Compose. Step by step, easy and fast solution for network management.

Install Paperless-ngx on Synology with Docker Compose to easily manage paperless documents. A simple step-by-step guide.
Step-by-step guide on how to configure Leox LXT-010S-H GPON ONT module on Mikrotik RB5009 router, instead of ONT module from Orange.
Step-by-step guide: Installing Traccar on Synology using Docker. Effective vehicle tracking on your own server.
Leave a Reply