Hello!
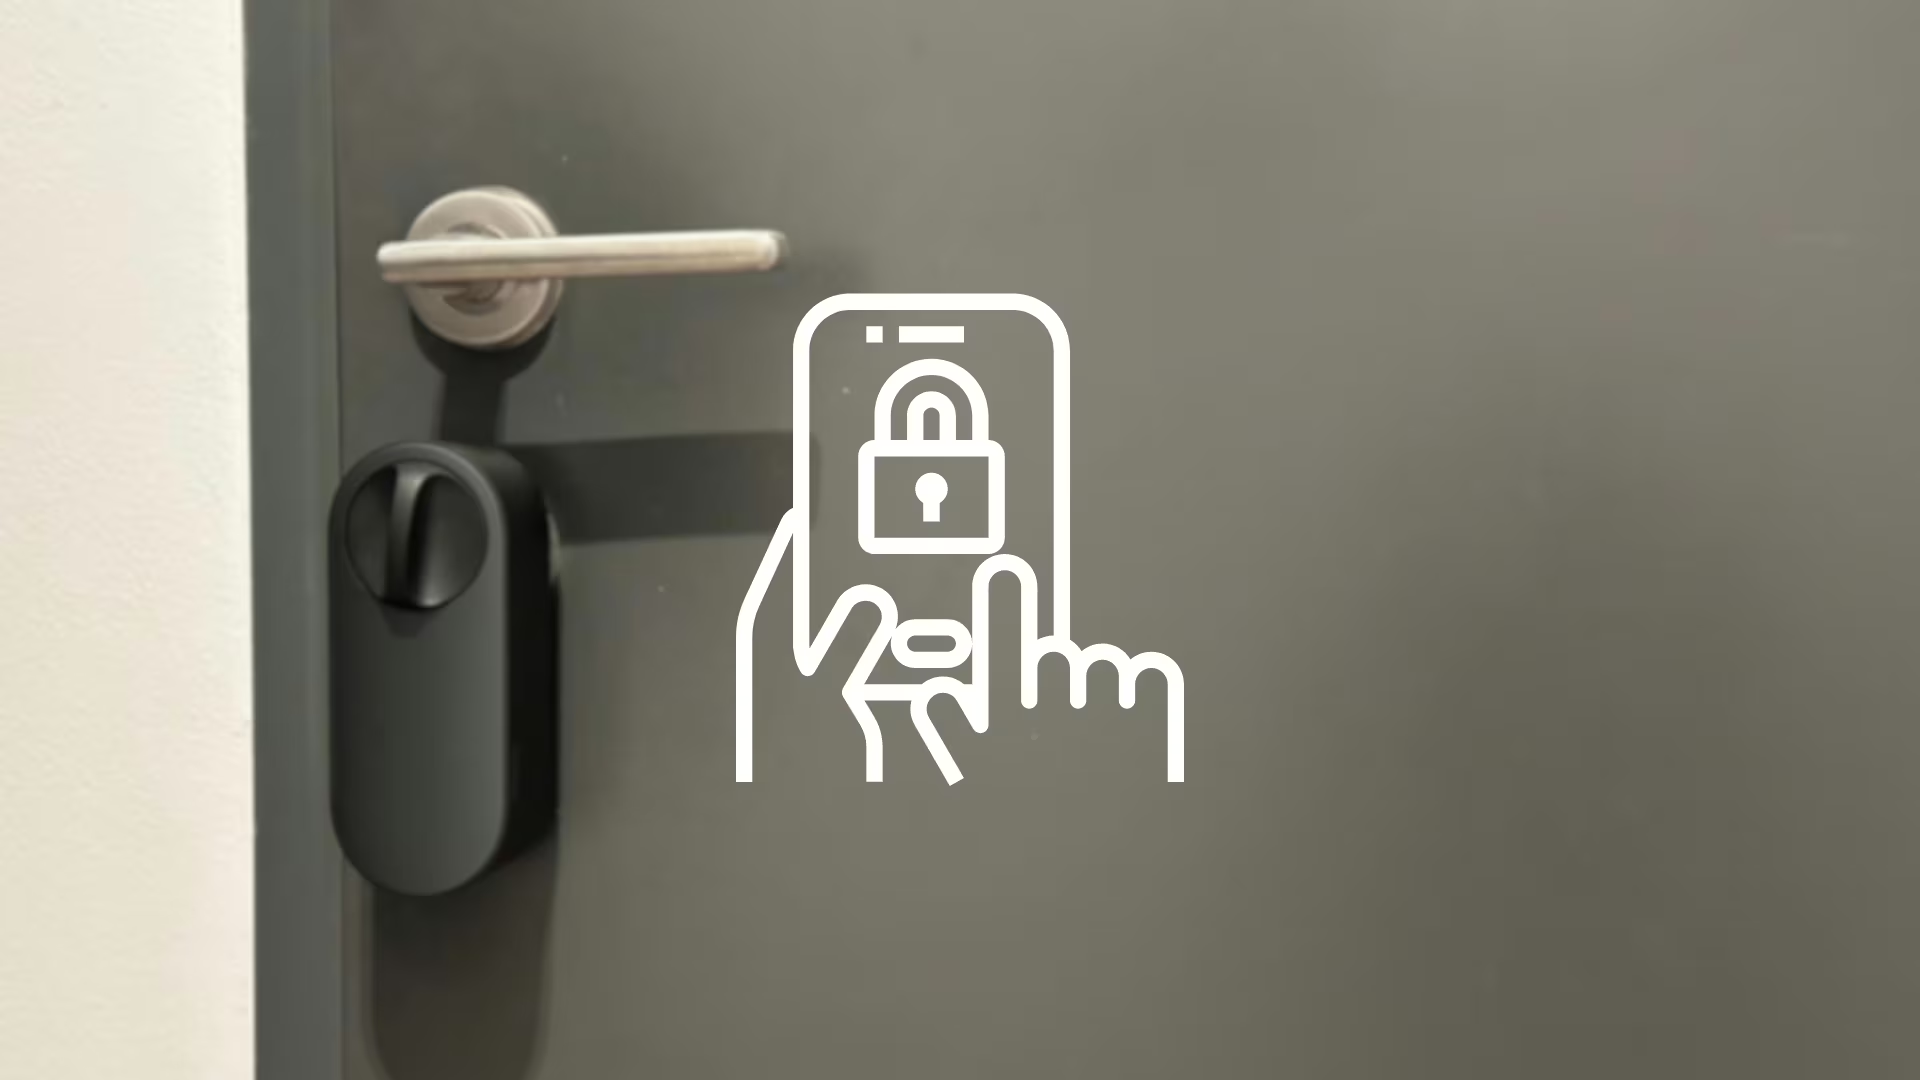
Smart home solutions are gaining popularity these days, and one of the key components of a smart home is a smart lock. Aqara Smart Lock U200 is the advanced device I’ve been eagerly waiting for, delivering both cutting-edge design and top-tier functionality.
In this review, we will take a closer look at this lock, its key features, as well as its integration with the popular Home Assistant and Apple HomeKit systems. I will try to describe in detail the first impressions – the advantages, as well as its first disadvantages.
Introduction
What is Aqara?

Aqara, powered by Lumi United Technology, is transforming the smart home landscape with their advanced and stylish home automation solutions. Founded in 2016, Aqara has quickly gained a reputation for its innovative and high-quality products that are compatible with a variety of smart home ecosystems. The brand offers a wide range of devices, including smart locks, sensors, cameras, outlets, switches and lighting controllers.
Aqara products are characterized by modern design and advanced technology. Them products combine sleek modern design with cutting-edge technology, crafted to work seamlessly with top smart home platforms like Apple HomeKit, Google Assistant, Amazon Alexa, and Home Assistant. This allows users to easily integrate Aqara devices with other systems in their homes.
Smart Lock and Apple Home Key on offer from manufacturer
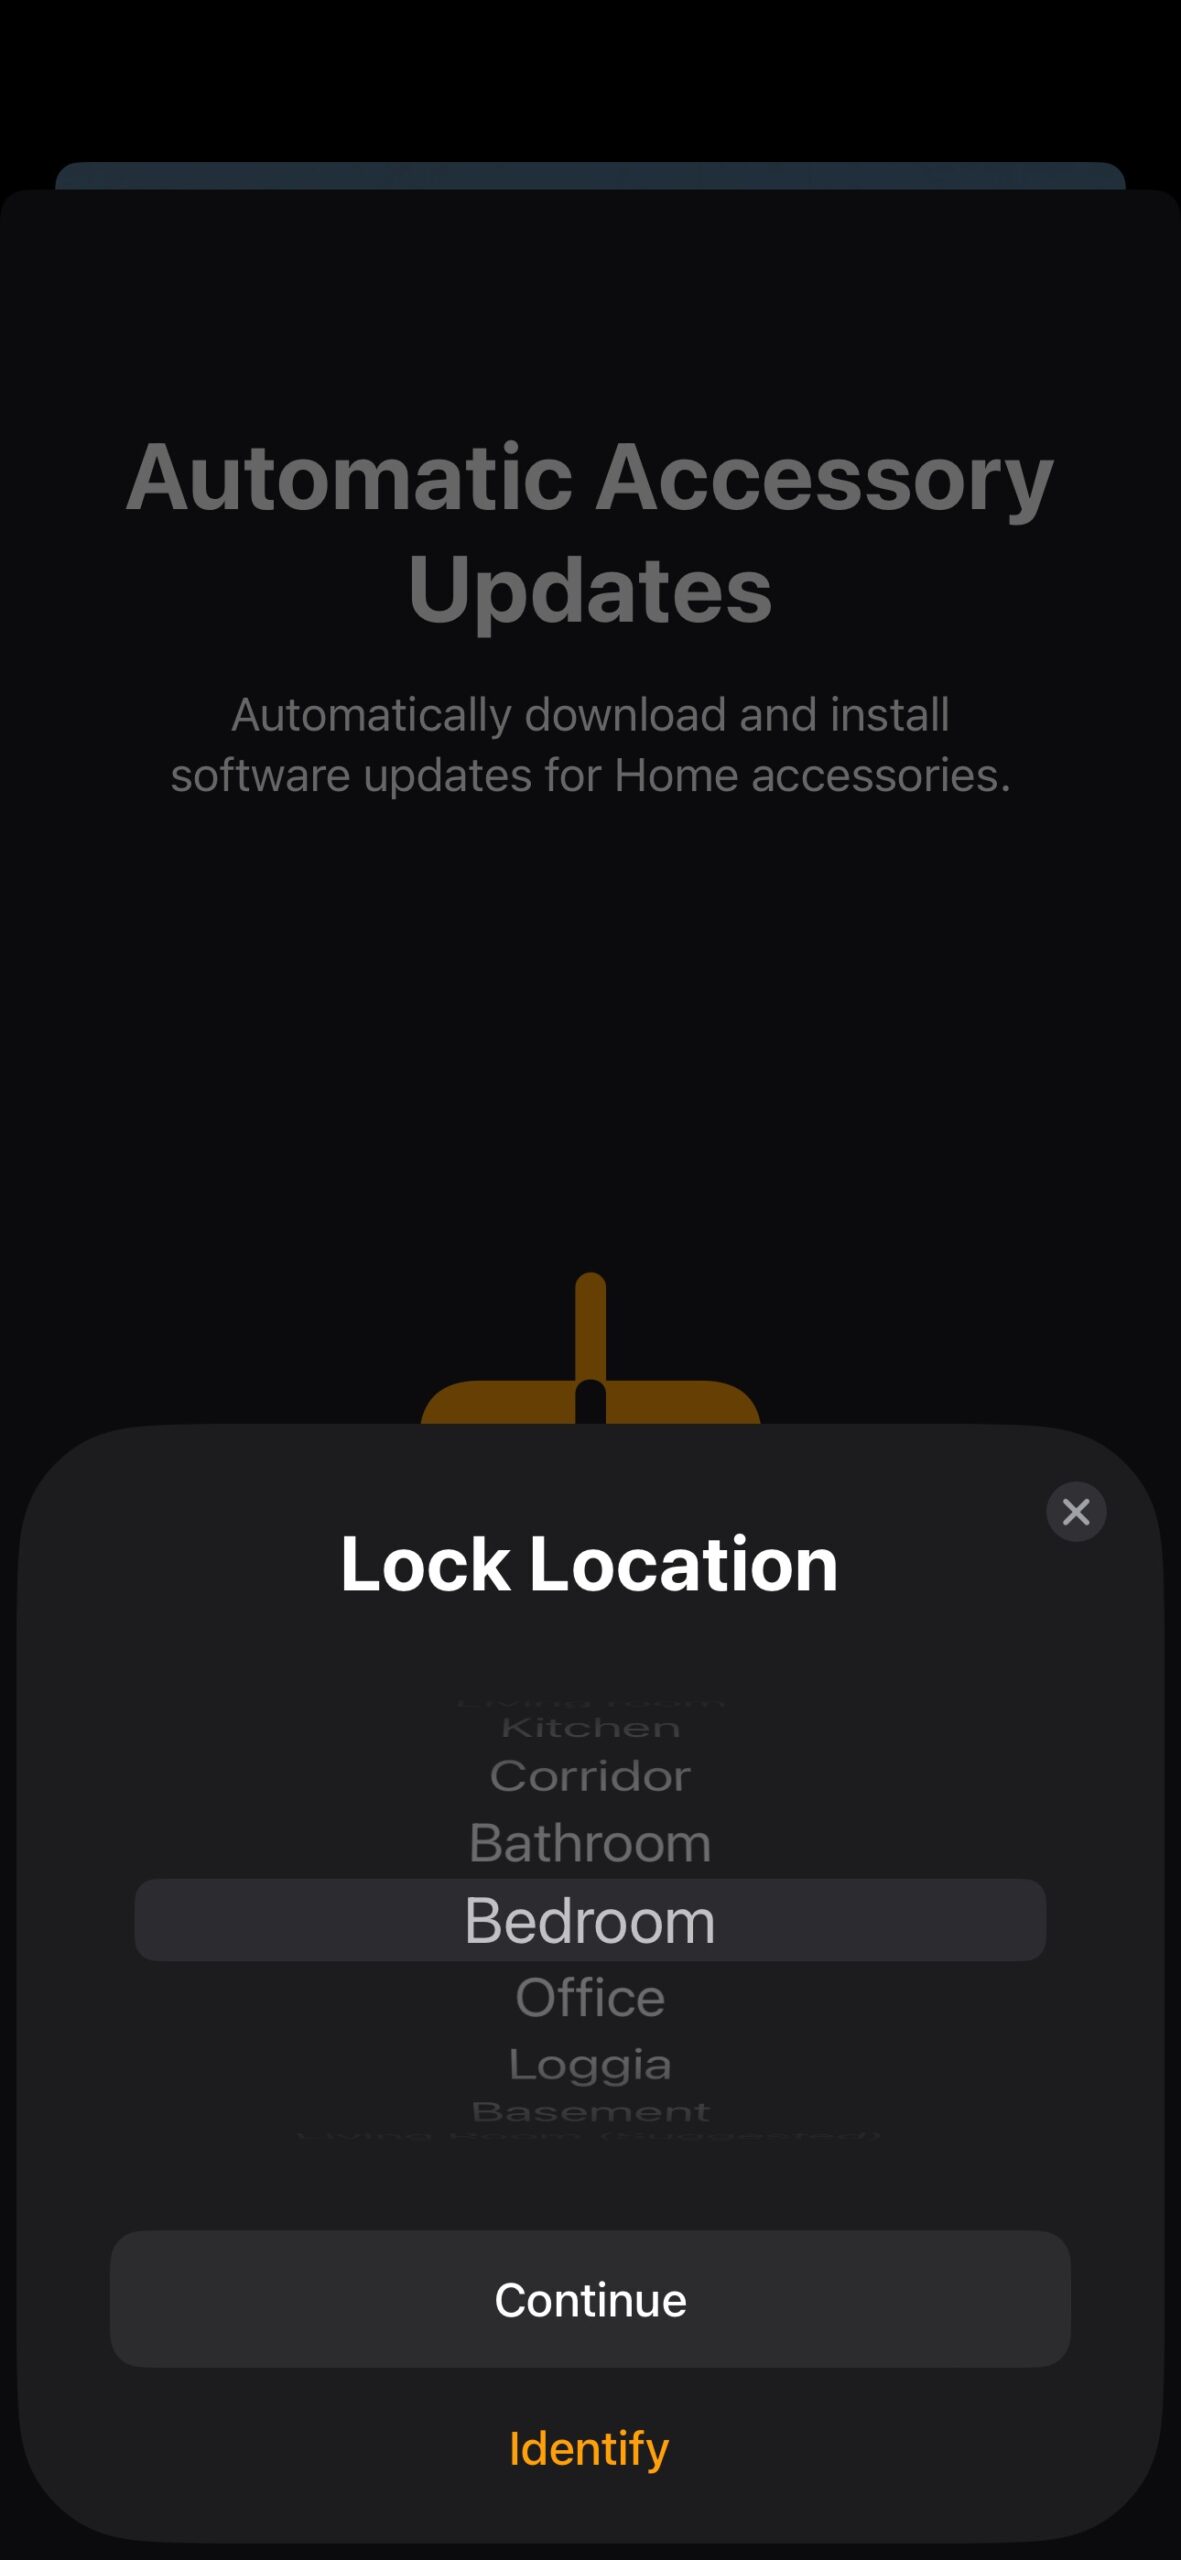
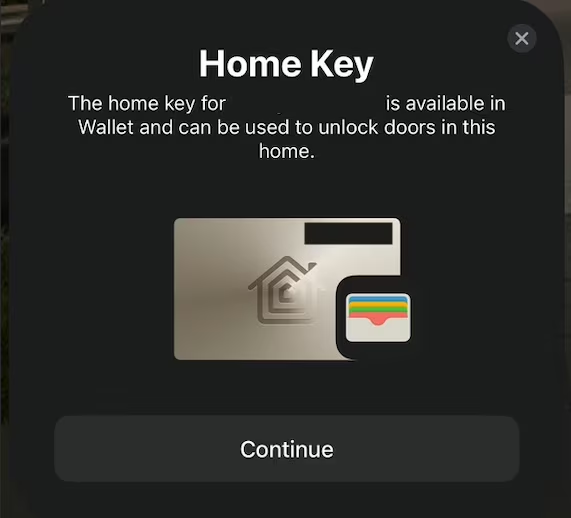
Aqara is expanding its innovative portfolio with the European launch of the first smart lock supporting HomeKey technology for Apple. The Aqara Smart Lock U200, equipped with this feature, allows users to unlock their doors using Apple Wallet. Simply bring your iPhone or Apple Watch close to the lock to open it, providing even more convenience and speed.
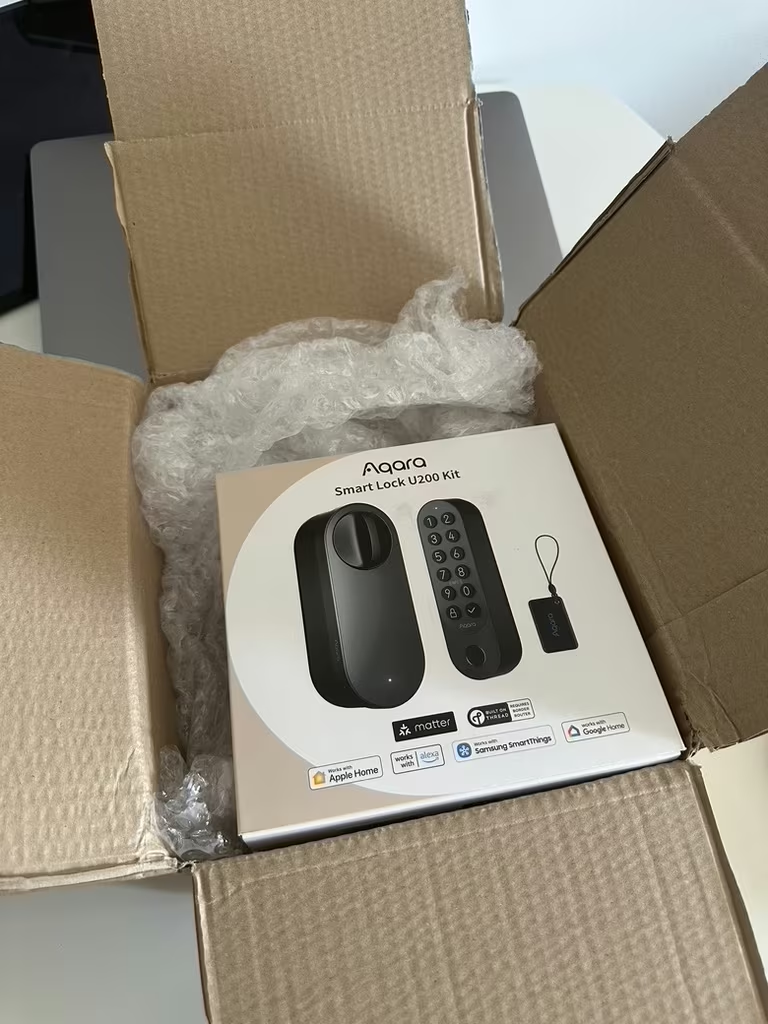
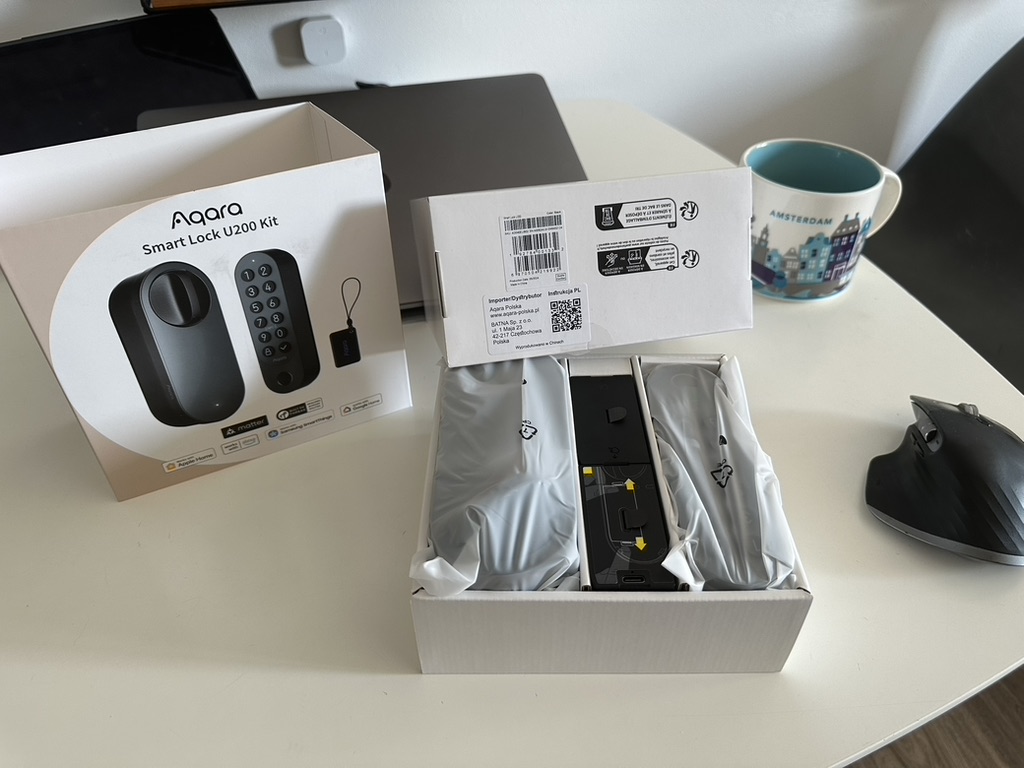
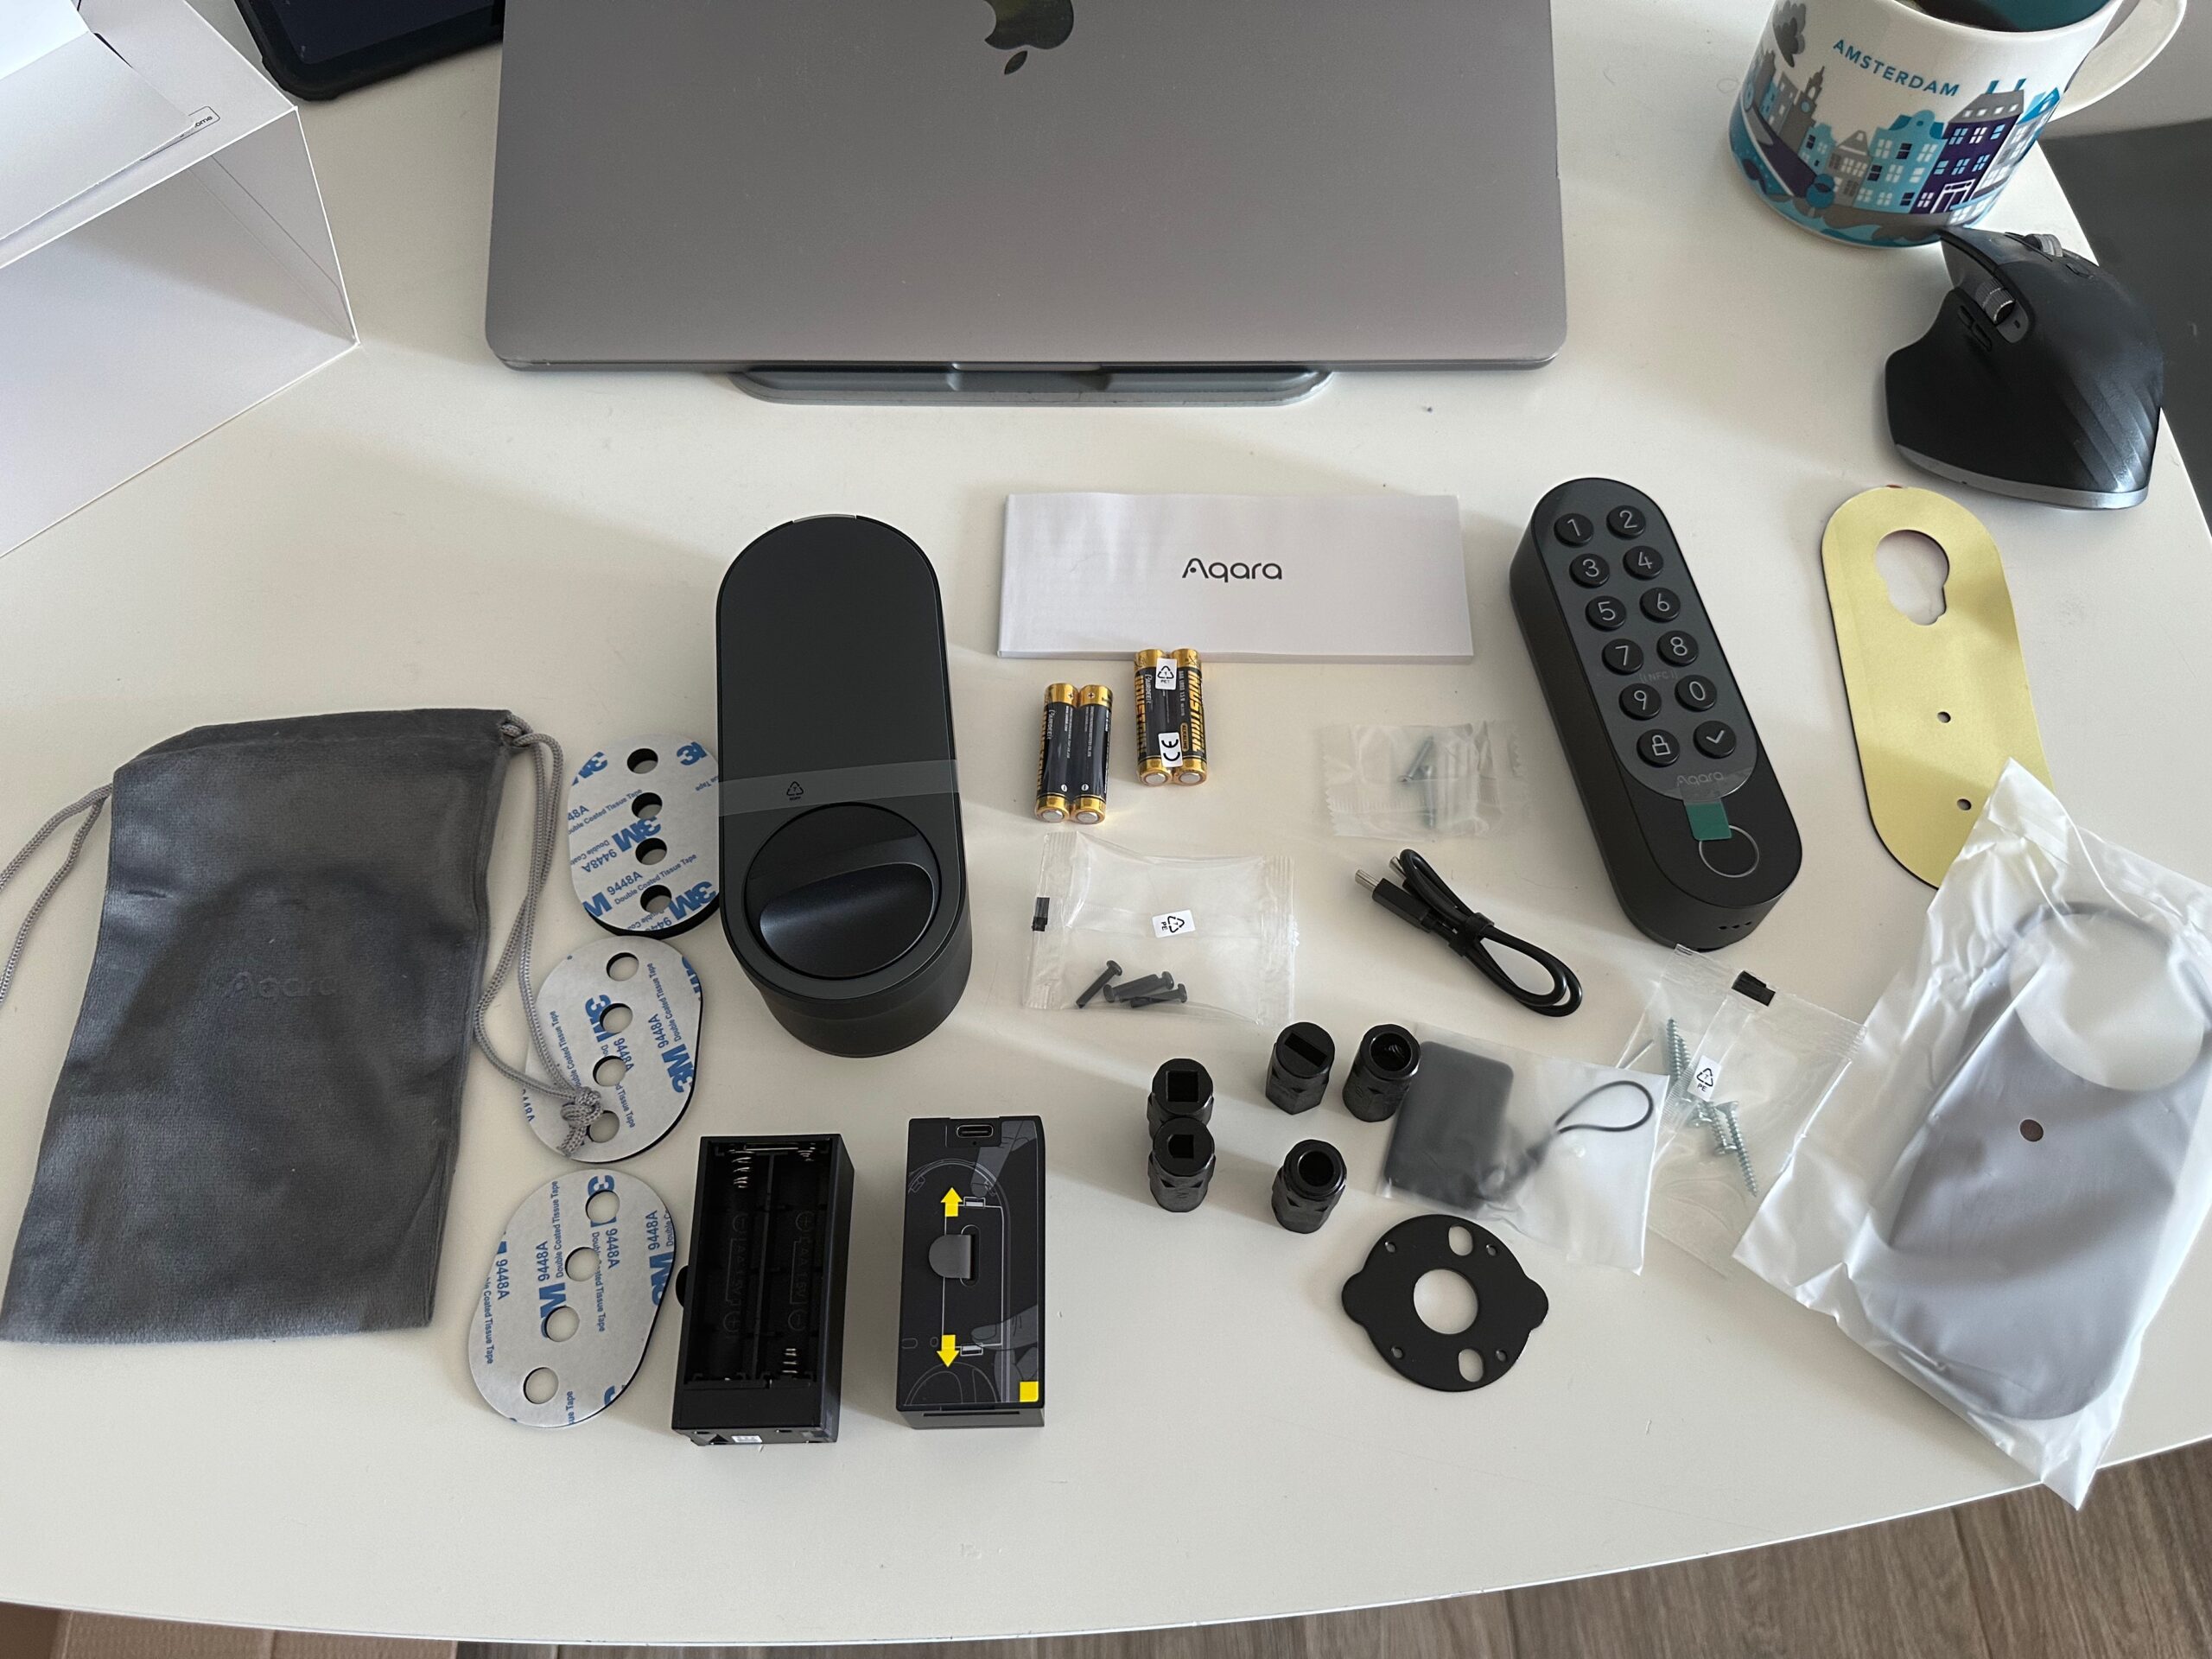
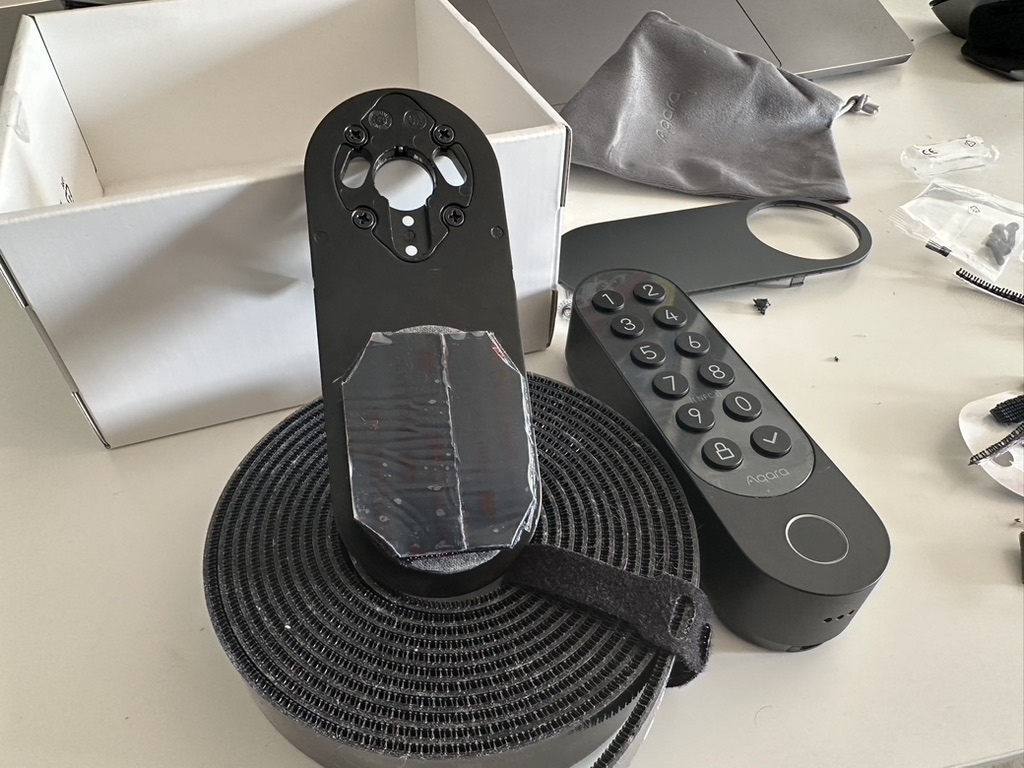
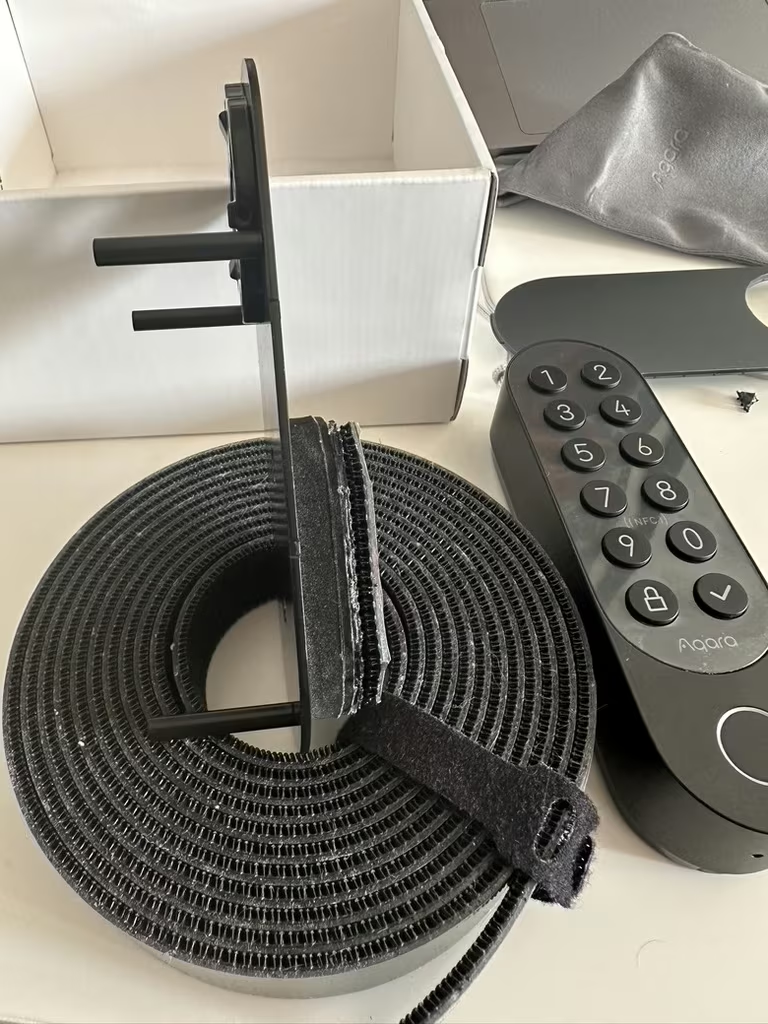
What do we get in the kit?
- Center overlay with mounting plate;
- External keyboard;
- Rechargeable battery (which we are able to charge with a charger via the USB-C connector);
- Adapter for AA batteries (if we wanted to interchangeably use with a full-fledged rechargeable battery);
- Sticker for the mounting plate (if we didn’t want to drill into the door);
- Three sizes of shims for the mounting plate (to stabilize the lower part of the plate);
- Adapters for modules equipped with a knob/knob;
- NFC tag;
- Mounting screws;
- A cover for our powerbank (which we can hang from the lock).
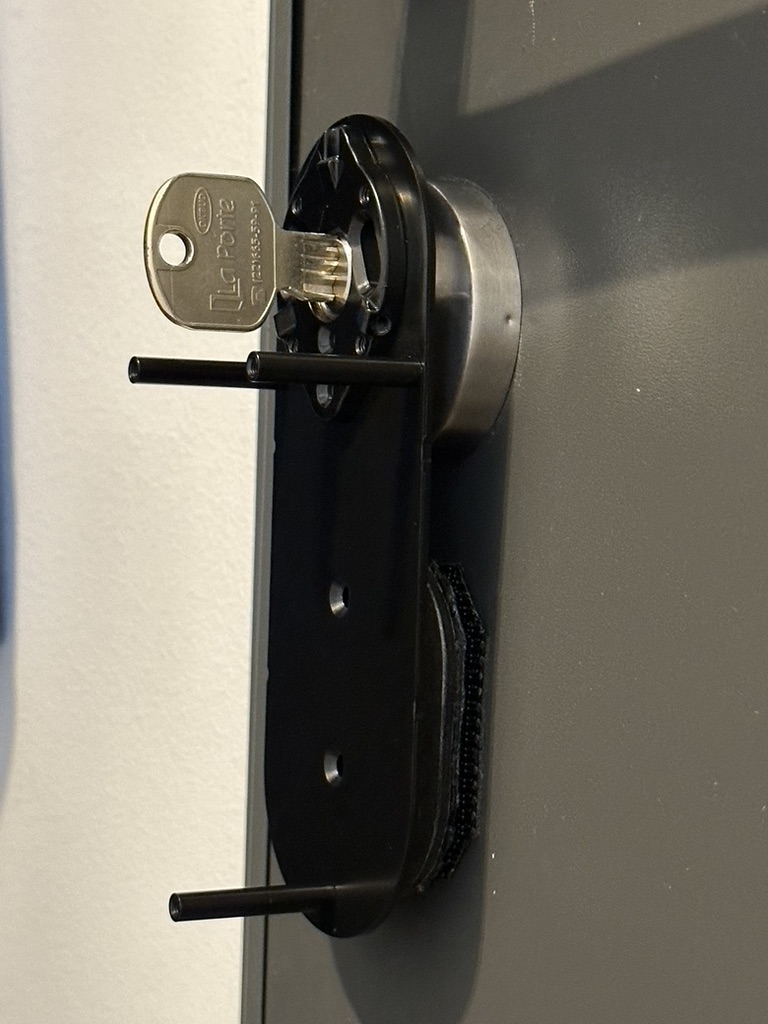
Lock cylinder with clutch

In order to take full advantage of the functions of smart locks such as Aqara, Nuki or Gerda Tedee, it is necessary to use the appropriate lock cylinder. The key component here is the lock clutch cylinder, which ensures the proper operation of the lock in different opening modes.
What is the clutch in the cylinder?
A clutch cylinder is a special type of lock cylinder that allows the key or electronic mechanism to turn independently on both sides of the door. This makes it possible:
- Unlocking the door from the outside: Even if the inside of the module is locked.
- Using an electronic mechanism: Smart locks can automatically lock and unlock doors without the need to manually turn the key.
- Security: Ensures that the door can be opened in an emergency, even if the key is in the lock on the other side.
Verification for property insurance
The most important aspect! When installing a smart lock, such as the one described in the article below, an important aspect to verify is the acceptance of such devices by the insurer. Not all insurance policies allow smart locks, so it’s worth checking the terms of your policy carefully.
What to verify
- Acceptance of Smart Locks by the Insurer
- Contact your insurer to find out if they accept smart door locks as part of your insurance policy.
- In the case of insurer Uniqa in Poland – it is required that a mechanical-electronic lock (i.e., a lock that is activated using an electronic system) actuates: one multi-point lock or one certified lock. In addition, you should inform your insurer that you have such a lock on your door.
- Technical Requirements
- Some insurers may have specific requirements for the operation of smart locks.
- Check if your smart lock meets these technical requirements.
- Documentation and Certifications
- Verify that the insurer does not by any chance require technical documentation of the lock. It can be: an instruction manual, technical specification or safety certificate.
- The insurer may require copies of these documents to verify the lock’s compliance with policy requirements.
 Why should it be checked?
The insurer’s failure to approve a smart lock could result in problems when paying out a claim in the event of a break-in or other event covered by the policy. Therefore:
- Financial security: Making sure your lock is accepted by your insurer ensures that you will be compensated if necessary.
- Peace of Mind: Knowing that your smart lock meets all of your insurer’s requirements gives you peace of mind when using modern security solutions.
General description
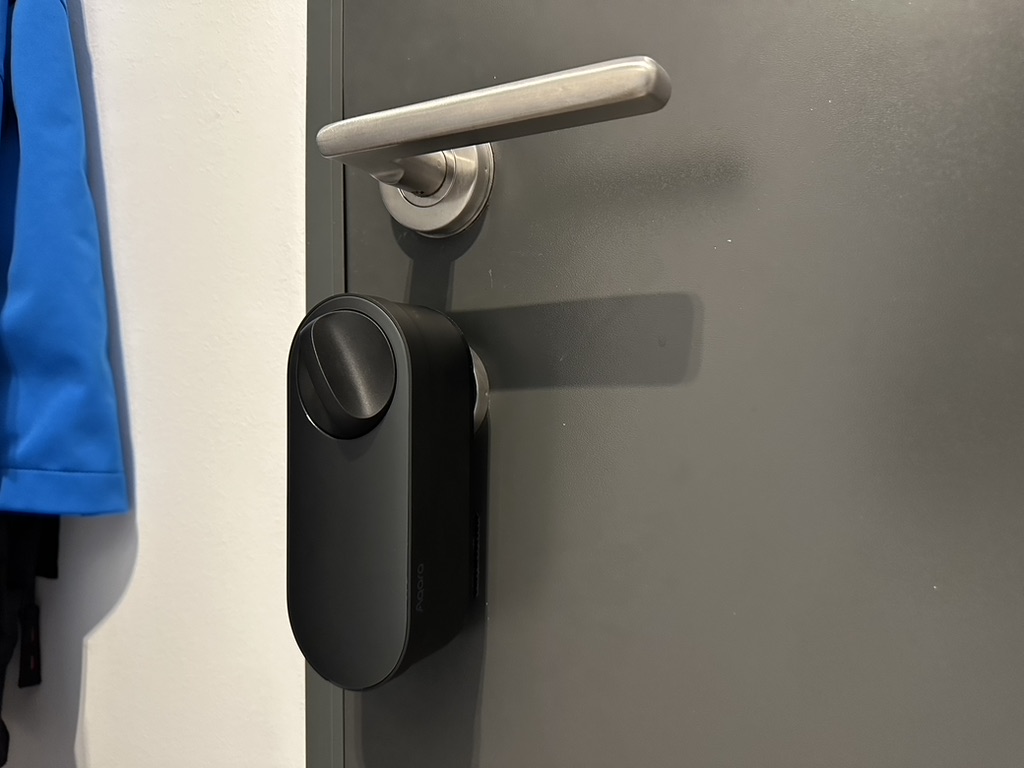
🔐 Appearance and quality of materials
The lock is characterized by a modern and elegant design that fits perfectly into the aesthetics of modern interiors. Its minimalist design with subtle lines makes it both functional and stylish, making it an attractive addition to any home. Unfortunately, the Smart Lock overlay itself is quite large, which may be a disadvantage for some users. It is slightly larger than the rival Nuki model, which may affect its perceived aesthetics and potentially make it more difficult to install in some locations.
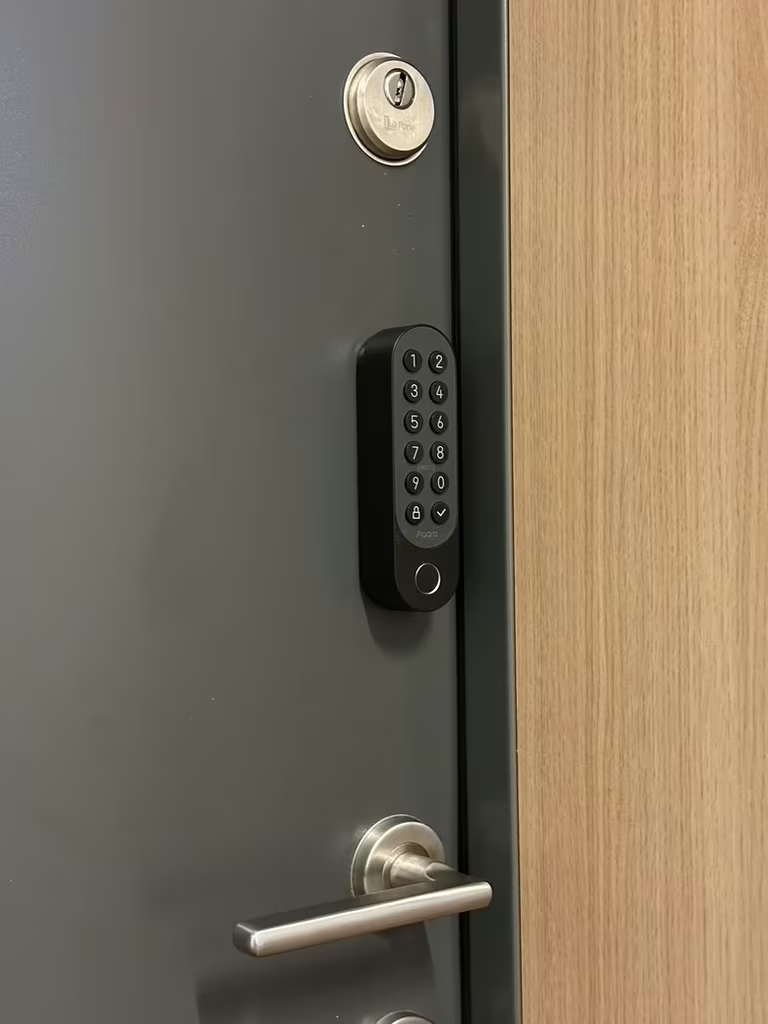
One of the key features of the lock from Aqara is its illuminated keypad. This solution ensures ease of use even in dark places, allowing convenient PIN entry without the need for additional lighting. The backlighting of the keypad is discreet, which not only makes it easier to use the lock at night, but also adds elegance to the overall design.
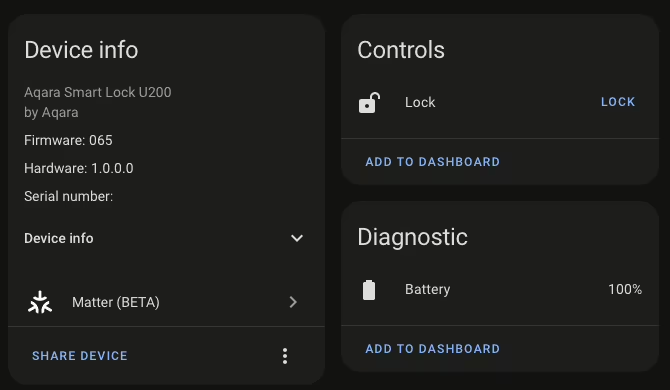
Integration with Home Assistant
The lock’s integration with Home Assistant looks a bit different than with Apple HomeKit. As of the date of writing, there is no official integration for this device in Home Assistant, and the lock itself does not support Wi-Fi technology, relying on the Matter protocol. To add a lock to Home Assistant, it is necessary to have a Thread gateway, such as the one built into Apple TV.
Issues and Requirements
- No Wi-Fi Functionality: the lock supports Matter protocol, not Wi-Fi. This is not a problem for me, but it is worth keeping in mind.
- Need for Thread gateway: In order to integrate with Home Assistant, a Thread gateway is required. You can use an Apple TV if you already own one.
- Apple Home Key, and Home Assistant: In order not to lose the functionality of Apple Home Key, you need to make your device available through Apple HomeKit to Home Assistant. However, if you don’t use Home Key (for example, you use Android), you can directly connect the lock to Home Assistant using the Thread gateway.
- Firmware: Before integration, make sure the lock’s firmware version is 3.0.0_0065. If not, update the device.
Configure Thread and Matter
- Configure Thread and Matter support on Home Assistant. You can find detailed instructions on the Home Assistant authors’ pages:
- Make sure IPv6 in Home Assistant is enabled in automatic (or static, depending on your own configuration) mode.
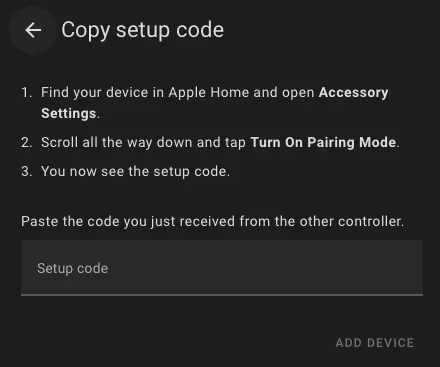
Get the configuration code at Apple Home
- Go to Apple Home and enter the details of the lock.
- At the very bottom, click the Turn On Pairing Mode button.
- A temporary code will be generated to connect the Matter device with Home Assistant.
Add your device to Home Assistant
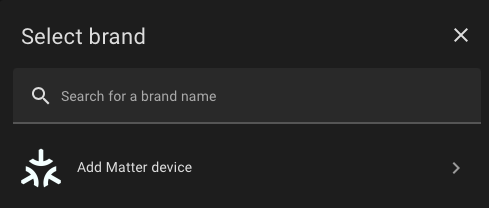
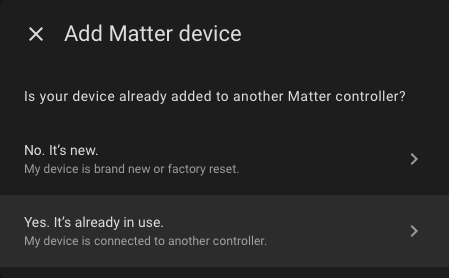
- Go to Home Assistant -> Settings -> Devices -> Add integration and select Add Matter Device.
- W odpowiedzi na pytanie Is your device already added to another Matter controller? click Yes, It’s already in use.
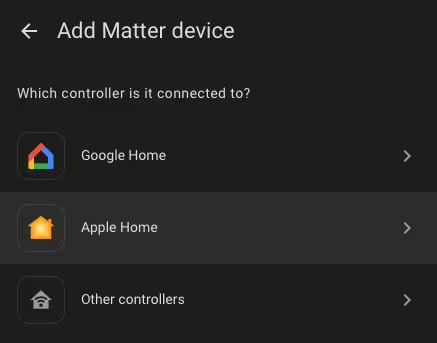
- Select Apple Home as the controller to which the device is connected.
- Copy the pairing code generated in the Apple Home app and enter it in Home Assistant.
- Wait for the pairing to finish. You may have to try several times for the process to succeed (with me it only worked the third or fourth time).
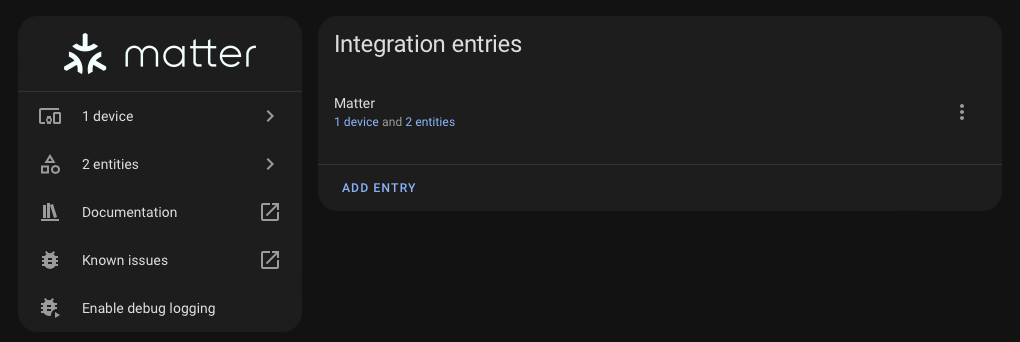
- Currently, control of the Aqara Smart Lock device in Home Assistant is limited to basic functions:
- Checking battery level: Ability to monitor the battery status of the lock (not the keypad).
- Unlocking and locking doors: simple commands to open and close doors.
Performance and usage
Speed of response
The lock responds normally to different methods of opening (manually turning the knob in the apartment or opening with an app). I rate it very good, I have not encountered any significant problems. The lock detects whether the door is open or closed. In rare cases, it may happen that if the door is left open for a long time, the lock mistakenly recognizes it as closed and turns the key. Nevertheless, I didn’t notice delays in the lock’s operation either in integration with Apple HomeKit or Home Assistant.
Stability of the connection
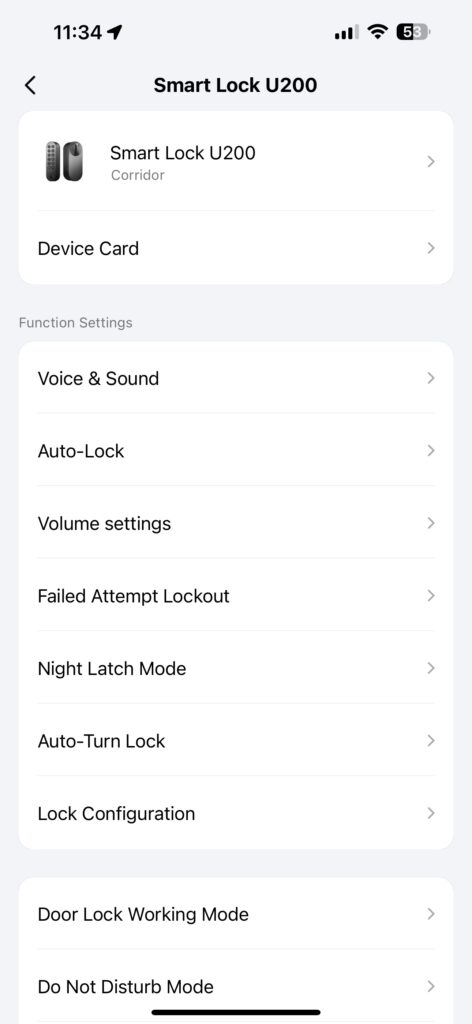
Currently, the only disadvantage is the need to physically press the keyboard if you want to modify any setting on the lock. This may be due to the deep sleep mode, which makes remote modifications a bit cumbersome. Despite this, the connection between the lock and the application is stable. Is it reliable? This we will verify over time.
Daily use and convenience
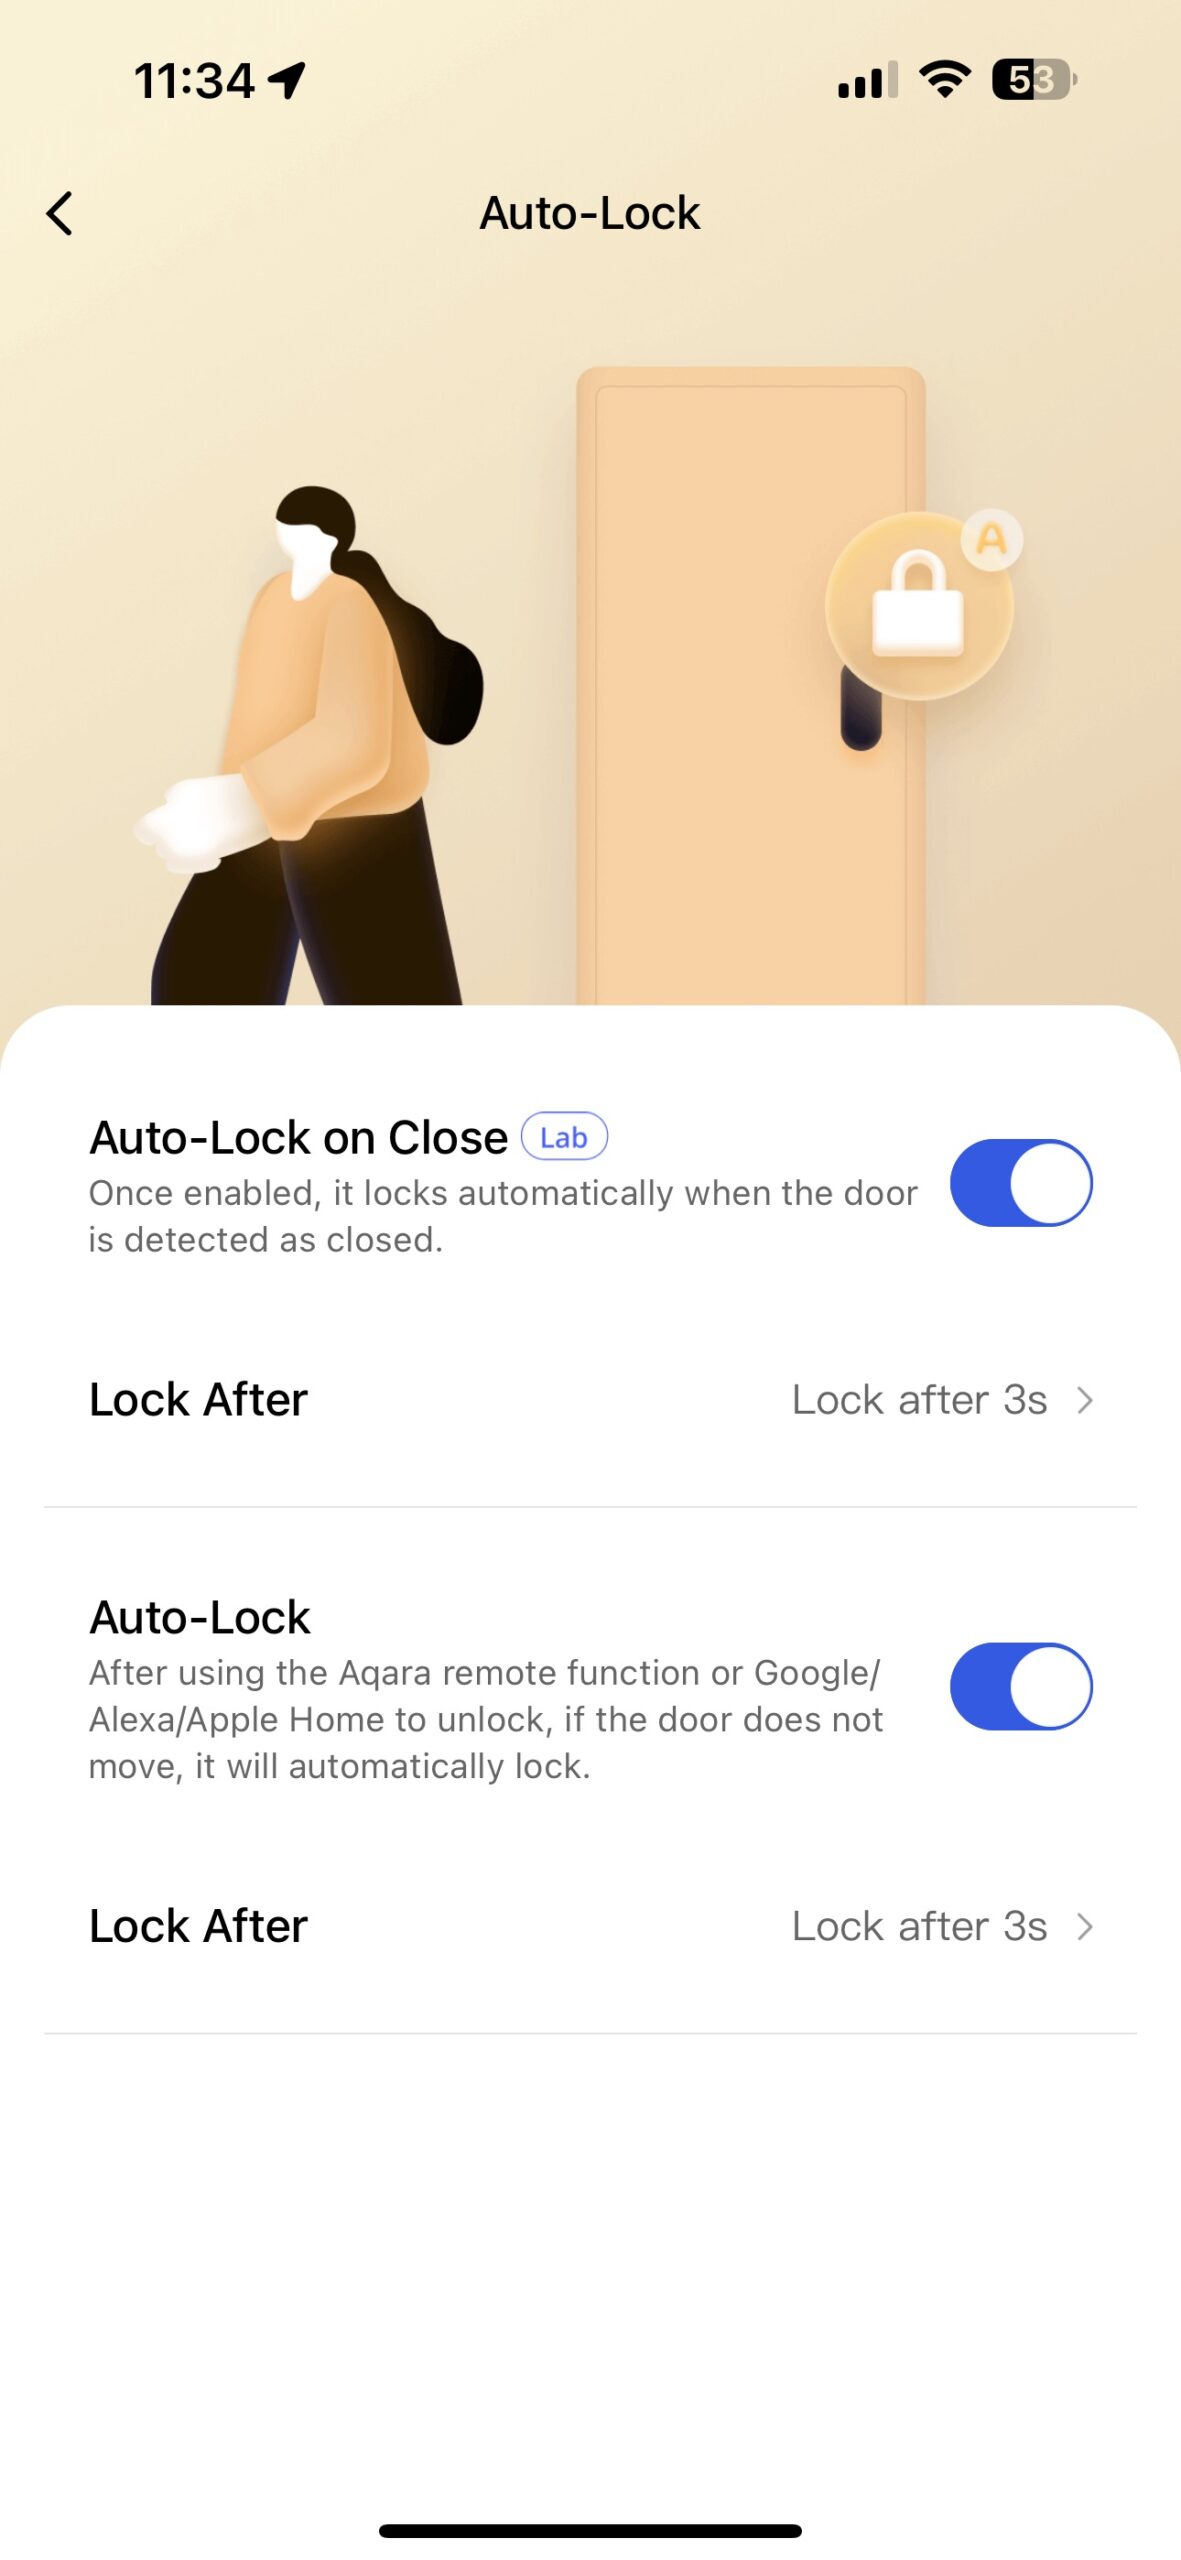
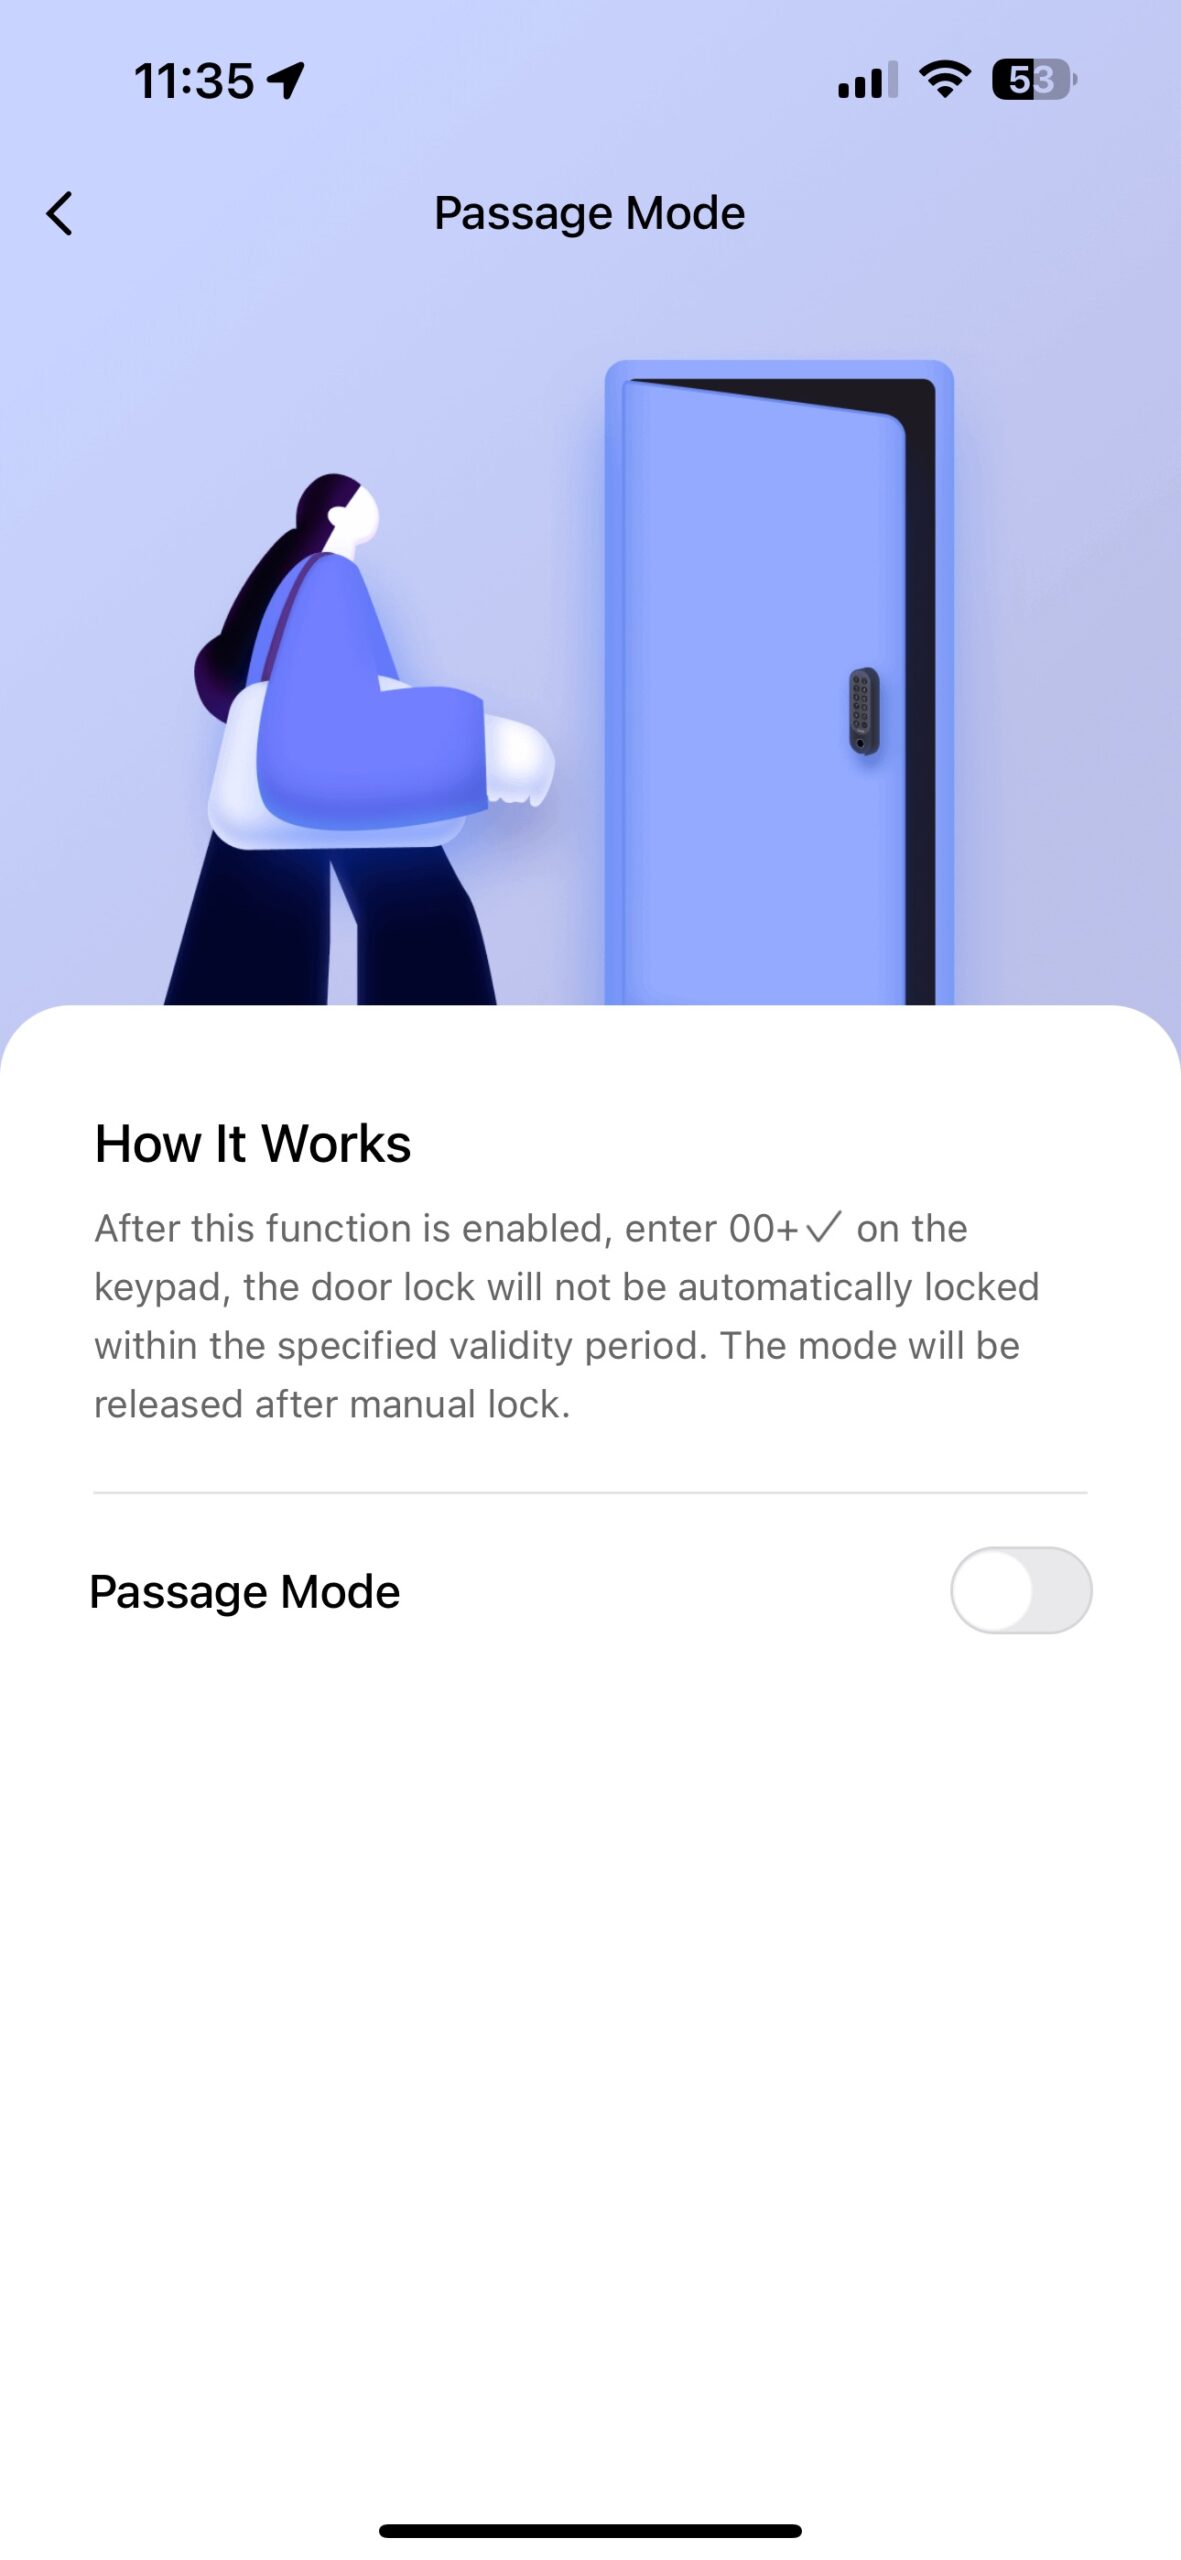
Changing habits from traditional keys to a smart lock significantly simplifies daily life. First of all, in the evenings, I don’t have to worry about forgetting to lock the door for the night. Automatically closing the door after a certain period of time adds an extra layer of security, protecting against the so-called “doorknockers” – people who seek unsecured doors and try to steal easily accessible items.
Aqara Smart Lock U200 changes the daily routine by eliminating the risk of leaving the door open and providing a greater sense of security. Automatic door locking means peace of mind, especially at night, which is invaluable in terms of home security.
Security
 Evaluation of the effectiveness of security functions
I rate the lock very well in terms of security features, especially after the first few days of use. First impressions are key, and the Aqara lock meets expectations in this regard. While there is potential for further functionality development, it already offers a robust set of options.
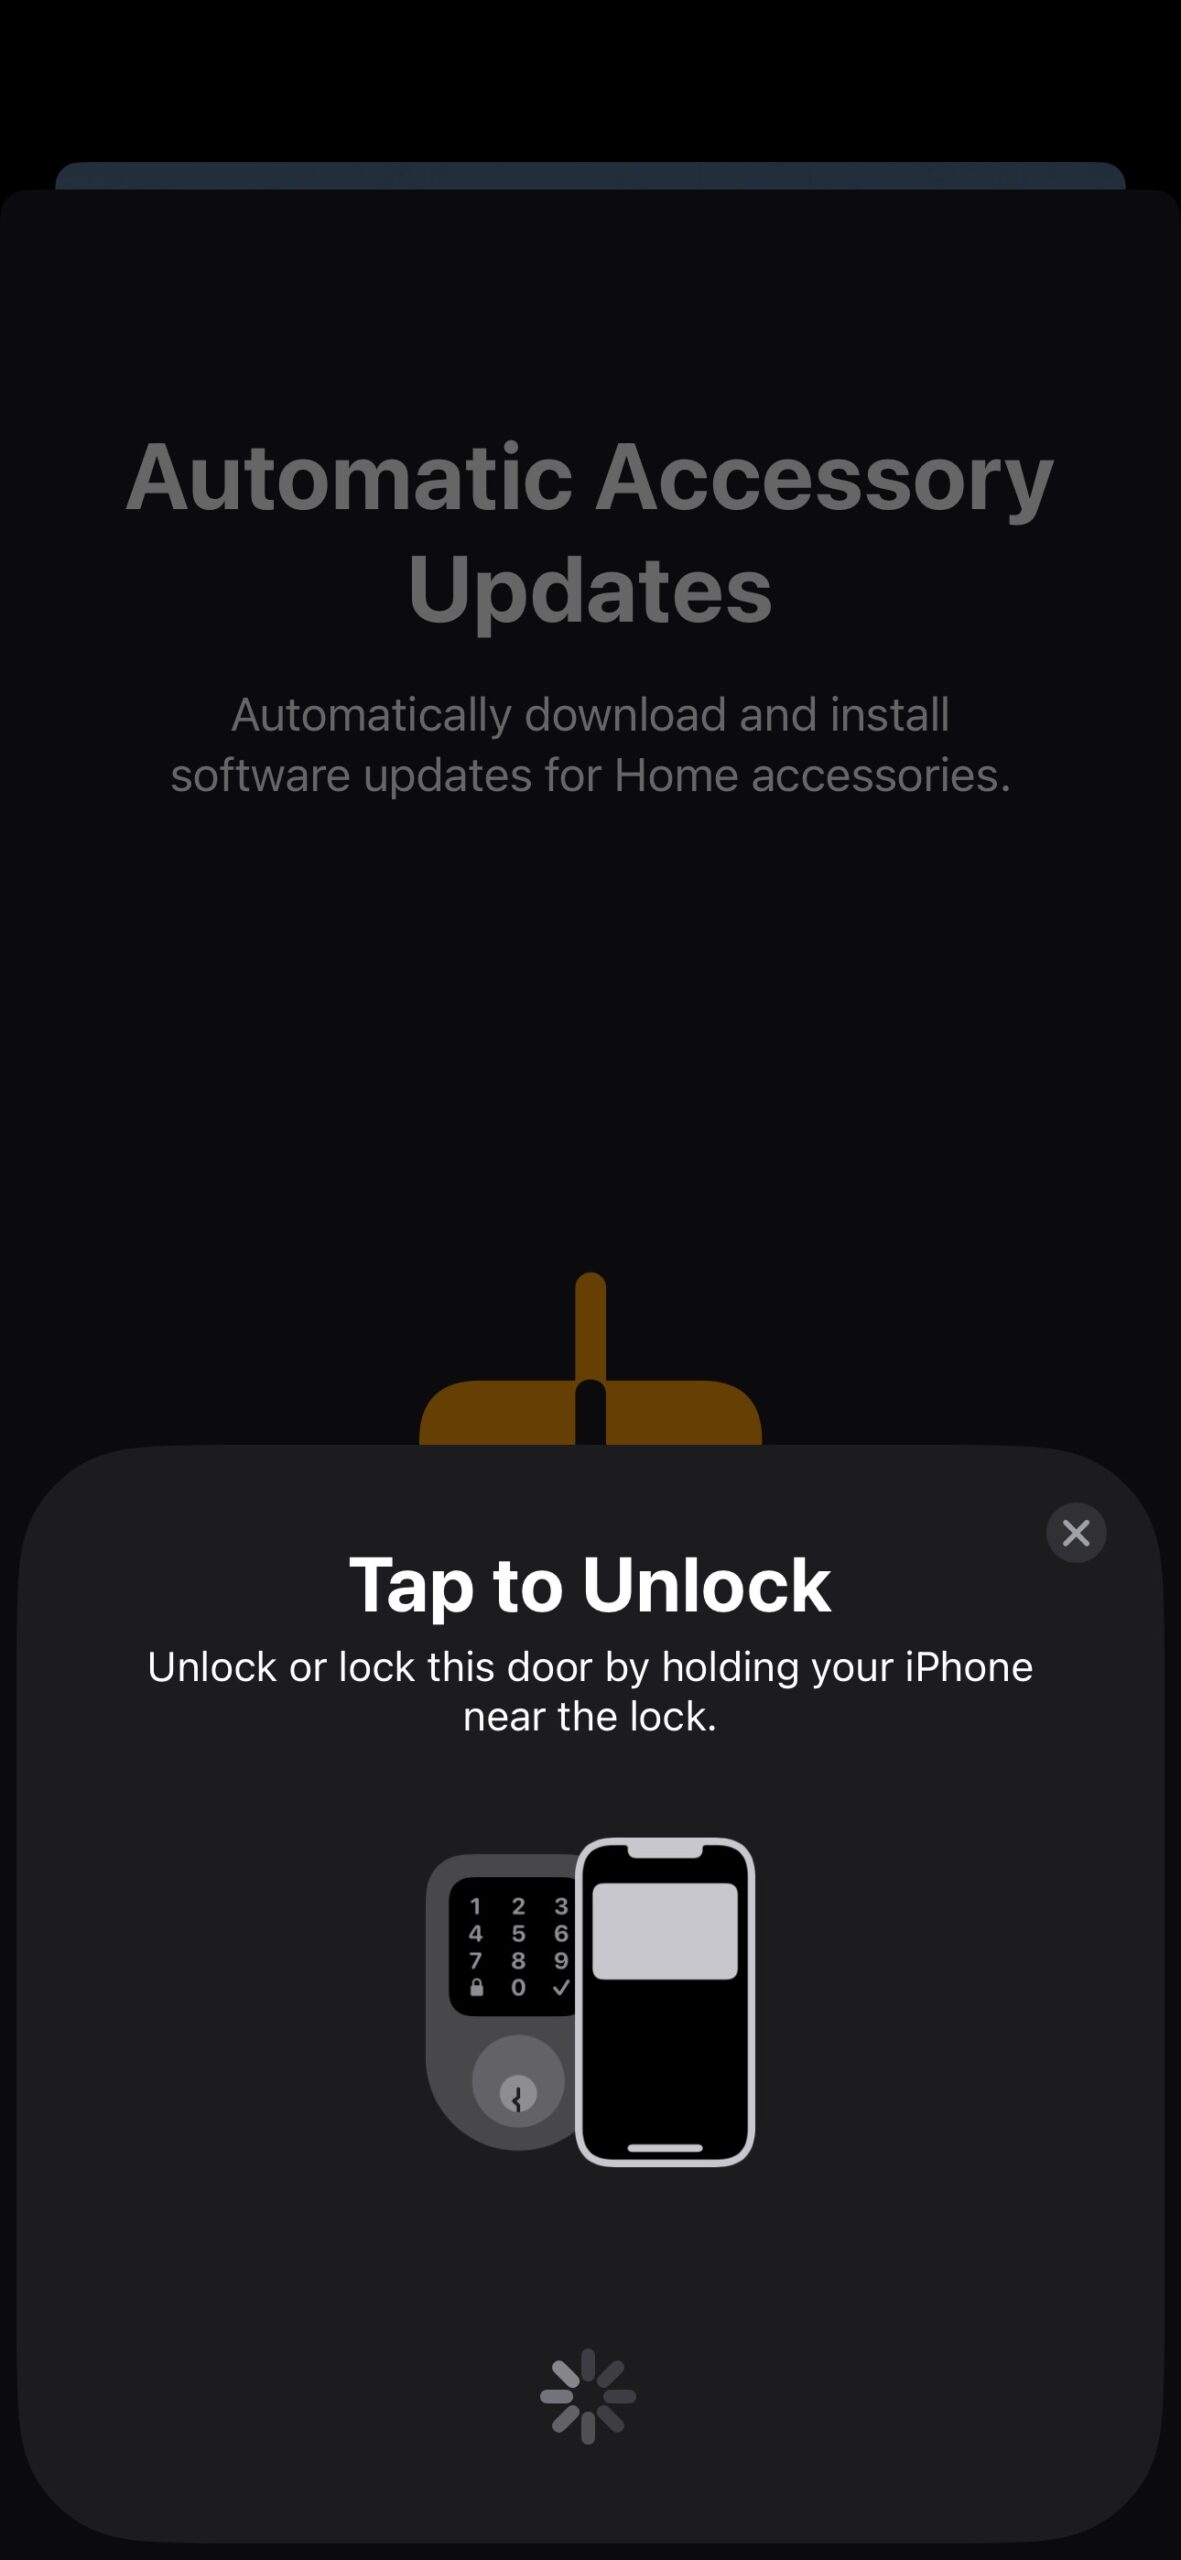
One of the most important distinguishing features of this lock is the Home Key, which allows you to unlock the door using Apple Wallet. It’s a super feature that significantly improves user comfort and safety.
Potential risks
However, it is worth remembering that despite the advanced technology, electronics can sometimes fail. That’s why I recommend always carrying traditional keys, just in case. They may be needed not only in an emergency situation, but also to access places such as the mailbox or trash can. In addition, the keys are useful should the lock’s battery suddenly run out.
Comparison with other smart locks on the market
In the context of the European market, the Aqara Smart Lock U200 compares favorably with other smart locks. For example, I had previously considered buying an Aqara lock, which included both a handle and a door lock. Unfortunately, that model did not support additional burglar bolts, which was a significant drawback, eliminating it as a potential security device.
Another problem was the issue of complaints. Although I had intended to purchase the lock while in Thailand, the lack of complaint options in Europe was a big problem. In the case of the device described in this article, purchased from a Polish distributor, such on Allegro.pl, I have the confidence that I can easily advertise it if necessary. This is a significant advantage.
Pros and cons
Pros
- Apple Home Key: Integration with Apple Wallet makes it possible to unlock doors with the Home Key, greatly enhancing convenience.
- Matter: support for the Matter protocol allows integration with various smart home systems for greater flexibility.
- Battery: The manufacturer claims that the battery lasts up to six months on a single charge, which is a big plus compared to other smart locks.
- Fingerprint keypad: Enables quick and secure door unlocking.
- Ease of installation: easy and intuitive installation process.
- USB-C charging: A modern and convenient way to charge the battery.
- Can use AA batteries: An adapter is included that allows you to use AA batteries instead of a rechargeable battery.
- External keypad power supply: The keypad can be powered by 12-24V AC/DC, eliminating the need to replace batteries.
Cons
- The need to click on the keypad: To modify any of the lock’s settings, you have to physically click the keypad (to wake up the device), which can be cumbersome.
- Limited settings through Matter: Lack of full control over lock settings if not using the manufacturer’s gateway, limiting the possibilities in Home Assistant.
- Manufacturer’s app required: Most of the key functions of the lock require the use of the dedicated Aqara Home app.
- It is not possible to purchase the keyboard separately: If the keyboard is stolen, there is currently no information about the possibility of buying the keyboard itself separately.
Summary
Aqara Smart Lock U200 is an advanced and convenient solution for those looking for a smart lock for their home. Integration with Home Key, support for the Matter protocol and a battery that lasts six months are its main advantages. The lock is easy to install and offers a number of features that enhance the convenience of daily use. But certain aspects, such as the need to physically click the keyboard when changing settings, limited configuration options without a manufacturer’s gateway, and the inability to purchase the keyboard separately, can be some difficulties. Nevertheless, the lock from Aqara is a solid choice in the smart lock market, offering, in my opinion, the right level of security and convenience.
Single sign-on to Portainer, step by step. Discover an easy way to single sign-on. Get the convenience of container management!
Discover simple instruction for changing the serial number of an RTL-SDR dongle on Linux. A step-by-step guide through the modification process.
Set up simple mirror lighting with ESPHome in Home Assistant. Discover simple integration and control light with ease.

Configure Single Sign-On between Authentik and WordPress for secure and comfortable login. Learn about step-by-step configuration.

Discover how to connect a device from Ubiquiti UniFi from another network to Network Application – using Mikrotik’s IPSec tunnel as an example.

Discover the secrets of installing and configuring your own ADS-B antenna on a Raspberry Pi. Develop skills and track aircraft in real time.
Comments (2)
Cappasays:
30/08/2024 at 12:46Is there a maximum amount of authorized users? I know for the Nuki Pro 4.0 its 200 but I cant find this information anywhere for the Aqara U200
Filip Chochółsays:
02/09/2024 at 22:58Huh, you killed me with this question. I don’t know. XD