Hello!
Today we will explore the topic of RADIUS configuration with Synology on Mikrotik devices. The introduction of this integration is a key step in ensuring secure user access to various services on the network. By combining the two platforms, effective central authentication and authorization becomes possible. As a result, administrators gain full control over access to the network, VPN services and the administration panel
Introduction
What is a Mikrotik?

MikroTik is a company best known for manufacturing networking equipment, including routers, switches, Wi-Fi access points. In addition, MikroTik also offers software, including the RouterOS operating system, which is used as firmware for most MikroTik devices.
RouterOS is an advanced operating system based on the Linux kernel, designed specifically for networking applications. It provides a wide range of features, including routing, firewall, VPN tunneling, bandwidth management, Internet access, as well as advanced configuration and monitoring tools.
MikroTik devices are popular among individual users, small businesses and large network operators alike because of their versatility, performance and relatively affordable price. Thanks to their flexibility, they can be used in a variety of scenarios, from simple home networks to advanced network infrastructures.
What is Synology and the RADIUS Server component?
![]() Synology is a company specializing in the production of network hardware and software for data storage and management. Their main products are NAS (Network Attached Storage) servers, which offer a wide range of functions such as file storage, media sharing, backup, and hosting network services.
Synology is a company specializing in the production of network hardware and software for data storage and management. Their main products are NAS (Network Attached Storage) servers, which offer a wide range of functions such as file storage, media sharing, backup, and hosting network services.
RADIUS Server is a package that runs on a server and supports the RADIUS protocol. It provides user authentication and authorization functions, and possibly accounting (recording information about user sessions). In Synology’s context, RADIUS Server is one of the features that can be configured on their NAS servers to centrally manage user authentication on the network. This makes integration with devices such as MikroTik possible, enabling effective access management in corporate or home networks.
Preparation
In order to prepare the tutorial, we will adopt an established domain name and certain configuration names, shown below. For customized configuration, apply settings according to individual requirements.
- Full domain name (FQDN) of Synology DSM: https://dsm.xyz.com,
- Installed on Synology via Package Center: RADIUS Server.
Hardware
- 1x Synology DS920+
- 1x Mikrotik RB5009UPr+S+IN
What is RADIUS?
The RADIUS (Remote Authentication Dial-In User Service) protocol is a standard used in computer networks to authorize, authenticate and manage user access. It is mainly used to control access to the network by remote users who want to connect to it, for example via VPN (Virtual Private Network).
RADIUS enables central management of the authentication process, meaning that user credentials and access information are stored and managed on a central RADIUS server. As a result, network administrators can set up a single place where user login data and access rules are stored, making it easier to manage and ensuring consistency across the network.
In practice, when a user tries to connect to a network, such as through a VPN, the network device sends an authentication request to the RADIUS server. The RADIUS server checks this data in its database and then returns a response as to whether the user has permission to access or not. In addition, RADIUS allows for additional features such as managing access based on various criteria, logging user sessions and reporting network access data.
In short, RADIUS is a key component of the network infrastructure, enabling efficient management of user access and enhancing network security.
RADIUS operation
The operation of the RADIUS protocol is to centrally manage the authentication, authorization, and accounting (AAA – Authentication, Authorization, and Accounting) process of users in computer networks.
- Authentication: When a user tries to access a network, e.g. via a VPN connection, their credentials (e.g. username and password) are sent to the RADIUS server by a network device (e.g. router, access point). The RADIUS server checks this data in its database or passes it to an external authentication source (such as an LDAP database), and then returns a response as to whether the authentication was successful or not.
- Authorization: Once a user is correctly authenticated, the RADIUS server decides whether the user has permission to access the requested resources on the network. Based on configured authorization rules, the RADIUS server determines which resources a user is allowed to use and under what conditions.
- Accounting: Optionally, the RADIUS server can keep records of users’ activities on the network, such as the time and length of the session, the amount of data sent by the user, or other activity information. This data can be used for auditing, billing or network performance analysis.
By centrally managing the authentication and authorization process, RADIUS enables administrators to effectively manage user access on the network. This is particularly useful in environments where there is a need to provide secure and consistent access for both local and remote users.
Limitations of RADIUS Server on Synology
The RADIUS Server application on Synology devices is mainly configured to authenticate users on the network, but does not offer full authorization functionality, i.e. deciding access to specific resources or services based on credentials. This means that the RADIUS Server application only verifies a user’s identity based on data from the user database, but does not determine the user’s authorization to use particular resources on the network.
In our case described here, where users were given access to the Mikrotik administration panel (WinBox), the use of RADIUS Server application on Synology devices would not provide proper authorization. Since the RADIUS Server application on Synology does not allow defining access privileges for individual users, all RADIUS-authenticated users would potentially have access to the administration panel as administrators.
Therefore, the RADIUS Server application on Synology in our case would be useful mainly for the administrator, who has full network management rights. On the other hand, for standard users who should not be able to access the Mikrotik administration panel as administrators, other authorization mechanisms would have to be used, such as creating separate user accounts with appropriate permissions on the Mikrotik.
Step 1 – Configuration in Synology DSM
- Log in to the DSM interface – Open a web browser and log in to the administration panel on your Synology device, using the appropriate credentials (administrator account),
- Install RADIUS Server – After logging in, go to the Package Center (which is the central place to manage applications on Synology devices). Search for the RADIUS Server package and install it on your device.
- Launch the application – After installing the application, go to the list of applications and launch the RADIUS Server application.
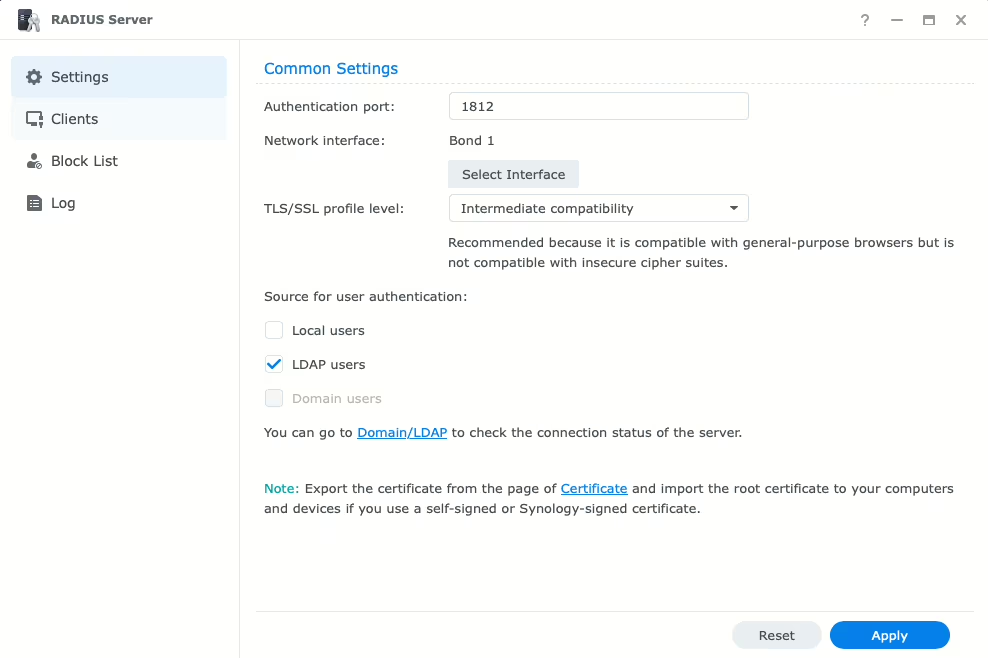
- In the Settings tab, set the following parameters.
- Common Settings
- Authentication port: 1812 (leave default)
- Network interface: If your NAS is running in Bonding mode – leave default. If you want another IP address to be responsible for authentication – define the appropriate port.
- TLS/SSL profile level: Intermediate compatibility
- Source for user authentication: if no LDAP server is configured, the system automatically limits the selection to local user accounts only. Local users are selected by default.
- Common Settings
- Go to the Clients tab and set the following parameters.
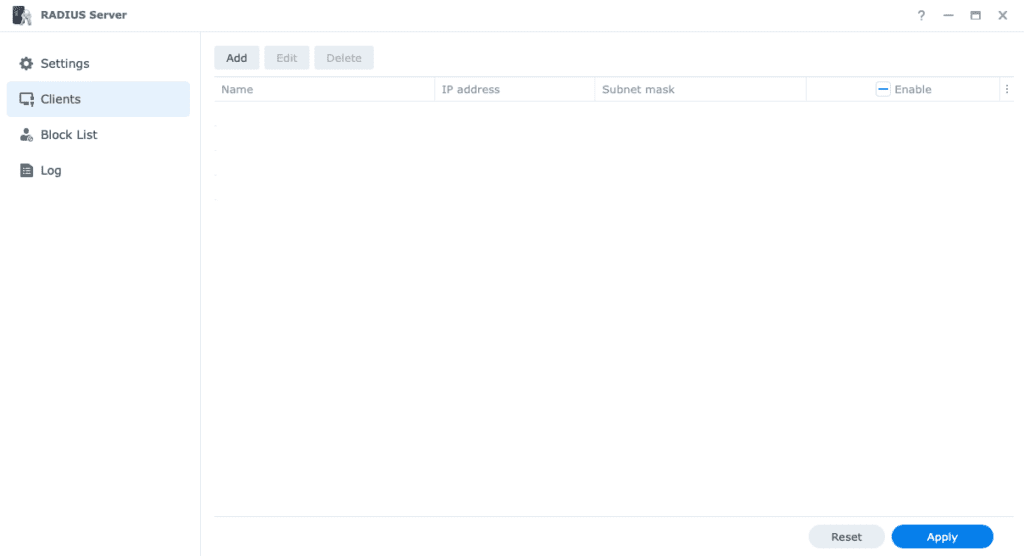
- Click Add, a smaller window will open for you with several fields to complete.
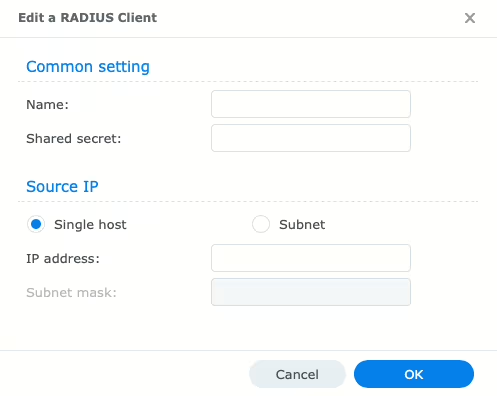
- Complete the following parameters.
- Common setting
- Name: set your own name, e.g. router01 or microtik01
- Shared secret: Set a complicated password, which you then paste into the configuration in Mikrotik.
- Source IP
- Mark Single host
- IP address: Enter the local address of your Mikrotik router, e.g. 192.168.88.1
- Common setting
- Save your settings by clicking OK. The window will be closed.
- Confirm the configuration by clicking Apply in the RADIUS server configuration window.
Step 2 – Configuration in Mikrotik WinBox
Configuring the connection to RADIUS Server
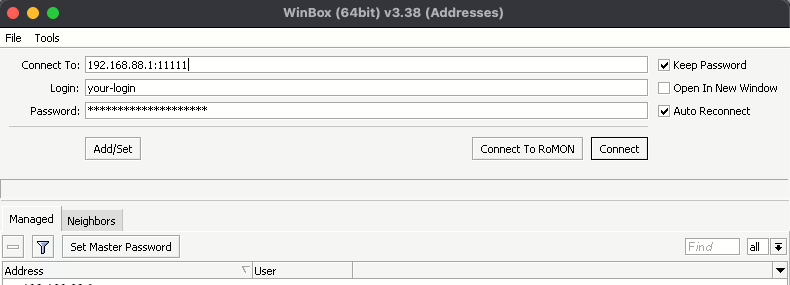
- Log in to WinBox – Launch the application and log in with your administrator credentials to your Mikrotik device.
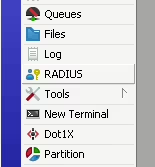
- Go to the RADIUS tab – Once logged in, go to the RADIUS tab on the WinBox main menu.
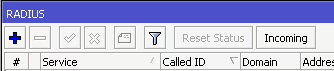
- Add a new RADIUS server – Click the + button on the RADIUS tab to add a new connection to an external server.
- Configure RADIUS server settings – In the configuration fields, configure the following parameters.
- General
- Service: This field refers to the type of service that will use the RADIUS server to authenticate users. For the purposes of the following instructions – I have PPP and Login selected.
- Address: Enter the local IP address of the NAS server on which the Synology RADIUS Server package is running, e.g. 192.168.88.20
- Protocol: udp
- Secret: Paste the complicated password you set in the RADIUS server parameters on the Synology (Shared secret)
- Authentication Port: 1812 (leave default)
- Accounting Port: 1813 (leave default
- Timeout: 400 ms (leave default)
- Save your settings by clicking Apply and OK. The window will be closed.
- General
Enabling login to WinBox using RADIUS
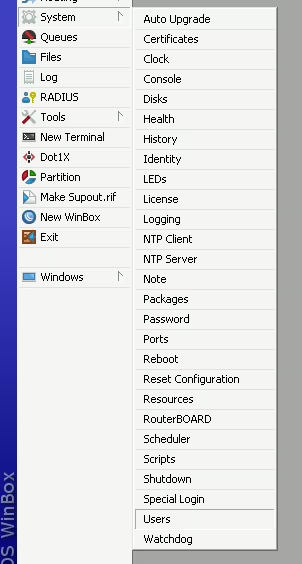
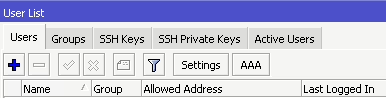
- Go to the System tab, then Users.
- To enable logging into WinBox via RADIUS, first click on the AAA button.
- In the Login Authentication & Accounting window, check the following options:
- Use RADIUS: select the option,
- Accounting: select the option,
- Interim Update: leave blank,
- Default Group: full,
- Exclude Groups: leave blank.
Check the operation of logging into WinBox using RADIUS
- Go to launch a new window by clicking New WinBox.
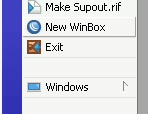
- Enter the login credentials you use on the Synology server.
- Done! 🚀
Additional sources and information
For further exploration and more information, I recommend checking out the links below. They are valuable sources that were used in the development of this guide.
- Mikrotik, RADIUS Summary: https://help.mikrotik.com/docs/display/ROS/RADIUS
A simple guide to installing and configuring an OGN receiver on a Raspberry Pi for air traffic monitoring. Watch air traffic.
Discover how to configure Synology RADIUS Server on Mikrotik devices. Learn about the steps and benefits of integration in our article.
Unblock the ports on the Synology and configure Nginx Proxy Manager. Przewodnik ułatwi instalację serwera proxy, zapewniając proste zarządzanie serwerem.
Discover how to connect a device from Ubiquiti UniFi from another network to Network Application – using Mikrotik’s IPSec tunnel as an example.
Configure Single Sign-On between Authentik and WordPress for secure and comfortable login. Learn about step-by-step configuration.
Set up simple mirror lighting with ESPHome in Home Assistant. Discover simple integration and control light with ease.
Leave a Reply