Hello!
Today, I’ll walk you through the steps to create smart mirror lighting using an ESP8266 NodeMCU board with ESPHome installed via Home Assistant. This will not only improve the convenience of light in the bathroom, but will also open the door for applying this solution in different areas of the house. In order to be able to easily turn the light on and off while being at the mirror, we will use the Shelly i3 mounted push-button, with full light control functionality both locally and remotely.
What is the ESP8266 NodeMCU?
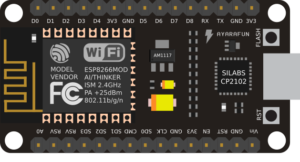 ESP8266 NodeMCU is a popular development board with ESP8266 microcontroller, ideal for IoT projects. Equipped with a Wi-Fi module, it facilitates easy connection to the network. Includes USB-to-Serial Converter for easy programming and communication with USB port. It supports Arduino IDE, which makes programming easy. With a large number of GPIOs, it allows connecting various devices. It is popular for its simplicity and community support, making it an excellent choice for DIY IoT projects.
What is ESPHome?
![]()
ESPHome is an open-source software that allows programming and configuration of devices based on ESP8266 and ESP32 microcontrollers to integrate them into the Home Assistant platform. It is a tool designed to facilitate the creation of smart IoT devices that can be easily controlled and monitored via Home Assistant.
ESPHome’s main features include: configuration via YAML, integration with Home Assistant, support for various modules, as well as automation and smart features.
Preparation
Before diving into creating smart mirror lighting using the ESP8266 and ESPHome, it’s a good idea to prepare properly. Below you will find the key steps to get your project started:
Required equipment and components
Make sure you have all the necessary materials:
- ESP8266 NodeMCU board (or ESP32, if you opt for a newer model),
- Relay module 1 channel – contacts 10A/250VAC – coil 5V
- Shelly i4 / i3 or other push-button module,
- Power source for the ESP8266 board (5V DC) and for the light fixture (230V AC),
- Wire connectors,
- The light holder in which we will install the plate,
- Connection wires for all components.
Installing ESPHome in Home Assistant
- Install ESPHome in your Home Assistant environment to easily configure and manage the ESP8266. Use the ESPHome documentation and follow the instructions.
Preparation of workspace
- Organize a workspace where you will assemble the system. Make sure you have access to tools and are comfortable working on the project.
Health and safety of working with electric voltage
Electrical safety is key when working with electricity. Here are some important recommendations:
- Power Off: Before any work on the circuit, turn off the power supply to avoid electric shock.
- Appropriate Tools: Use tools that are insulated and designed for electrical work – they should meet appropriate safety standards.
- Experience: Electrical installation work requires experience. If you are unsure of your skills, it is advisable to enlist the help of an experienced person.
- Eye and Hand Protection: Wearing eye and hand protection is recommended, especially when soldering and handling connections.
- Check the Power Supply: Make sure you know where the main power supply is and that it is off before taking any action.
- Knowledge of the Electrical System: Always verify that you know how an electrical system works. Do not take action blindly.
Remember that tampering with electrical installations can be dangerous, and if you are unsure of your skills, it is always a good idea to consult an electrician or an electrical specialist. electrical installations.
Step 1 – VLAN IoT
As a security practice, I recommend setting up a separate network for IoT devices, separate from the main home network. For this purpose, it is worth using the VLAN (Virtual Local Area Network) function, which allows physical separation of devices, such as those based on ESPHome, from other devices in the home infrastructure.
Benefits
Creating a dedicated network for IoT devices offers several advantages:
- Security: Separating IoT devices from the main network haelps minimize the potential risk of attacks. If an IoT device is possibly compromised, access to the main home network is difficult.
- Controlling Communications: Creating a separate network allows for more precise control over who communicates with IoT devices and how. You can define communication rules that only allow specific devices (for example, a server or virtual machine from Home Assistant) to interact with IoT devices.
- Network Traffic Optimization: Separating IoT device traffic from main network traffic can help optimize network performance.
Implementation
To implement such separation, it is worth consulting the documentation and settings of the router. In the case of Home Assistant, using the appropriate firewall rules on the router, you can customize access to IoT devices. This approach introduces a layer of additional security to our smart home infrastructure.
Step 2 – Install and configure firmware to work with Home Assistant
Once the ESPHome add-on is running on the Home Assistant server, it’s time to move on to adding the first ESPHome-based device.
Connecting to a computer
- Connect the board using a USB cable to your computer. It is important to use a USB cable with data transmission, as many cheap cables only provide power.
- To be sure of correct operation, I recommend using Chrome or Edge browser (there is a transfer of data transmission through the COM port to the browser using WebSerial).
Home Assistant
- After completing these steps, log in to Home Assistant,
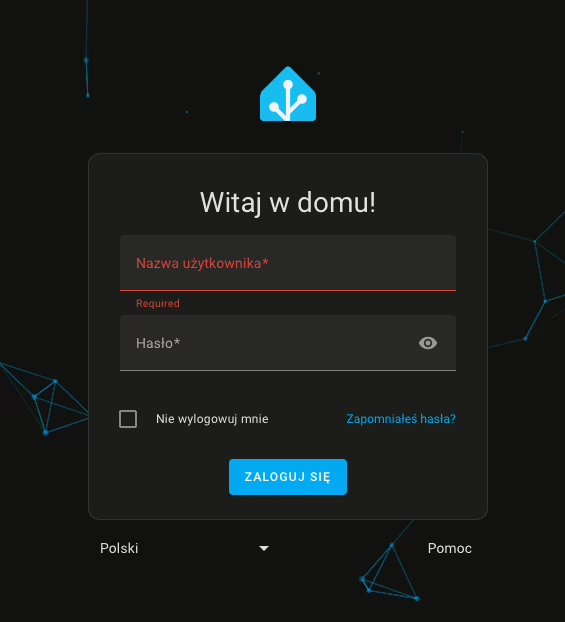
- From the side panel, go to the ESPHome tab,
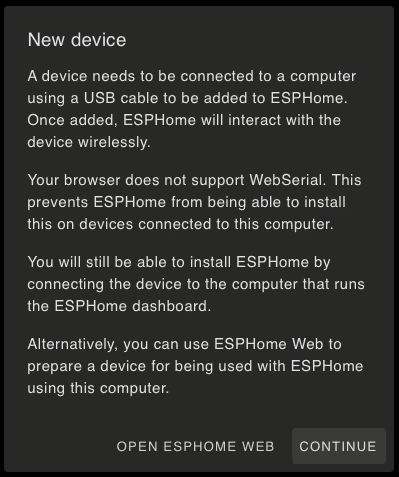
- Then click New Device,

After selecting the option to add a new device, we may encounter a browser incompatibility message, especially for browsers that do not support WebSerial. Alternatively, we may also encounter a message indicating that there is no secure connection (HTTPS) to the dashboard. In this situation, we can click Continue to continue the process of adding the device.
- In the next window, we enter a name for our device (it can be a name or alias we created) and the details of our Wi-Fi network.
- Wi-Fi network entry is only necessary when adding a device for the first time. Subsequent ESPHome-based additions will not require this step.
- Then, for ESPHome to install the firmware on the ESP8266 board, click Connect.
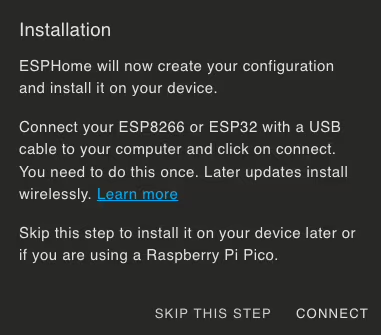
- After a while, the browser will display a window for selecting a device for serial port communication. Find your device, whose name should include CP210x UART, and click Connect.
- Then wait until the firmware is installed on the board.
Completion of the process
After a successful installation, you should receive a message confirming the completion of the process. Your device will also appear on the dashboard with the description ONLINE. This means that the board has been correctly configured and is ready to proceed.
Step 3 – Upload the code to control the light in ESPHome
# bath-mirror v 1.0 #
esphome:
  name: esp01-bath-mirror
  friendly_name: esp01-bath-mirror

esp8266:
  board: esp01_1m

# Enable logging
logger:

# Enable Home Assistant API
api:
  encryption:
    key: "TUTAJ BĘDZIE WYGENEROWANY KOD PRZEZ ESPHOME"

web_server:
  port: 80

ota:
  password: "TUTAJ POJAWI SIĘ WYGENEROWANE HASŁO PRZEZ ESPHOME"

wifi:
  ssid: !secret wifi_ssid
  password: !secret wifi_password

captive_portal:

# OD TEGO MIEJSCA MOŻESZ SKOPIOWAĆ ZAWARTOŚĆ #
# Cały kod załączyłem poglądowo jak powinien wyglądać #

output:
  - platform: gpio
    pin:
      number: GPIO14
      mode:
        output: "True"
        open_drain: "True"
    id: relay_1
    inverted: true

light:
  - platform: binary
    name: "Oświetlenie lustra"
    output: relay_1
    restore_mode: ALWAYS_OFF
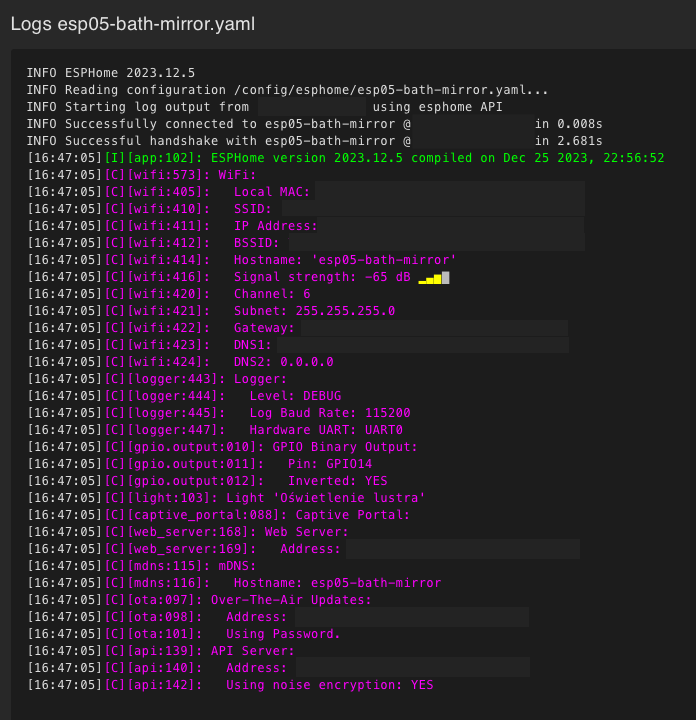
id: light_1 - We are waiting for the software to be compiled and uploaded to the board. If the installation process is successful, you will see similar information about your device as in the attached screenshot.
Step 4 – Connect all components to the board and install the code on the board
Remember to perform these activities with the highest standards of electrical safety. Ensure that all connections are properly secured and comply with local electrical codes.
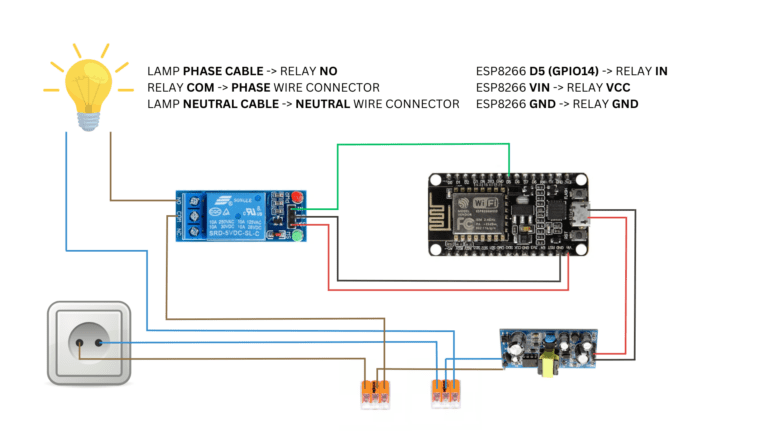
- Connect quick-connect electrical connectors:
- Connect the phase and neutral wires to the quick-connect electrical connectors. These connectors will serve as a power distribution point. Note: Do not connect the connectors to the voltage yet.
- Connect the power supply to the inverter:
- From the quick-connectors, run power to the inverter, which converts the voltage from 230V AC to 5V DC. This step is essential because it provides the proper power supply for the ESP8266 board.
- Powering the ESP8266 board:
- From the ESP8266 board, lead the 5V DC power wires from the inverter. You can connect the board’s power supply to the microUSB connector.
- Also run a communication wire from the ESP8266 to the relay, which will be used to control the lighting.
- Connecting a light socket:
- From the light fixture, lead the neutral wire to the quick-disconnect
- Connecting the relay:
- Route the phase wire from the quick-connect to the relay,
- Connect the phase wire to the COM connector of the relay,
- From the relay, from the NO connector, run a wire to the light fixture.
- Make sure all connections are properly secured:
- Check that the contacts of the plates do not touch the metal (possible) parts of the light fixture.
- Connect the installation to the power supply:
- Wait for the ESP8266 board to connect to your Wi-Fi network.
Now we will proceed to add the new device to the integration section of Home Assistant.
Step 5 – Reverse proxy on Synology using Nginx Proxy Manager
Do you use Synology and want to improve access to your Home Assistant server? Here’s a quick step-by-step guide on how to set up a login using a domain name and subdomain, such as ha.xyz.com, instead of entering an IP address. You can achieve all this with Docker Compose in the Portainer.
👉 Check out step 1 now and get your environment ready for more improvements!
Thus, by using a domain name instead of an IP address, you simplify the process of logging into your Home Assistant server on Synology.
Step 6 – Adding a device to Home Assistant
- In the Home Assistant notification section, you should see that our home automation server has detected a new device,
- Go to Settings, then to Integrations and Devices.
- The new device will bear a blue border. We approve the new device for integration.
- Set the area where the device will be located. In our case, it will be the Bathroom.
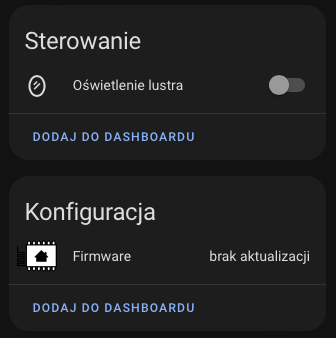
- Congratulations! You have reached this stage, which means that you have successively gone through the configuration process. To check the operation of the new device, you can directly go to it and control the light from the Home Assistant. 🚀
Step 7 – Activate the light at the mirror with Shelly i3 / i4
The history of renovation: a lesson on lighting in the bathroom
Often, when renovating our first apartment, we overlook certain aspects that may be important in the future. In my case, it was the lighting of the bathroom, where I had only two wires fed as two sections of lighting. The lighting in the bathroom was controlled by a button next to the door, which created some limitations.
The plan was to have a ceiling light, a light under the tub and a light by the mirror. The problem arose when the under bath and mirror lights were connected to one section, making it impossible to switch on the light over the bath and the ceiling light at the same time. This was due to the additional requirement to turn on the light above the mirror. Bravo me! 😅
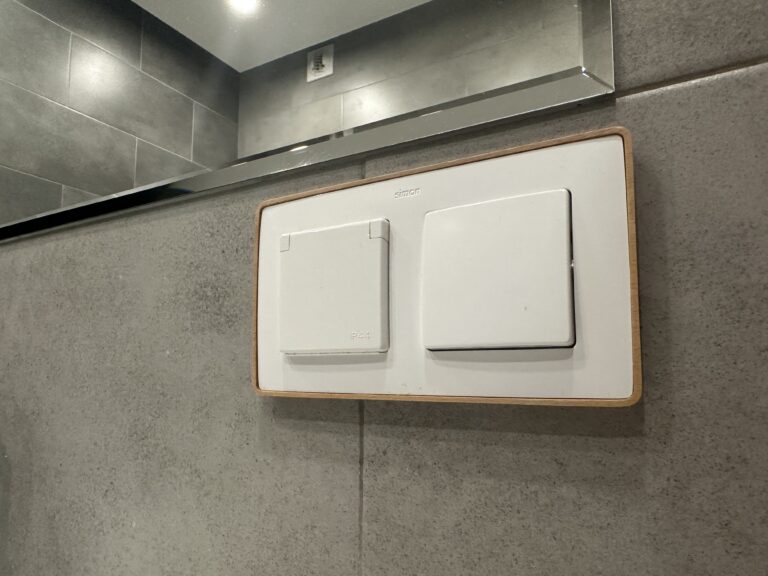
The solution was found at the mirror, where there were two independent electrical wires with two boxes. They have become the key element for the light actuation configuration at the mirror, described below.
Supporting lighting at the mirror with Shelly i3
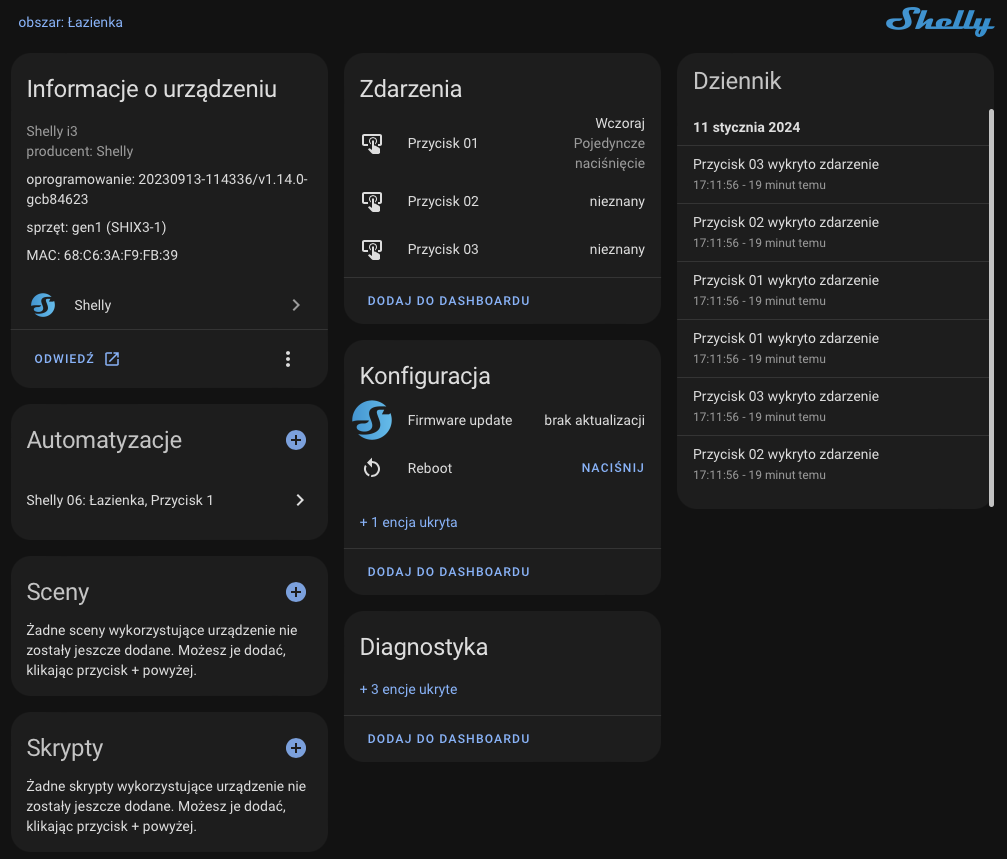
At this stage, I decided to simplify my life by configuring the light activation at the mirror with the Shelly i3 button. This allowed me to avoid juggling the app on my phone and instead start using the convenient button located right next to the mirror.
Shelly i3 installation
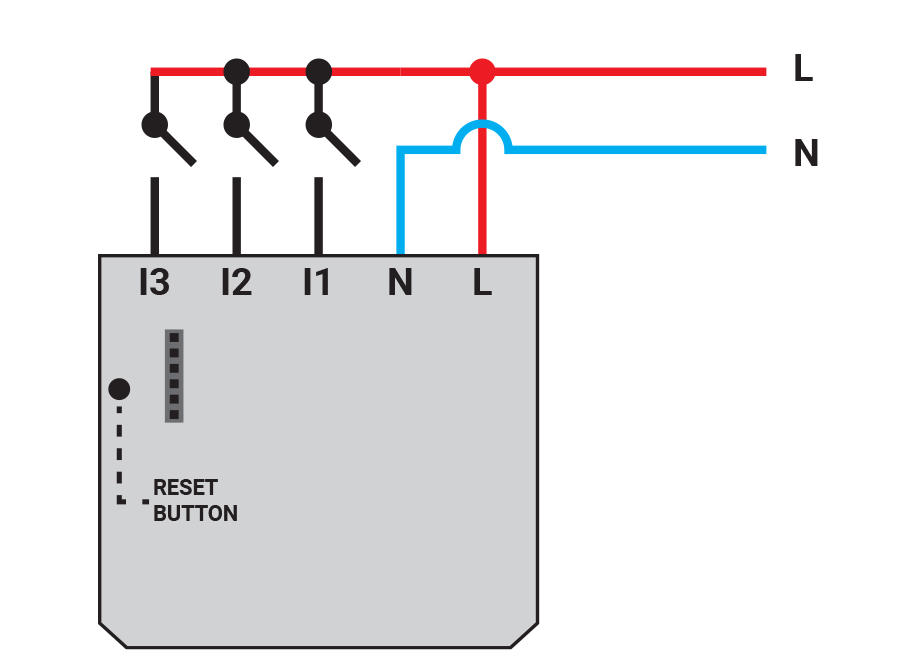
- Install the Shelly i3 scene activator in the box based on the diagram included in the device manual,
- Set the password, configure the descriptions on the device, and then connect the device to Home Assistant.
Setting up automation
- Go to Settings, then Automations and Scenes,
- In the lower right corner, click Create Automation and then Create New Automation (Start from the beginning with an empty automation),
- The scheme should look as follows:
- When:
- Device: Button in the bathroom (or as we’ll call it, our tile from Shelly)
- Trigger: the first button will be pressed one at a time.
- Perform:
- Device: Mirror lighting (or as we’ll call it, our ESP board)
- Trigger: Toggle Mirror Lighting
- When:
- Save the automation, name it, for example: Bathroom, button 1.
- Done! 🚀
Read also
- Are you already using Authentik and Portainer? Learn how to set up single sign-on to easily and securely log in to Portainer. Read the simple guide here to make these applications more convenient to use.
- Discover how easy it is to install the ADS-B receiver on a Raspberry Pi and start tracking flights in real time. Read here a simple guide that will open up the fascinating world of sky observation!
- Immerse yourself in the world of vehicle monitoring with Traccar on your Synology! A step-by-step guide along with the use of Docker will enable you to install it quickly and efficiently. Track your vehicles, analyze the data and control the route.
Additional materials and information
For further exploration and more information, I recommend checking out the links below. They are valuable sources that were used in the development of this guide.
- Getting Started with ESPHome and Home Assistant: https://esphome.io/guides/getting_started_hassio#installing-esphome-dashboard
How about Shelly or Sonoff in that case?
It is worth mentioning the ready-made solutions available on the market, such as Shelly or Sonoff. These products offer simple integration, making them ideal for those looking for a quick and easy solution to smart lighting. Devices from them are available in different variants, allowing you to choose the best fit for your specific needs.
Although my approach is based on DIY using ESP8266, it’s worth considering off-the-shelf products, especially if you want a quick implementation. The final choice depends on the user’s preferences, the complexity of the project and the degree of control expected over the functionality of the lighting. Many home automation enthusiasts will find benefits in both off-the-shelf products and microcontroller-based projects tailored to their own needs and creativity.
Why ESP8266 and not ESP32?
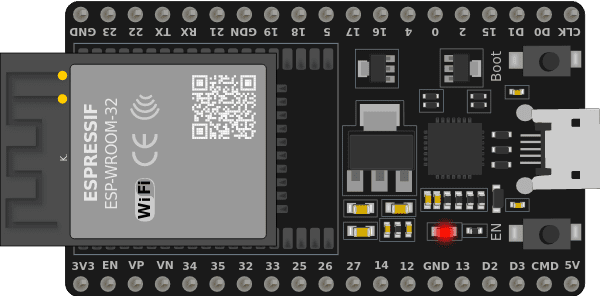 In choosing an ESP8266 board, it is not always only the technical parameters that determine the choice. In my case, the ESP8266 was on hand, which greatly accelerated the start of the project. However, it’s important to note that there’s nothing preventing you from using a newer board, such as the ESP32, if you have one on hand. The ESP32 offers more processing power, more I/O pins, and additional features, which can be beneficial in more advanced projects. It is worth adjusting the choice of tile according to the specifics of the project and the availability of available resources. So the choice between the ESP8266 and newer models depends on individual needs, hardware availability and the range of functions we want to achieve in our project.
While it’s true that we don’t need much computing power to light a mirror, it’s worth noting that the ESP32 offers more resources that can be useful for more complex projects. However, for simple applications such as our mirror lighting, the ESP8266 is an ideal choice – it is compact, economical and meets our specific requirements.
Leave a Reply