
Hello!
In the previous guide, I discussed installing Traccar on a Synology server using Docker Compose. Nevertheless, we have not yet configured the reception of GPS data. In this simple step, I’ll show how to do it, using the example of a GPS device from Teltonika.
 What is Traccar?
Traccar is an open-source vehicle tracking tool for monitoring and managing fleets. It works on the principle of a GPS server, collecting data from GPS devices and other sensors, and then presents this information in a web-based interface. Traccar allows you to track the location of vehicles in real time, analyze route history, monitor fuel consumption and other parameters.
Preparation
In order to prepare the tutorial, we have already adopted a predetermined domain name and certain configuration names, shown below. For customized configuration, adjust the settings according to individual requirements.
- Full domain name (FQDN) of Traccar: https://traccar.xyz.com
- Public IP address or configured public domain name with the operator with whom you registered your domain.
Step 1 – Configure the server via Docker Compose in the Portainer
Do you already have a server configured on your Synology device? If not, read this article to prepare your server, then return here to continue with further configuration.
Step 2 – Check the Traccar server documentation
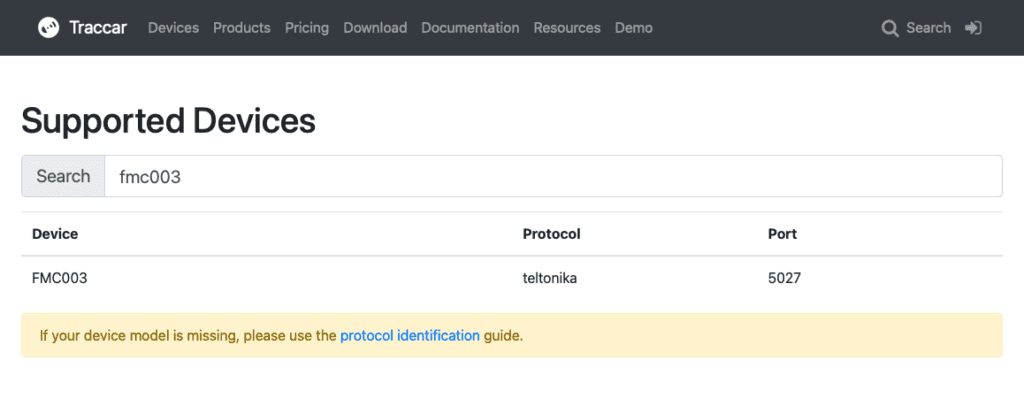
To start the setup, check which port your GPS is communicating on. As part of the following instruction, we will use an example Teltonika device model FMC003, which communicates on port 5027.
Check the list of supported devices on the official technical documentation page
Step 3 – Set up redirection on your router
In order for the GPS to properly transmit data to the server, it is necessary to allow the port to be accepted and to specify to which address within your LAN it should be directed.
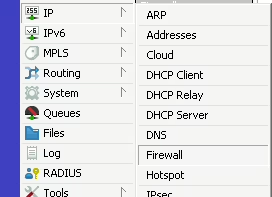
For example, on a Mikrotik router:
- Start WinBox and log in to your administrator account,
- Go to the IP tab, then select Firewall from the menu.
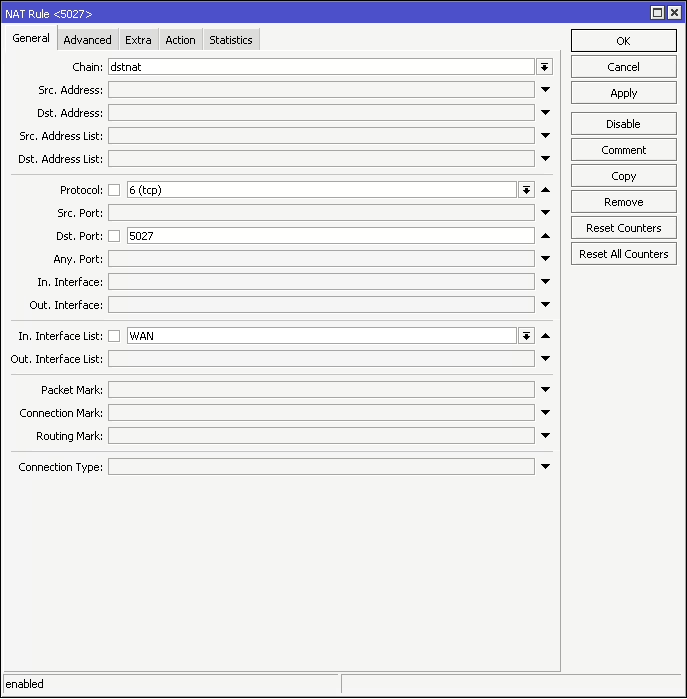
- Click the NAT tab

- Click on the + sign in the upper left corner of the window to add a new redirection policy.
- On the General tab, set the parameters described below:
- Chain: dstnat
- Protocol: 6 (tcp)
- Dst. Port: 5027
- In. Interface List: WAN or In. Interface: Select your WAN interface (usually ether01).
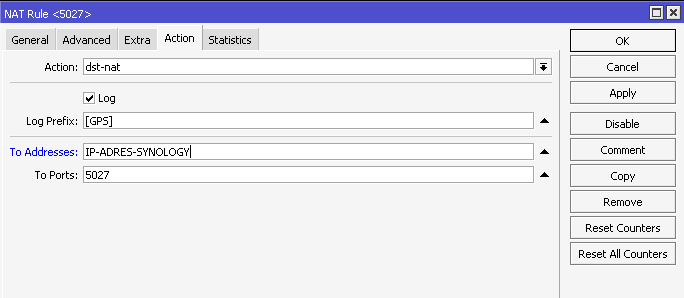
- Go to the Action tab and set the parameters described below:
- Action: dst-nat
- (Optional) Select Log, in Log Prefix: enter [GPS]
- To Addresses: IP-ADDRESS-SYNOLOGY
- To Ports: 5027
Step 4 – Set up the firewall on the Synology
The packets must pass through Synology’s internal firewall to reach the server seamlessly. Once the Mikrotik is configured with NAT, the packets already know where they are supposed to go.
- Log in to your file server and open the Control Panel.

- Go to the Security section, then click on the Firewall tab.
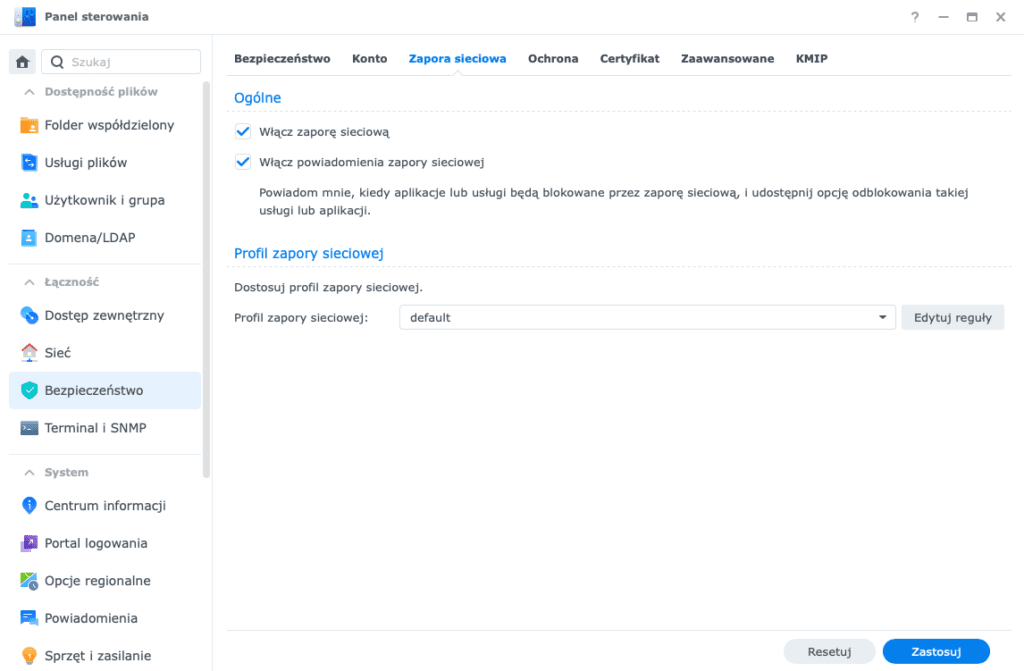
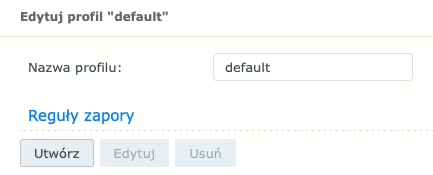
- Go to edit Firewall Profile rules and in the newly opened window click Create a new firewall rule.
- In the newly opened window for creating a firewall rule, set the parameters described below:
- Type: Destination port
- Protocol: TCP
- Ports (separate with commas): 5027
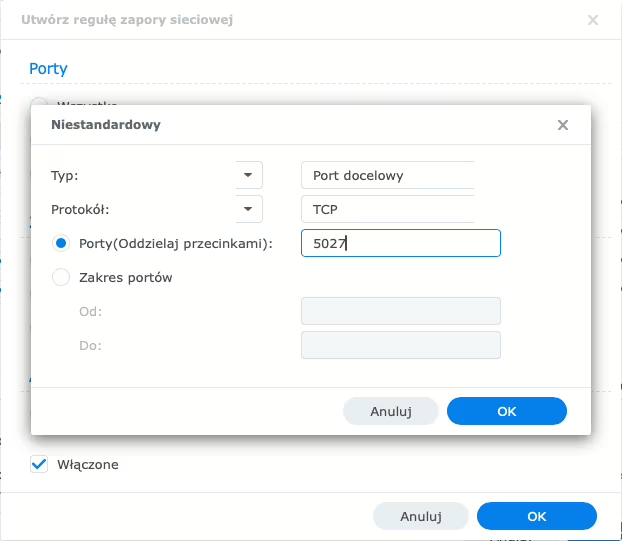
- Save the configuration by clicking OK in the open windows. On exiting firewall rule editing, you will receive a message that the firewall settings have been saved successfully.

Step 5 – Set the additional port of the created Docker Compose in the Portainer
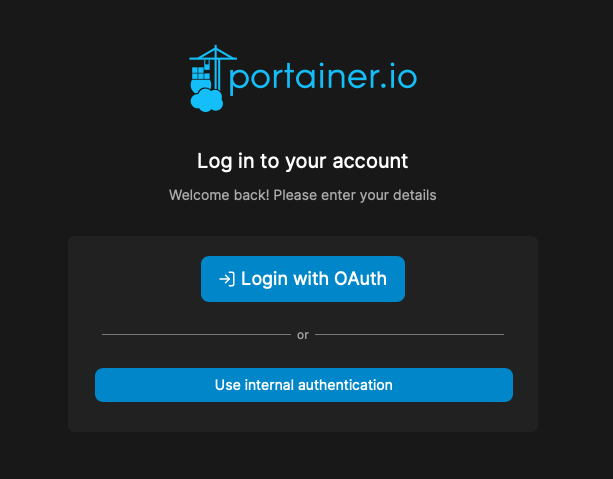
- Log in to your account and go to the administration interface.
- Are you using the Authentik single sign-on system? Make the login process easier for yourself by integrating Portainer with Authentik with the help of these instructions.
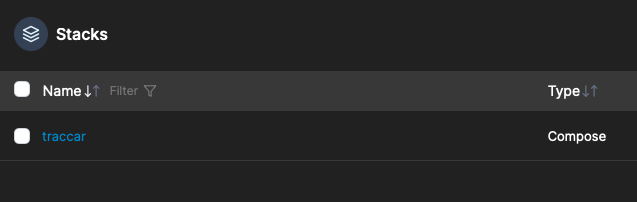
- Select your environment (eng: Environments) in which you will edit the configuration of the created Docker Compose. Then go to Stacks and select the created Stacks named traccar.
- At the top under Stack details, go to Editor.
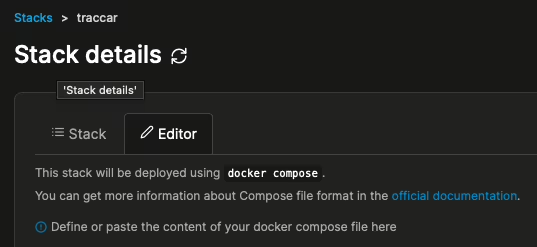
- In the Docker Compose editor, in the Traccar server section, find the ports definition and add a new port according to the following example:
- Click Update the stack and wait for the Portainer to update the content.
- If everything goes successfully, the message Success: Stack successfully deployed will appear in the upper right corner of the screen.
Step 6a – Selecting the SIM card for telemetry
In order to ensure the proper functioning of our GPS system, it will be necessary to obtain a SIM card. High data transfer is not required, so truthfully, buying a SIM card with Internet access for 30-40 PLN per month with a limit of, say, a 10 GB data package would be overkill. After testing, I found a virtual operator, 1nce, that allows you to purchase a SIM card for telemetry applications for 10 euros.
- First – The validity of such a card is 10 years,
- Second – 500 MB Internet access package
- Third – 250 SMS packet.
- Fourth – the card has the ability to operate in 165 countries.
The card arrived just three days after I ordered it from the operator’s website. At the moment I notice that the average monthly consumption is in the range of 5 MB to 8 MB.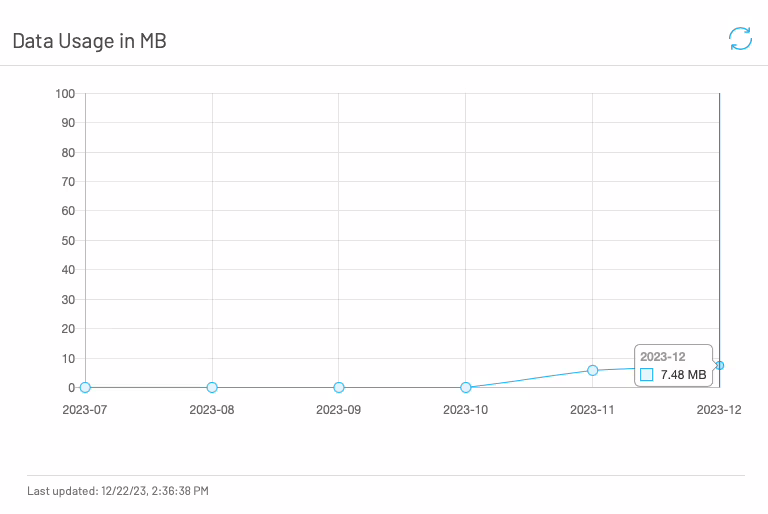
Step 6b – Configure the parameters of the GPS device
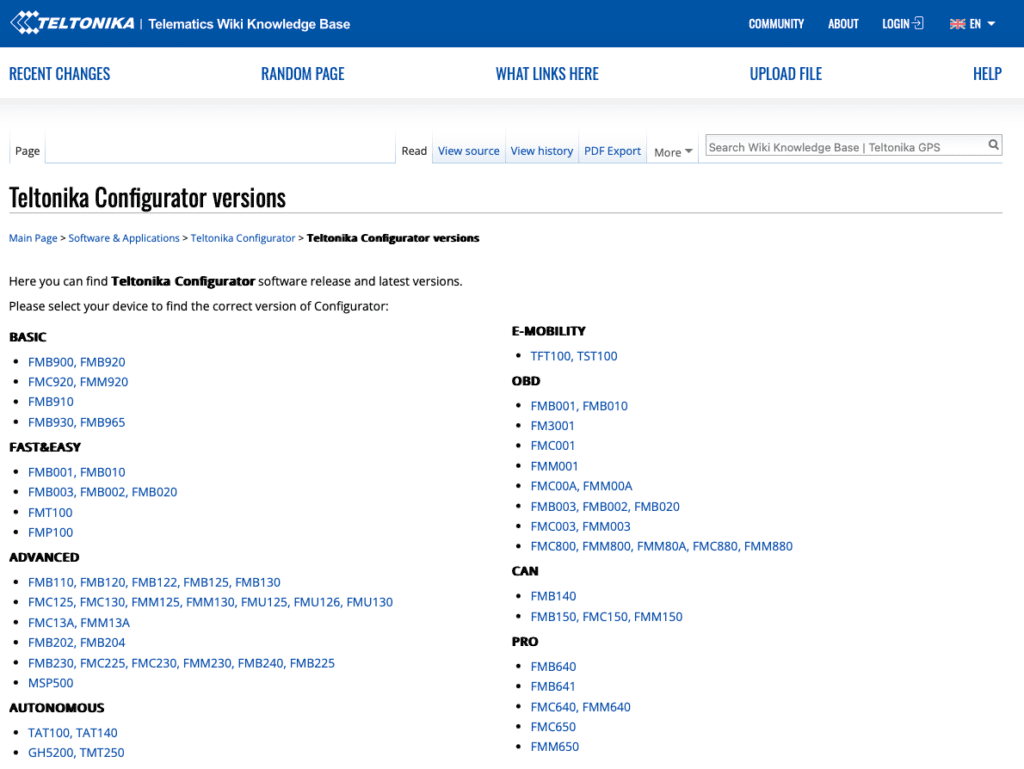
If you already have a SIM card that you will use for GPS – then you can move on to further configuration. To set the parameters of our GPS from Teltonika, we need the Teltonika Configurator program, which we download from the manufacturer’s website at this link.
At the outset of the manual, I indicated that within the following guidelines, we will be using an example Teltonika device model FMC003, which establishes communication on port 5027.
Unfortunately, Teltonika Configurator is only available for Windows operating systems. To use the program on macOS systems, you will need to use virtualization tools such as Parralels Desktop or other software to run virtual operating systems.
- After visiting a website that provides various versions of GPS configuration software, select your device from the available list and download the appropriate software to your Windows computer. In the case of our FMC003 model, we are using configurator version 1.7.53_E.FMX00X_R.6, consistent with the data available on the date of this guide.

The configurator is a comprehensive tool that allows you to configure the device, both when it is immediately connected to a computer and when you create or adjust the configuration without physically connecting to the device. In each case, there is an option to create a new configuration or open an existing configuration file.
- Before running the software on your computer, first connect your device with a USB cable.
- After selecting your device from the initial screen, continue by going to the GPRS tab. Then, in the Server Settings section, enter the following data:
- Domain: PUBLIC-ADDRESS-IP
- Port: 5027
- Protocol: TCP
- TLS Encryption: None
- If you are using the previously recommended SIM card from operator 1nce, you should additionally configure the GPRS Settings section:
- GPRS Context: Enable
- APN: iot.1nce.net
- APN Username: empty
- APN Password: empty
- GPRS Authentication: PAP
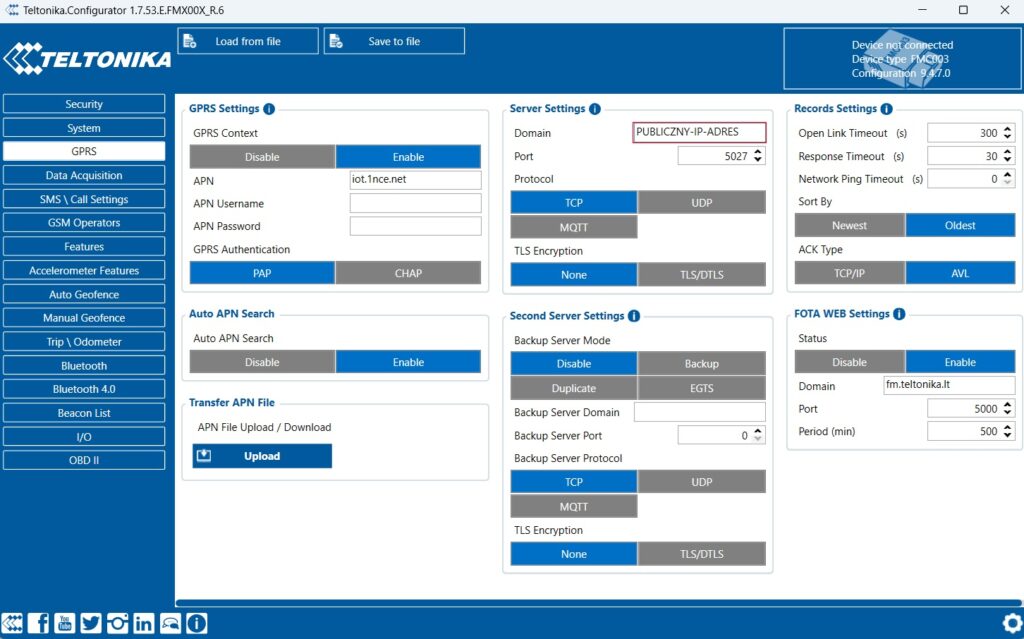
- After adjusting your own settings on the GPS device, save the entered parameters by clicking Save to device. After the configurator confirms that the new configuration has been saved on the device, we can safely disconnect the USB cable from the GPS and plug it into the car.

Step 7 – Add the device to the Traccar server
- Log in to your account, then on the left side of the screen click the + icon to add a new device.

- Fill in the blanks below using the following values:
- Required:
- Name: Personal car,
- Identifier: the IMEI of our GPS (you will find it on the housing of the device next to the serial number).
- Extra (optional):
- Group: example Family cars (you must create earlier in the server settings),
- Phone: example MSISDN SIM card rewritten from the 1nce administration panel,
- Model: FMC003,
- Contact: e.g., enter your name
- Category: Car
- Calendar: empty
- Expiration: 01/01/2099
- Device Image (optional):
- Upload a photo of your car
- Attributes (optional):
- empty
- Required:
- To confirm the parameters you entered, click Save. Wait a while for the GPS to send messages to our server.
- Done! 🚀
After successfully establishing a connection between our server and the remote GPS device installed in the car, we will be able to see its current position.
Leave a Reply